The Ultimate Savory Stuffing Recipe: A Holiday Must-Have!
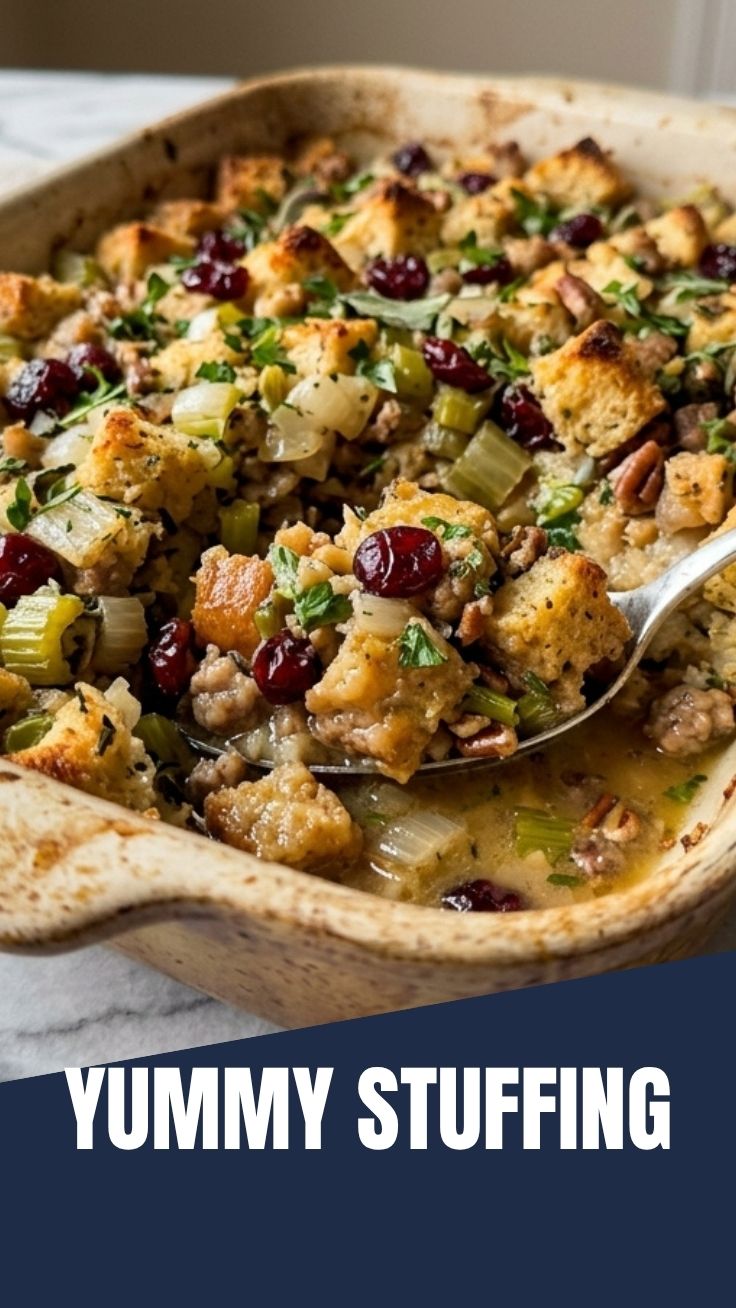
Are you ready to transform your holiday table with a side dish that’s far from just an afterthought? This savory stuffing recipe isn’t just about combining ingredients; it’s about crafting a culinary experience that evokes warmth, comfort, and the joy of home cooking. Forget the pre-packaged versions; making your own from scratch allows for unparalleled flavor customization, ensuring every bite is a delightful medley of herbs, spices, and textures. You’ll be surprised how easily you can achieve a gourmet-level side that becomes the star of any meal, as satisfying as the main course itself. And if you’re thinking about creating a comforting, homemade feel, this recipe delivers, much like how a perfectly crafted plush toy brings immediate joy.
Ingredients & Kitchen Tools
To embark on this delicious journey, gather these essentials:
- 1 loaf (16-20 oz) day-old rustic bread: Stale bread is key for absorbing liquids without getting soggy. Cut into 1-inch cubes.
- 1 cup unsalted butter: Adds richness and helps toast the vegetables.
- 2 large yellow onions: Finely diced for sweet and savory depth.
- 4 stalks celery: Finely diced, provides a subtle crunch and classic flavor.
- 2 cloves garlic: Minced, for aromatic intensity.
- 1 tbsp fresh sage: Finely chopped, the quintessential stuffing herb.
- 1 tbsp fresh thyme: Finely chopped, adds an earthy, fragrant note.
- 1 tsp fresh rosemary: Finely chopped, for a piney, peppery aroma.
- 1/2 cup fresh parsley: Chopped, brightens the flavor.
- 4 cups chicken or vegetable broth: Low sodium preferred, provides moisture.
- 2 large eggs: Lightly beaten, acts as a binder.
- 1 tsp salt: To enhance all flavors.
- 1/2 tsp black pepper: For a touch of spice.
- Optional additions: 1 cup cooked sausage or mushrooms, 1/2 cup dried cranberries for sweetness.
Kitchen Tools:
- Large baking dish (9×13 inch): For baking the stuffing.
- Large mixing bowl: To combine ingredients.
- Large skillet: For sautéing vegetables.
- Sharp knife and cutting board: For prepping ingredients.
- Measuring cups and spoons: For precise ingredient amounts.
Prep Time & Cooking Schedule
- Prep Time: 25 minutes
- Cook Time: 40-50 minutes
- Total Time: Approximately 1 hour 15 minutes
This recipe can be partially prepped ahead of time. You can chop your vegetables and cube your bread the day before, store them separately, and then assemble and bake closer to serving. This allows for warm, freshly baked stuffing without the last-minute stress!
Step-by-Step Instructions
1. Toast the Bread: Preheat your oven to 300°F (150°C). Spread the bread cubes in a single layer on a large baking sheet. Toast for 15-20 minutes, or until lightly golden and dry. This step is crucial for preventing soggy stuffing. You want it dry enough to absorb the flavorful broth, much like the careful preparation for the filling of a beautiful plush.
2. Sauté Aromatics: In a large skillet over medium heat, melt the butter. Add the diced onions and celery, cooking until softened, about 8-10 minutes. Stir in the minced garlic, sage, thyme, and rosemary, cooking for another minute until fragrant.
3. Combine Ingredients: Transfer the toasted bread cubes to a large mixing bowl. Add the sautéed vegetable mixture, chopped fresh parsley, salt, and pepper. If using, fold in cooked sausage, mushrooms, or dried cranberries.
4. Add Liquid: In a separate small bowl, whisk together the chicken broth and beaten eggs. Pour this liquid mixture evenly over the bread and vegetable mixture. Gently toss to combine, ensuring all bread cubes are moistened. Let it sit for 5-10 minutes to allow the bread to fully absorb the liquid.
5. Bake: Spoon the mixture into your greased 9×13 inch baking dish. Cover with aluminum foil and bake for 30 minutes.
6. Brown Top: Remove the foil and continue baking for another 10-20 minutes, or until the top is golden brown and crispy.
7. Serve: Let the stuffing rest for 5-10 minutes before serving.
Nutritional Benefits & Advantages
This homemade stuffing offers more than just incredible flavor; it can also be a surprisingly wholesome addition to your meal. Packed with fiber from the bread, onions, and celery, it aids in digestion. The fresh herbs are rich in antioxidants and anti-inflammatory compounds, boosting your nutrient intake with every spoonful. By making it yourself, you control the amount of sodium and unhealthy fats, making it a healthier alternative to many store-bought options. It’s a satisfying and hearty side that provides sustained energy.
Tips, Variations & Cooking Advice
- Gluten-Free: Substitute regular bread with your favorite gluten-free loaf.
- Vegetarian/Vegan: Use vegetable broth and a plant-based butter alternative. Omit eggs or use a flax egg (1 tbsp ground flax meal + 3 tbsp water per egg).
- Spice It Up: Add a pinch of red pepper flakes for a subtle heat.
- Nutty Flavor: Incorporate 1/2 cup toasted pecans or walnuts for added texture and richness.
- Moisture Control: If your stuffing seems too dry, add a splash more broth. If too wet, bake uncovered for a bit longer.
- Alternative Meats: Cooked ground turkey or finely chopped bacon can also be excellent additions.
Common Mistakes to Avoid
- Soggy Stuffing: This is the most common pitfall. Always use day-old or toasted bread. Do not over-saturate with liquid.
- Under-seasoning: Be generous with salt, pepper, and fresh herbs. Taste your mixture before baking (but only if it doesn’t contain raw eggs).
- Overcrowding the Pan: Too much stuffing in one dish can lead to uneven baking. If you have a large batch, use two smaller dishes.
- Forgetting to Cover: Covering initially helps steam the stuffing, ensuring it cooks through without drying out. Removing the cover then allows for a crispy top.
Storage & Meal Prep Tips
Leftover stuffing can be stored in an airtight container in the refrigerator for up to 3-4 days. To reheat, microwave individual portions or warm in an oven at 350°F (175°C) until heated through. For longer storage, freeze it for up to 3 months. Thaw overnight in the refrigerator before reheating. It makes a fantastic addition to meal prep throughout the week!
Conclusion
Crafting your own savory stuffing from scratch is a rewarding experience that elevates any meal, offering a depth of flavor and personal touch that store-bought versions simply can’t match. From the perfectly toasted bread to the aromatic blend of herbs and savory broth, every component works in harmony to create a truly unforgettable side dish. This recipe promises not only a delicious outcome but also the satisfaction of creating something wonderful with your own hands, much like the satisfaction of completing a beautiful plush project. We encourage you to try this recipe and make it your own; experiment with the variations and discover your perfect blend! Share your creations with us in the comments below.
FAQs
Q1: Can I make this stuffing ahead of time?
A1: Absolutely! You can chop vegetables and cube bread a day in advance. You can also assemble the entire dish (without baking) and refrigerate it for up to 24 hours. Just add about 10-15 minutes to the baking time when cooking from cold.
Q2: What kind of bread is best for stuffing?
A2: Day-old rustic bread, sourdough, or even a basic white sandwich bread that’s been dried out works wonderfully. The key is for the bread to be sturdy and somewhat dry to absorb moisture without becoming mushy.
Q3: My stuffing turned out dry. What went wrong?
A3: This often happens if the bread wasn’t properly moistened, or if it was baked uncovered for too long. Ensure all bread cubes are coated with the liquid mixture and consider adding a bit more broth next time.
Q4: Can I use dried herbs instead of fresh?
A4: Yes, but adjust the quantity. Dried herbs are more potent, so use about one-third of the amount of fresh herbs (e.g., 1 teaspoon dried sage instead of 1 tablespoon fresh).
Q5: How can I make the top extra crispy?
A5: For a crispier top, drizzle a little extra melted butter over the exposed stuffing before the final uncovered baking stage, or even sprinkle with a little Parmesan cheese.