Unleash Your Inner Chef: Master the Art of Homemade Nachos
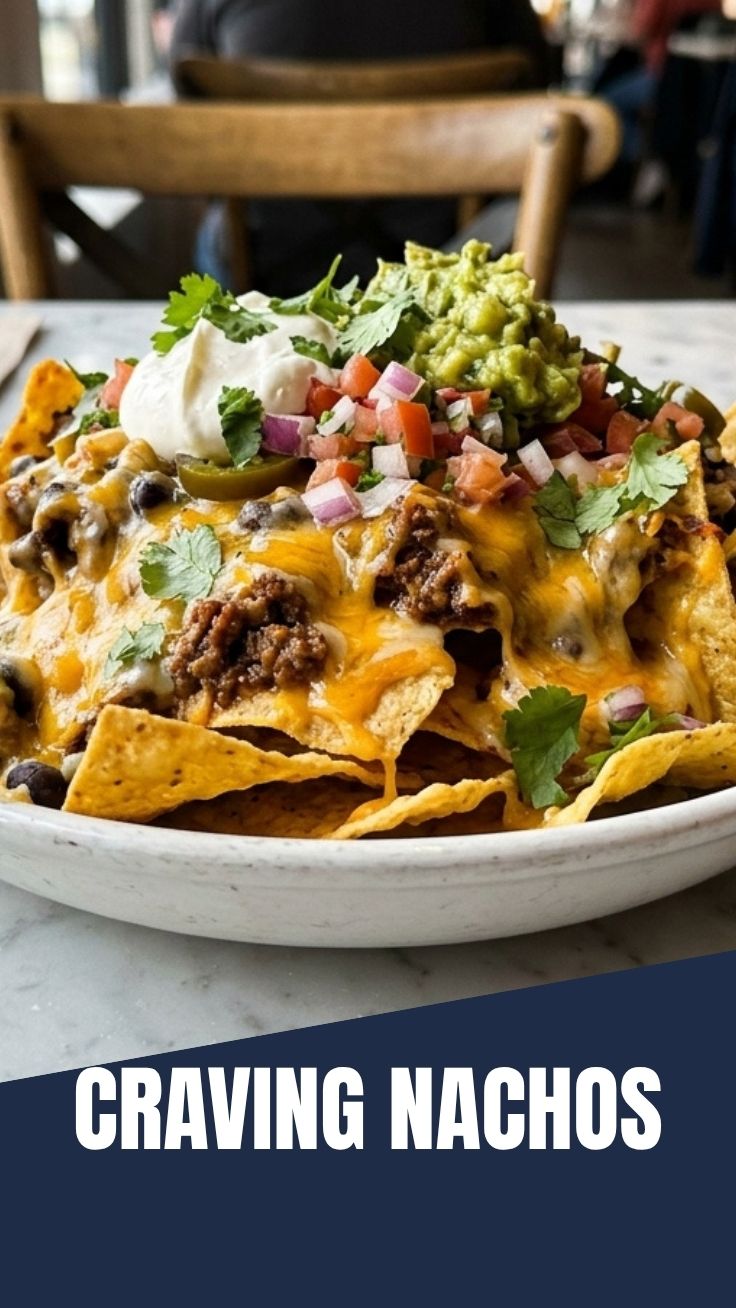
Tired of flimsy, lackluster restaurant Nachos? Imagine a platter overflowing with perfectly crispy chips, generously layered with savory toppings, and oozing with melted cheese, all crafted in your own kitchen. This isn’t just a fantasy; it’s a delicious reality waiting to happen! Learning to make your own Nachos at home offers unparalleled freshness, customizable ingredients, and a truly satisfying culinary experience that far surpasses any pre-made alternative. We’re not just talking about any regular batch; we’re diving into the world of truly delectable, homemade Loaded nachos that will elevate your snack game to an entirely new level. Get ready to transform simple ingredients into an extraordinary feast that will tantalize your taste buds and impress your guests.
Ingredients & Kitchen Tools
To embark on your journey to perfect Nachos, gather the following:
- 12 oz bag of your favorite tortilla chips: Sturdy chips are key for holding ample toppings. Brands like Tostitos Scoops or Mission Restaurant Style work well.
- 1 lb ground beef or turkey: For a hearty, savory base. You can also use shredded chicken or black beans for a vegetarian option.
- 1 packet taco seasoning: A quick and easy way to add flavor. Look for low-sodium options if preferred.
- 1 cup salsa: Your preferred heat level. Freshly made or jarred will work.
- 1 can (15 oz) black beans, rinsed and drained: Adds protein and fiber. Alternatively, pinto beans.
- 1 cup shredded cheddar cheese: Melts beautifully and provides classic nacho flavor. Monterey Jack, Colby, or a Mexican blend are great alternatives.
- 1/2 cup shredded Monterey Jack cheese: Enhances the melty, gooey texture.
- 1/2 red onion, finely diced: Offers a crisp, pungent contrast.
- 1/2 cup pickled jalapeños, sliced: Adds a tangy, spicy kick. Fresh jalapeños can be used for extra heat.
- 1/4 cup fresh cilantro, chopped: For a burst of freshness and color.
- Optional toppings: Sour cream, guacamole, sliced olives, corn, extra hot sauce.
Kitchen Tools:
- Large baking sheet: Essential for spreading out chips evenly.
- Large skillet or pan: For browning meat and mixing ingredients.
- Spatula: For stirring and flipping.
- Cutting board and sharp knife: For chopping vegetables.
Prep Time & Cooking Schedule
- Prep Time: 15 minutes (Includes chopping veggies and browning meat)
- Cook Time: 10-15 minutes
- Total Time: 25-30 minutes
This recipe is perfect for a quick weeknight meal or a game-day spread. The quick cooking time means you can have a delicious platter of Nachos ready in under half an hour from start to finish. There’s no resting or marinating time required, making it an ideal spontaneous treat.
Step-by-Step Instructions
1. Preheat Oven & Prepare Meat: Preheat your oven to 375°F (190°C). In a large skillet over medium-high heat, brown the ground beef (or turkey), breaking it up with a spatula. Drain any excess fat. Stir in the taco seasoning and 1/4 cup of water. Simmer until the liquid has mostly evaporated, about 3-5 minutes. This ensures your Nachos have a well-seasoned base.
2. Assemble the First Layer: Spread half of the tortilla chips in a single layer on a large baking sheet. Sprinkle half of the cooked meat mixture, half of the black beans, half of the diced red onion, and half of the pickled jalapeños over the chips.
3. Add Cheese & Second Layer: Sprinkle half of the shredded cheddar and Monterey Jack cheeses evenly over the first layer of toppings. Repeat with the remaining chips, meat mixture, beans, onion, jalapeños, and cheeses to create a truly layered, glorious pan of Loaded nachos. This layering technique ensures every chip gets a generous coating of deliciousness.
4. Bake to Perfection: Bake for 10-15 minutes, or until the cheese is melted and bubbly and the chips are lightly golden. Keep a close eye on them to prevent burning.
5. Garnish & Serve: Carefully remove the baking sheet from the oven. Drizzle with salsa and sprinkle with fresh cilantro. Add any optional toppings like sour cream or guacamole. Serve immediately while hot and cheesy!
Nutritional Benefits & Advantages
Homemade Nachos offer several nutritional advantages over their fast-food counterparts. By controlling ingredients, you can reduce sodium, unhealthy fats, and artificial additives. Choosing lean ground meat or black beans boosts protein and fiber content, promoting satiety. Incorporating fresh salsa, red onion, and cilantro adds vitamins, minerals, and antioxidants. Opting for whole-grain tortilla chips can also increase dietary fiber, making this a more wholesome and satisfying meal or snack.
Tips, Variations & Cooking Advice
- Flavor Variations: Experiment with different spice blends like chili powder, cumin, or smoked paprika in your meat mixture. For a smoky twist, add a dash of liquid smoke.
- Ingredient Swaps:
* Vegetarian: Swap ground meat for extra black beans, pinto beans, or refried beans. Sautéed mushrooms or bell peppers can also be added.
* Dairy-Free: Use your favorite plant-based shredded cheese.
* Gluten-Free: Ensure your tortilla chips are certified gluten-free.
- Alternative Cooking Methods: While baking is ideal for melty cheese, you can also assemble smaller portions in an air fryer for extra crispy results (cook at 350°F for 5-7 minutes).
- Portion Control: For individual servings, use small, oven-safe dishes or cast-iron skillets.
- Spice Level: Adjust the number of jalapeños or substitute with serrano peppers for more heat. A touch of cayenne pepper in the meat mixture can also add a kick.
Common Mistakes to Avoid
- Overcrowding the Pan: This leads to soggy chips and uneven melting. Use a large baking sheet or two to spread chips in a single layer.
- Under-Seasoning the Meat: Bland meat equals bland Nachos. Don’t skimp on the taco seasoning or other spices.
- Burning the Chips: Keep an eye on the oven, especially during the last few minutes. Chips can go from perfectly golden to burnt quickly.
Putting Wet Toppings on Before Baking: Sour cream, guacamole, and extra salsa should be added after* baking to prevent the chips from getting soggy.
- Using Thin, Flimsy Chips: These will break under the weight of the toppings. Invest in sturdy tortilla chips.
Storage & Meal Prep Tips
While Nachos are best enjoyed fresh, you can prep some components in advance. Cook and season the ground beef, dice the onions, and chop the cilantro up to 2-3 days ahead and store them in airtight containers in the refrigerator.
Leftover Nachos can be stored in an airtight container in the refrigerator for up to 1-2 days, but the chips will lose their crispness. Reheat in a preheated oven at 300°F (150°C) for 5-10 minutes to gently warm them through. Avoid microwaving, as it will make the chips even softer.
Conclusion
Crafting your own delicious, crispy, and flavorful Nachos at home is a culinary triumph that’s well within reach. With this guide, you now have all the tools and knowledge to create a truly spectacular spread that goes way beyond basic. From perfectly seasoned meat to abundant, gooey cheese and fresh, vibrant toppings, this recipe for homemade Loaded nachos promises a satisfying and customizable experience that restaurant versions simply can’t match. Don’t hesitate – gather your ingredients, fire up your oven, and prepare to delight your taste buds. Share your delicious creations in the comments below, or tell us your favorite customizations!
FAQs
Q1: Can I make these nachos vegetarian?
A1: Absolutely! Replace the ground beef with an extra can of black beans (or pinto beans), or use a plant-based ground meat alternative. Sautéed bell peppers, corn, or mushrooms also make great additions.
Q2: How do I prevent my chips from getting soggy?
A2: Ensure you don’t overcrowd the baking sheet, allowing for even heat distribution. Also, add wet toppings like sour cream, guacamole, and salsa after baking, just before serving.
Q3: What’s the best cheese to use for nachos?
A3: A blend of good melting cheeses like cheddar, Monterey Jack, or a Mexican cheese blend works best for that classic gooey texture and flavor. Freshly shredded cheese melts better than pre-shredded.
Q4: Can I make the meat mixture ahead of time?
A4: Yes, you can cook and season the ground beef (or other protein) up to 2-3 days in advance and store it in an airtight container in the refrigerator. This cuts down on prep time when you’re ready to assemble and bake your nachos.
Q5: How can I make these nachos spicier?
A5: Increase the amount of pickled jalapeños, use fresh sliced jalapeños or serrano peppers, add a pinch of cayenne pepper to the meat mixture, or drizzle with your favorite hot sauce after baking.