Unlock Tropical Bliss: Craft the Perfect Homemade Key Lime Pie
Ever wondered if you could recreate that iconic, tangy, and refreshingly sweet Key Lime Pie taste right in your own kitchen? The answer is a resounding yes! There’s an undeniable satisfaction in crafting a dessert from scratch, especially one as beloved as this. From the zesty burst of fresh key lime to the creamy, luscious filling, making this pie at home allows you to control every ingredient, ensuring a superior flavor and a truly personalized experience that store-bought versions simply can’t match. Prepare to impress yourself and your loved ones with this truly irresistible treat!
Ingredients & Kitchen Tools
This delightful Key Lime Pie comes together beautifully with a few essential ingredients and kitchen tools.
- For the Graham Cracker Crust:
* 1 ½ cups Graham Cracker Crumbs: Approximately 10-12 full graham cracker sheets, finely crushed. We recommend using a food processor for a consistent crumb.
* ¼ cup Granulated Sugar: Adds a touch of sweetness to balance the buttery crust.
* 6 tablespoons Unsalted Butter, melted: Acts as the binder for the crumbs, creating a firm crust.
- For the Key Lime Filling:
* 14 oz can Sweetened Condensed Milk: The magical ingredient that gives the pie its creamy texture and sweet foundation. Do not substitute.
½ cup Fresh Key Lime Juice: About 8-10 key limes, juiced. Use fresh* for the best flavor; bottled juice often contains preservatives that alter the taste.
* 2 Large Egg Yolks: Adds richness and helps set the filling.
* 1 teaspoon Key Lime Zest: Finely grated zest from 2-3 key limes. Don’t skip this for an enhanced citrus aroma and flavor.
- For the Topping (Optional):
* 1 cup Heavy Cream: For a classic whipped cream topping.
* 2 tablespoons Powdered Sugar: Sweetens the whipped cream.
* ½ teaspoon Vanilla Extract: Adds a subtle warmth to the whipped cream.
- Kitchen Tools:
* 9-inch Pie Plate: A glass or ceramic pie plate works best for even baking.
* Food Processor (optional) or Ziploc Bag & Rolling Pin: For crushing graham crackers.
* Small Mixing Bowls: For crust and filling components.
* Whisk: For combining ingredients smoothly.
* Citrus Juicer & Zester: Essential for extracting fresh key lime juice and zest.
* Rubber Spatula: For scraping bowls and folding.
* Electric Mixer (optional): For making whipped cream.
Prep Time & Cooking Schedule
This delightful dessert requires a bit of chilling time, so plan accordingly!
- Prep Time: 20 minutes
- Bake Time: 15-18 minutes
- Chill Time: At least 4-6 hours (preferably overnight)
- Total Time: Approximately 4 hours 35 minutes to 6 hours 38 minutes (mostly hands-off chilling)
The extended chill time is crucial for the Key Lime Pie to firm up and reach its optimal texture and flavor. Don’t rush this step!
Step-by-Step Instructions
Follow these detailed steps to create a perfect homemade Key Lime Pie, bursting with the vibrant essence of key lime.
1. Preheat Oven & Prepare Crust: Preheat your oven to 350°F (175°C). In a medium bowl, combine graham cracker crumbs, granulated sugar, and melted butter. Mix until well combined and the crumbs resemble wet sand. Press the mixture firmly and evenly into the bottom and up the sides of a 9-inch pie plate. You can use the bottom of a glass to help create a firm, smooth crust.
2. Bake the Crust: Bake the crust for 8-10 minutes, or until lightly golden brown. This helps set the crust and prevents it from becoming soggy. Remove from oven and let cool completely on a wire rack.
3. Prepare the Filling: In a large bowl, whisk together the sweetened condensed milk, fresh key lime juice, egg yolks, and key lime zest until thoroughly combined and smooth. Do not overmix; simply whisk until no streaks remain.
4. Pour & Bake the Filling: Pour the key lime filling into the cooled graham cracker crust.
5. Bake the Pie: Bake for 15-18 minutes, or until the center is just set but still slightly wobbly when gently shaken. The edges should be firm. Baking too long can cause the filling to crack.
6. Cool & Chill: Remove the pie from the oven and let it cool completely on a wire rack at room temperature. Once cooled, cover loosely with plastic wrap and refrigerate for at least 4-6 hours, or preferably overnight, to allow the pie to set fully.
7. Make Optional Whipped Cream Topping: If making, in a cold bowl with cold beaters, whip heavy cream, powdered sugar, and vanilla extract until stiff peaks form.
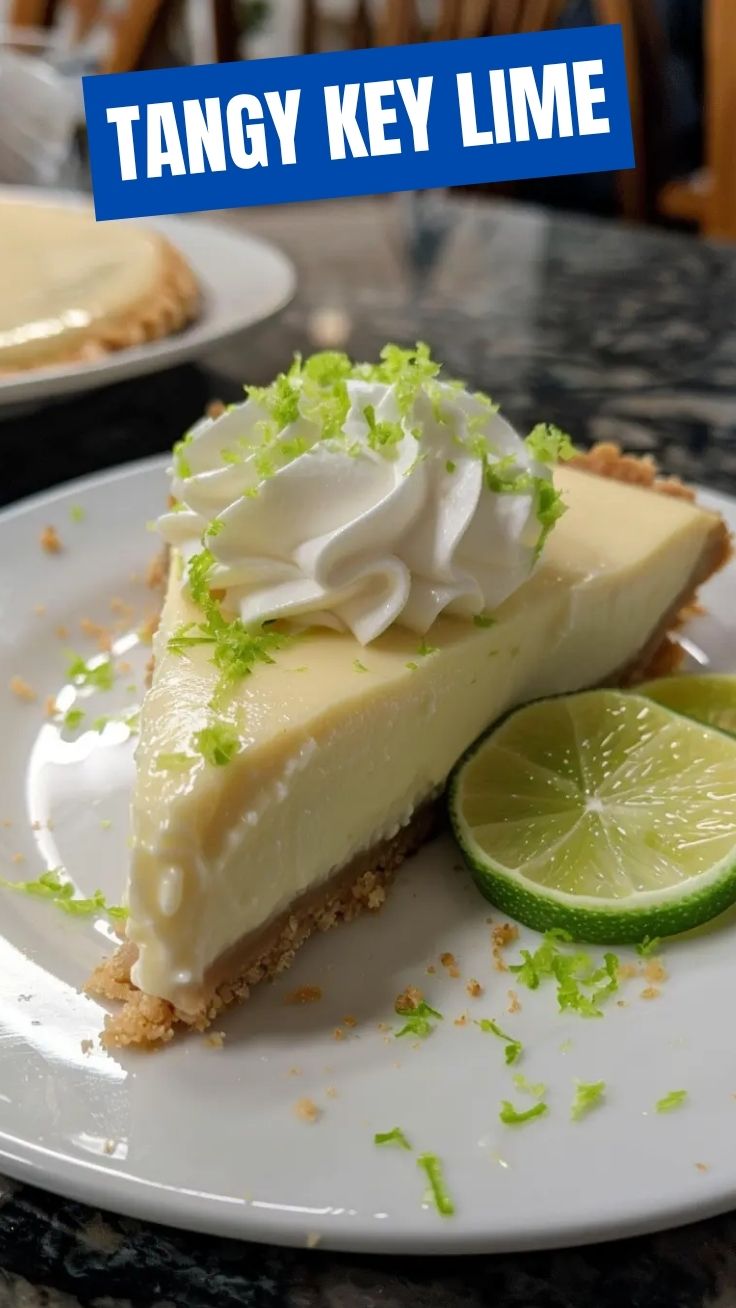
8. Serve: Slice and serve your delicious Key Lime Pie! Garnish with whipped cream and extra lime zest if desired.
Nutritional Benefits & Advantages
Beyond its incredible taste, this homemade Key Lime Pie offers some notable advantages. Fresh key limes are a fantastic source of Vitamin C, an essential antioxidant that supports immune health and collagen production. While it is a dessert, preparing it at home gives you control over the quality of ingredients, allowing you to choose organic limes or high-quality dairy, influencing the overall nutritional profile. The combination of dairy from the sweetened condensed milk and egg yolks provides some protein and calcium, making it a more wholesome treat than many ultra-processed desserts.
Tips, Variations & Cooking Advice
- Lime Selection: Always opt for fresh key limes for the authentic flavor. If true key limes are unavailable, regular Persian limes can be used, but the flavor profile will be slightly less intense and more tart.
- Crust Variations: For a different twist, try a pre-made shortbread crust or even a crushed vanilla wafer crust.
- Sweetness Adjustment: If you prefer a less sweet pie, you can slightly reduce the amount of sweetened condensed milk, though this may alter the texture.
- Dairy-Free Option: While challenging for the creamy filling, a dairy-free version can be attempted using full-fat canned coconut milk (chilled, use the thick cream) and a dairy-free sweetened condensed milk substitute.
- Flavor Boost: For an extra layer of citrus, brush the inside of the baked pie crust with a tablespoon of key lime juice before adding the filling.
Common Mistakes to Avoid
- Over-baking the Crust: A burnt crust will impart a bitter taste. Keep an eye on it during the 8-10 minute bake time.
- Using Bottled Lime Juice: This is the quickest way to ruin the authentic flavor. Freshly squeezed key lime juice is non-negotiable for a truly sublime pie.
- Over-mixing the Filling: Vigorously whisking can introduce too much air, which can cause the pie to crack during baking or cooling. Mix until just combined.
- Under-chilling: Insufficient chilling time will result in a runny, unset pie. Patience is key for that perfect slice!
- Over-baking the Filling: This can lead to a dry, cracked filling. The center should still have a slight wobble when you pull it from the oven, as it will continue to set as it cools.
Storage & Meal Prep Tips
Your homemade Key Lime Pie is best enjoyed within 3-4 days when stored properly.
- Refrigeration: Store the pie, loosely covered with plastic wrap, in the refrigerator. If you’ve added whipped cream, it’s best to add it just before serving, as whipped cream can deflate over time.
- Freezing: For longer storage, you can freeze individual slices or the entire pie (without whipped cream topping) for up to 1 month. Wrap tightly in plastic wrap, then in foil. Thaw in the refrigerator overnight before serving. The texture may be slightly different after freezing but will still be delicious.
Conclusion
Crafting your own Key Lime Pie is a joyful and rewarding experience that promises a burst of tropical sunshine with every bite. By following these detailed steps and embracing the vibrant zest of fresh key lime, you’re not just making a dessert; you’re creating a memorable culinary moment. We encourage you to try this recipe and savor the unparalleled taste of a truly homemade classic. Did you make it? Share your pie pictures and thoughts in the comments below!
FAQs
Q1: Can I use regular limes instead of key limes?
A1: While fresh key limes offer a distinct, tarter flavor, you can substitute regular Persian limes. You might need a bit more juice, and the flavor will be slightly less intense.
Q2: My pie filling cracked after baking. What went wrong?
A2: Cracking is usually a sign of over-baking. The pie filling should still have a slight wobble in the center when you remove it from the oven, as it will continue to set as it cools.
Q3: How can I prevent my graham cracker crust from being soggy?
A3: Ensure you bake the crust for the recommended 8-10 minutes before adding the filling. This pre-baking step helps create a barrier and prevents the crust from absorbing moisture from the filling.
Q4: Can I make this pie ahead of time for an event?
A4: Absolutely! Key Lime Pie is an excellent make-ahead dessert. It needs at least 4-6 hours to chill, and can be made up to 2 days in advance. Add any whipped cream topping just before serving.
Q5: What’s the best way to get the most juice from my key limes?
A5: Roll the key limes firmly on your countertop before cutting and juicing. You can also briefly microwave them for 10-15 seconds to soften them, making them easier to juice.