Unlocking the Secret to the Perfect Apple Pie (and Why You Should Bake It Today!)
Ever wondered what makes a truly unforgettable apple pie? Is it the crisp, buttery crust, the perfectly spiced, tender apple filling, or the nostalgic aroma that fills your home? For many, the classic apple pie isn’t just a dessert; it’s a cherished memory, a comforting hug in edible form. And while countless recipes exist, mastering your own Apple Pie (Classic) at home offers a deeply rewarding experience, allowing you to personalize every nuanced flavor. Imagine the satisfaction of pulling a golden-brown, bubbling pie from your oven, ready to share with loved ones. It’s an act of culinary love, far superior to any store-bought alternative. This comprehensive guide will walk you through crafting a pie that rivals even Grandma’s apple pie recipe, making you a master of this timeless dessert.
Ingredients & Kitchen Tools
To embark on this delightful baking journey, gather the following:
- For the Crust (or use 2 pre-made pie crusts):
* 2 ½ cups All-Purpose Flour: The structural backbone of your pie. Opt for unbleached for a slightly finer texture.
* 1 teaspoon Salt: Enhances flavor and balances sweetness. Coarse sea salt is a great choice.
* 1 cup (2 sticks) Unsalted Butter, very cold and cubed: Essential for flaky layers. Using cold butter is non-negotiable.
* ½ cup Ice Water: Helps bring the dough together without overworking the gluten, ensuring tenderness. Add a tablespoon at a time as needed.
- For the Filling:
* 6-8 Medium Apples (a mix of Granny Smith, Honeycrisp, and Fuji works best): Granny Smith provides tartness and structure, while Honeycrisp and Fuji add sweetness and good texture. Peel, core, and slice them into ¼-inch pieces.
* ¾ cup Granulated Sugar: Sweetens the filling. Adjust to your apple’s sweetness.
* ¼ cup All-Purpose Flour (or 2 tablespoons Cornstarch): Thickens the filling, preventing a watery pie.
* 1 teaspoon Ground Cinnamon: The quintessential apple pie spice.
* ¼ teaspoon Ground Nutmeg: Adds warmth and depth.
* ⅛ teaspoon Ground Cloves (optional): A tiny pinch elevates the spice profile.
* 1 tablespoon Lemon Juice: Brightens the flavor and prevents apples from browning.
* 2 tablespoons Unsalted Butter, cut into small pieces: Adds richness and a lovely sheen.
- For the Egg Wash (optional):
* 1 Egg Yolk + 1 tablespoon Milk: Creates a beautiful golden-brown crust.
- Kitchen Tools:
* 9-inch Pie Dish: Your pie’s home. Ceramic or glass bakes more evenly.
* Large Mixing Bowls: For dough and filling.
* Pastry Blender or Food Processor: For cutting butter into flour (or just your hands!).
* Rolling Pin: For shaping the dough.
* Measuring Cups and Spoons: For accurate ingredient portions.
* Paring Knife and Peeler: For apple preparation.
* Whisk: For combining dry ingredients.
Prep Time & Cooking Schedule
- Prep Time: 45-60 minutes (includes making the crust, if doing so from scratch, and preparing apples).
- Chill Time for Dough: 30-60 minutes (crucial for a tender crust).
- Cook Time: 50-60 minutes.
- Resting Time: At least 2-3 hours (allows the filling to set and prevents a soupy pie – patience is key!).
Plan your baking session to allow ample time for chilling and resting. Starting the dough a day ahead is also a great strategy to break up the work.
Step-by-Step Instructions
1. Prepare the Pie Crust (if making from scratch): In a large bowl, whisk together flour and salt. Cut in the very cold, cubed butter using a pastry blender or your fingertips until the mixture resembles coarse meal with some pea-sized butter pieces remaining. Gradually add ice water, one tablespoon at a time, mixing until the dough just comes together. Do not overmix. Divide the dough in half, flatten into discs, wrap in plastic wrap, and refrigerate for at least 30 minutes.
2. Prepare the Apple Filling: In a large bowl, combine the peeled, cored, and sliced apples. Add sugar, flour (or cornstarch), cinnamon, nutmeg, cloves (if using), and lemon juice. Toss gently until the apples are evenly coated.
3. Assemble the Pie: On a lightly floured surface, roll out one disc of chilled pie dough into a 12-inch circle. Carefully transfer it to your 9-inch pie dish. Trim the excess dough, leaving about a ½-inch overhang.
4. Add the Filling: Pour the apple mixture into the pie crust, mounding it slightly in the center. Dot the top of the filling with the small pieces of butter.
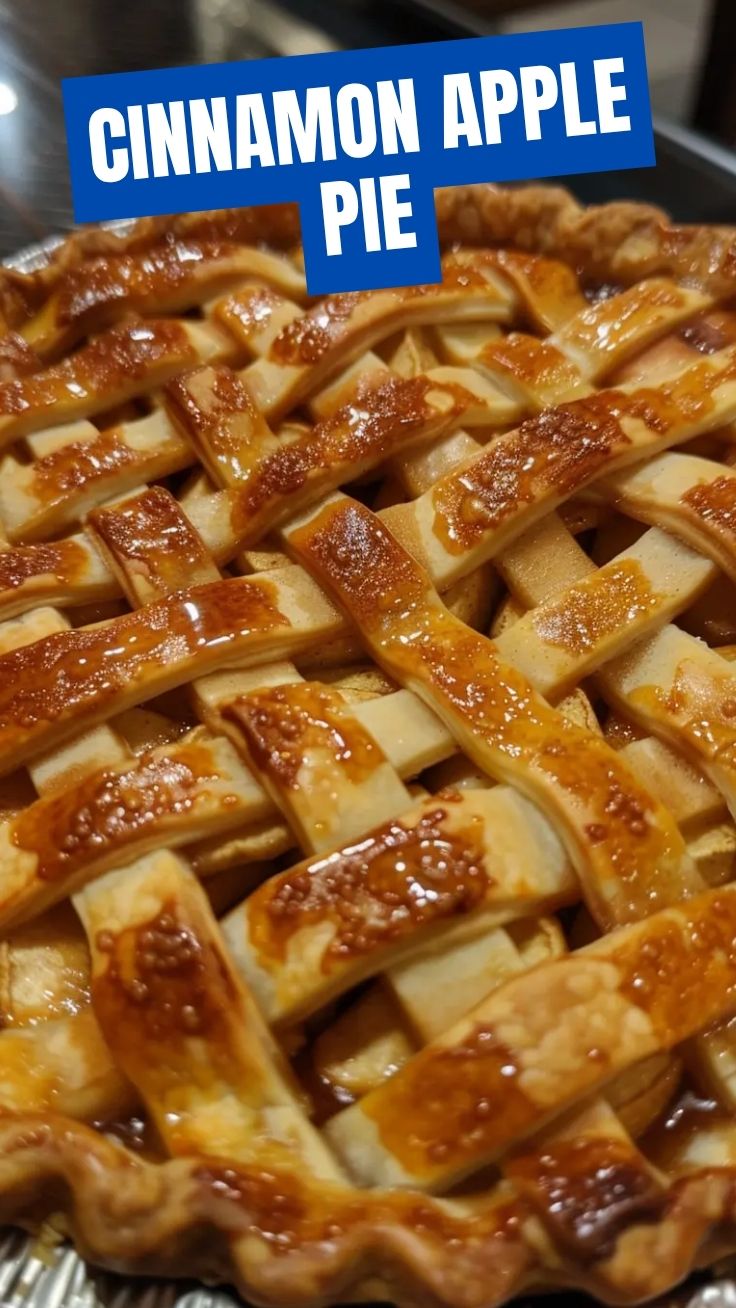
5. Create the Top Crust: Roll out the second disc of dough. You can either place it directly over the filling, cut vents, and crimp the edges, or create a beautiful lattice top for your Apple Pie (Classic). For a lattice, cut the dough into 1-inch strips and weave them over the filling. Trim and crimp the edges of both crusts together.
6. Chill (Optional but Recommended): For flakier results, refrigerate the assembled pie for 15-20 minutes while you preheat your oven.
7. Preheat Oven & Bake: Preheat oven to 425°F (220°C). If desired, brush the top crust with egg wash and sprinkle with a little extra sugar. Place the pie on a baking sheet (to catch any drips). Bake for 15 minutes, then reduce the oven temperature to 375°F (190°C) and continue baking for 35-45 minutes more, or until the crust is golden brown and the filling is bubbly. If the crust browns too quickly, loosely tent with foil.
8. Cool Completely: This is the hardest part! Let the pie cool on a wire rack for at least 2-3 hours before slicing and serving. This allows the filling to set properly, preventing a runny mess. Your patience will be rewarded with a perfect slice reminiscent of Grandma’s apple pie recipe.
Nutritional Benefits & Advantages
Apples are a fantastic source of dietary fiber, which aids digestion and can contribute to feelings of fullness. They also contain beneficial antioxidants and Vitamin C. While pie is a treat, using fresh, high-quality apples and controlling sugar content allows for a more wholesome dessert. Homemade pies also give you complete control over ingredients, avoiding preservatives and artificial flavors often found in store-bought options.
Tips, Variations & Cooking Advice
- Apple Choice is Key: A blend of sweet and tart apples prevents the pie from being one-note. Don’t shy away from experimenting with different varieties.
- Spice It Up: Beyond cinnamon and nutmeg, consider a pinch of allspice or ginger for a different warm spice profile.
- Caramel Apple Pie: Add a drizzle of homemade or store-bought caramel sauce over the apple filling before adding the top crust.
- Crumb Topping: Instead of a full top crust, create a streusel topping with flour, sugar, oats, and butter for a textural contrast.
- Gluten-Free Version: Use a gluten-free all-purpose flour blend for the crust and, if applicable, ensure your thickening agent (e.g., cornstarch) is certified gluten-free.
- Dairy-Free Version: Substitute unsalted butter with a high-quality plant-based butter alternative for both the crust and filling.
Common Mistakes to Avoid
- Overworking the Dough: This develops gluten, leading to a tough, chewy crust. Handle the dough as little as possible.
- Not Using Cold Butter: Warm butter melts too quickly, resulting in a less flaky crust.
- Not Chilling the Dough: Chilling solidifies the butter, ensuring flakiness, and makes the dough easier to handle.
- Not Letting the Pie Cool: Cutting into a hot pie will result in a runny filling. Give it time to set.
- Ignoring the Apples: Not peeling apples can lead to a chewy texture; not coring leaves unpleasant bits.
Storage & Meal Prep Tips
Leftover apple pie can be stored at room temperature, covered loosely, for up to 2 days. For longer storage, refrigerate in an airtight container for up to 4-5 days. To freeze an unbaked pie, wrap it tightly in plastic wrap and then foil, and freeze for up to 3 months. Bake from frozen, adding an extra 15-20 minutes to the baking time. Baked pie can also be frozen, wrapped well, for up to 2 months. Reheat slices gently in the oven or microwave.
Conclusion
Baking your own Apple Pie (Classic) is a journey that yields not only a delectable dessert but also a profound sense of accomplishment and culinary connection. By following these steps, understanding the nuances of ingredients, and avoiding common pitfalls, you’ll be well on your way to creating a pie that will impress everyone at your table. Don’t be intimidated; the process is incredibly rewarding, and the result is a taste of pure comfort and tradition, perhaps even rivaling Grandma’s apple pie recipe. So, roll up your sleeves, embrace the delightful aromas, and share your baking triumph with the world! What are your favorite apple pie memories, or secret ingredients? Share them in the comments below!
FAQs
Q1: What are the best apples for apple pie?
A1: A mix is best! Granny Smith provides tartness and structure, while Honeycrisp, Fuji, or Braeburn add sweetness and tender texture without turning to mush.
Q2: My pie crust is tough. What went wrong?
A2: Most likely, you overmixed the dough. Overworking develops gluten, which makes the crust tough. Handle the dough as little as possible and ensure your butter is very cold.
Q3: How do I prevent a soggy bottom crust?
A3: Ensure your oven is hot enough initially (425°F/220°C) and consider blind baking your bottom crust for 10-15 minutes before adding the filling. Also, allow your pie to cool completely to let the filling set.
Q4: Can I make the pie dough ahead of time?
A4: Absolutely! Pie dough can be made up to 2-3 days in advance and stored in the refrigerator, or frozen for up to 1-2 months. Thaw frozen dough in the refrigerator overnight before use.
Q5: How do I know when the apple pie is fully cooked?
A5: The crust should be golden brown, and the filling should be bubbling through the vents. You can also carefully insert a thin knife or skewer into one of the vents; if the apples are tender, it’s done.