Unlocking the Secret to Perfect Chocolate Crinkle Cookies at Home
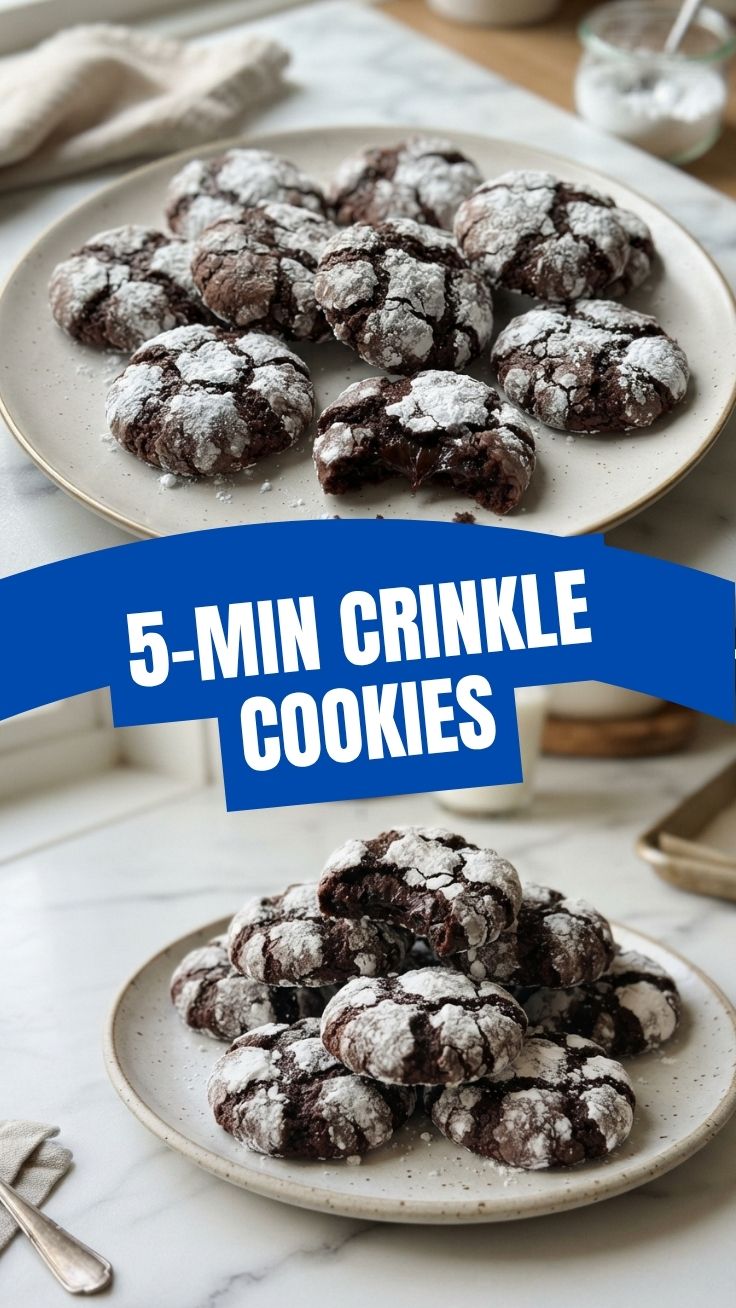
Are you tired of store-bought cookies that lack that homemade charm and irresistible chewiness? Imagine biting into a soft, fudgy cookie, its surface delicately dusted with powdered sugar, each bite revealing a rich chocolatey center. This dream becomes a reality with our easy-to-follow guide to crafting the most delightful Chocolate Crinkle Cookies right in your own kitchen. Not only will you impress your friends and family with these bakery-worthy treats, but you’ll also savor the satisfaction of creating something truly special from scratch. Mastering these beloved Crinkle Cookies offers a rewarding culinary experience, delivering unparalleled flavor and a comforting aroma that fills your home.
Ingredients & Kitchen Tools
To embark on your crinkle cookie journey, gather the following:
Ingredients:
- 1 cup unsalted butter, softened: Essential for a rich, tender crumb. Room temperature butter creams beautifully.
- 2 cups granulated sugar: Provides sweetness and contributes to the cookie’s structure.
- 4 large eggs: Binds the ingredients and adds moisture.
- 1 teaspoon vanilla extract: Enhances the chocolate flavor. Opt for pure vanilla for the best taste.
- 2 cups all-purpose flour: The base of your cookies. Sifting ensures a lighter texture.
- 1 cup unsweetened cocoa powder: The star ingredient! Use a good quality Dutch-processed cocoa for deep chocolate flavor.
- 2 teaspoons baking powder: The leavening agent that gives the cookies their lift.
- 1/2 teaspoon salt: Balances sweetness and intensifies chocolate flavor.
- 1 cup powdered sugar (confectioners’ sugar): For rolling the cookies, creating that iconic crinkle effect.
Kitchen Tools:
- Large mixing bowls: For combining wet and dry ingredients.
- Electric mixer (stand or hand-held): For creaming butter and sugar, essential for proper aeration.
- Whisk: To combine dry ingredients.
- Spatula: For scraping down the bowl and folding ingredients.
- Plastic wrap: For chilling the dough.
- Baking sheets: Lined with parchment paper or silicone baking mats.
- Parchment paper or silicone baking mats: Prevents sticking and ensures even baking.
- Cooling rack: For cooling the baked cookies evenly.
- Small bowl: For holding powdered sugar for rolling.
Prep Time & Cooking Schedule
- Prep Time: 20 minutes (active)
- Chill Time: 2 hours (minimum) to overnight (essential for easier handling and better crinkles)
- Cook Time: 8-10 minutes per batch
- Total Time: Approximately 2 hours 30 minutes (mostly inactive chilling)
The chilling time is crucial for these cookies. It allows the butter to solidify, preventing the cookies from spreading too much during baking and ensuring the powdered sugar coating adheres properly for that beautiful crinkle. Plan to prepare the dough in advance, even the night before, for best results.
Step-by-Step Instructions
1. Cream Butter and Sugar: In a large mixing bowl, using an electric mixer, cream together the softened butter and granulated sugar on medium speed until light and fluffy, about 3-5 minutes. This aeration is key for tender cookies.
2. Add Eggs and Vanilla: Beat in the eggs one at a time, mixing well after each addition. Stir in the vanilla extract until just combined.
3. Combine Dry Ingredients: In a separate bowl, whisk together the flour, cocoa powder, baking powder, and salt.
4. Combine Wet and Dry: Gradually add the dry ingredients to the wet ingredients, mixing on low speed until just combined. Do not overmix; overmixing can develop gluten, leading to tougher cookies. The dough will be soft and sticky.
5. Chill the Dough: Cover the bowl with plastic wrap and refrigerate for at least 2 hours, or preferably overnight. This chilling step is non-negotiable for perfectly formed Chocolate Crinkle Cookies. The firmer dough is easier to roll and promotes the distinctive crinkle.
6. Preheat Oven & Prepare Pan: Preheat your oven to 350°F (175°C). Line baking sheets with parchment paper or silicone baking mats.
7. Roll in Powdered Sugar: Place the powdered sugar in a small bowl. Scoop out dough (about 1 tablespoon per cookie) and roll it into a ball. Generously coat each dough ball in powdered sugar. The thicker the coating, the more pronounced the crinkles will be. This particular step is what gives these classic Crinkle Cookies their signature look.
8. Bake: Arrange the coated dough balls on the prepared baking sheets, leaving about 2 inches between them. Bake for 8-10 minutes, or until the edges are set and the centers still look slightly soft. They will firm up as they cool.
9. Cool: Let the cookies cool on the baking sheets for a few minutes before transferring them to a wire rack to cool completely.
Nutritional Benefits & Advantages
While Chocolate Crinkle Cookies are a treat, they offer a few surprising benefits. Dark cocoa powder, a primary ingredient, is rich in antioxidants, which can contribute to overall health. Homemade cookies also give you control over the quality of ingredients, allowing you to choose organic butter, cage-free eggs, and good quality cocoa, avoiding artificial flavors and preservatives often found in store-bought options. Baking at home allows for dietary adjustments, catering to specific needs or preferences.
Tips, Variations & Cooking Advice
- Intensify Chocolate Flavor: For an even deeper chocolate taste, add a pinch of espresso powder to your dry ingredients.
- Citrus Zest: For a brighter flavor profile, incorporate orange or peppermint extract along with or in place of vanilla, or add the zest of an orange directly into the dough.
- Gluten-Free Version: Substitute all-purpose flour with a 1:1 gluten-free baking flour blend for a delicious gluten-free alternative.
- Nutty Twist: Fold in chopped pecans or walnuts into the dough for added texture and flavor.
- Less Sweet: Reduce the granulated sugar by ¼ cup if you prefer a less sweet cookie, though the powdered sugar coating provides significant sweetness.
Common Mistakes to Avoid
- Not Chilling the Dough: This is the most common mistake! Skipping the chill time results in flat, overly spread cookies and poor crinkle formation.
- Overmixing the Dough: Overmixing develops gluten, leading to tough, dense cookies. Mix until just combined.
- Not Enough Powdered Sugar: Be generous with the powdered sugar coating. A thin coating will melt into the cookie, diminishing the crinkle effect.
- Overbaking: Overbaked cookies will be dry and hard. They should look slightly soft in the center when removed from the oven.
- Baking on an Unlined Sheet: Without parchment paper or a silicone mat, the cookies are likely to stick and burn.
Storage & Meal Prep Tips
Store Chocolate Crinkle Cookies in an airtight container at room temperature for up to 5 days. For longer storage, they can be frozen for up to 3 months. To freeze, place the cooled cookies in a single layer on a baking sheet until firm, then transfer to a freezer-safe bag or container, separating layers with parchment paper. Thaw at room temperature before serving. You can also freeze the raw dough balls, rolled in powdered sugar, for a quick bake later. Simply bake from frozen, adding an extra minute or two to the baking time.
Conclusion
Crafting these delightful Chocolate Crinkle Cookies is a deeply satisfying experience, yielding a treat that is both visually stunning and incredibly delicious. By following these detailed steps and heeding our expert tips, you’re guaranteed to produce a batch of perfect cookies with that iconic fudgy interior and crisp, sugary exterior. Don’t let the simplicity of these Crinkle Cookies fool you; they are a true showstopper. We encourage you to try this recipe and share your culinary successes! What is your favorite cookie flavor? Let us know in the comments below!
FAQs
Q1: Why are my crinkle cookies flat?
A1: The most common reason for flat cookies is insufficient chilling time for the dough, or the oven not being at the correct temperature. Ensure your butter isn’t too soft when creaming, and generously chill the dough.
Q2: Can I use regular cocoa powder instead of Dutch-processed?
A2: Yes, but Dutch-processed cocoa gives a darker color and milder, less bitter chocolate flavor. If using regular cocoa, you might slightly adjust the baking powder (check your recipe or add a pinch more baking soda if using unsweetened natural cocoa).
Q3: How do I get a thick powdered sugar coating to stay on?
A3: Ensure your dough is well-chilled. The colder, slightly tacky dough allows the powdered sugar to adhere better. Roll the balls generously, patting the sugar on if needed.
Q4: My crinkles aren’t very pronounced. What went wrong?
A4: This often happens if the dough isn’t cold enough, if the powdered sugar coating was too thin, or if the oven temperature was too low, causing the cookies to spread too slowly.
Q5: Can I make the dough ahead of time?
A5: Absolutely! The dough can be stored in the refrigerator for up to 3-4 days. This makes them ideal for meal prep or baking fresh batches whenever a craving strikes.