Unlock the True Flavor of Texas: Your Ultimate Guide to Homemade Texas Beef Chili
Are you ready to transform your kitchen into a haven of rich, smoky aromas and robust flavors? Few dishes encapsulate the soulful essence of Texan cuisine quite like a homemade Texas Beef Chili. Far more than just a stew, this iconic dish is a celebration of slow-cooked perfection, embodying a culinary tradition that prioritizes depth and intensity. Forget bland, canned versions; preparing a legitimate Chili con carne from scratch offers an unparalleled satisfaction. It allows you to control every ingredient, tailoring it to your exact taste, and discover the true potential of this hearty staple. This comprehensive guide will walk you through every step, ensuring your homemade Texas Beef Chili is nothing short of legendary.
Ingredients & Kitchen Tools
- 2 lbs Boneless Beef Chuck Roast: Preferably well-marbled, cut into ½-inch cubes. The fat renders down, adding incredible flavor and tenderness.
- 2 tbsp Avocado Oil or Lard: For browning the meat. Lard offers a traditional flavor depth.
- 1 Large Yellow Onion: Finely chopped. Provides a sweet aromatic base.
- 4-6 cloves Garlic: Minced. Essential for deep flavor.
- 1 (28 oz) can Crushed Tomatoes: Unsalted is best for controlling seasoning. Adds body and a touch of tang.
- 1 (14.5 oz) can Diced Tomatoes: Unsalted. For textural variation.
- 2 cups Beef Broth: Low sodium is preferred. The liquid medium for simmering.
- 4-6 dried Ancho Chilies: Stems and seeds removed, toasted, and rehydrated. Provides a fruity, smoky base.
- 2-3 dried Guajillo Chilies: Stems and seeds removed, toasted, and rehydrated. Slightly sweeter and less intense than anchos.
- 1-2 dried Arbol Chilies: Stems and seeds removed, lightly toasted. For a spicy kick; adjust to your preference.
- 1 tbsp Cumin Powder: Toasted for maximum aroma. An iconic chili spice.
- 1 tbsp Smoked Paprika: Adds a deep, smoky undertone.
- 1 tsp Dried Oregano: Mexican oregano preferred for its earthier notes.
- ½ tsp Cayenne Pepper: Optional, for added heat.
- 2 tbsp Masa Harina: Mixed with ¼ cup water. Used as a thickener and adds a subtle corn flavor.
- Salt and Freshly Ground Black Pepper: To taste.
- Optional Toppings: Shredded cheddar cheese, sour cream, chopped green onions, pickled jalapeños, cornbread.
Kitchen Tools:
- Large Dutch Oven or Heavy-Bottomed Pot (6-8 quarts): Ideal for even heat distribution and slow simmering.
- Blender or Food Processor: To make the chili paste from rehydrated chilies.
- Cutting Board and Sharp Knife: For preparing ingredients.
- Measuring Spoons and Cups: For accurate ingredient amounts.
- Wooden Spoon or Spatula: For stirring.
- Ladles: For serving.
Prep Time & Cooking Schedule
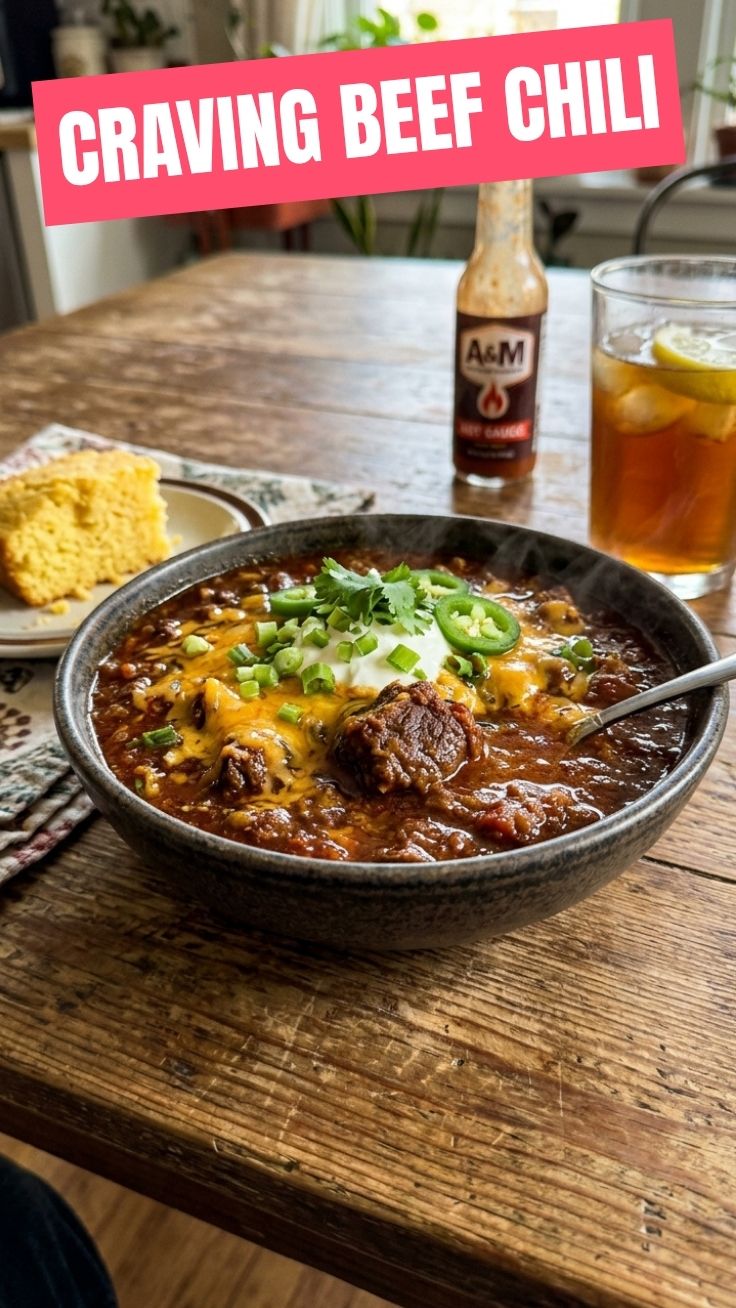
- Prep Time: 45 minutes (includes cubing beef, chopping veggies, toasting and rehydrating chilies)
- Active Cook Time: 30 minutes (browning meat, sautéing aromatics)
- Simmer Time: 2.5 – 3 hours (low and slow for tender meat and developed flavors)
- Resting Time: 15-30 minutes (allows flavors to meld and liquid to redistribute, making it richer). Plan for a total of 4-5 hours from start to finish. This is a perfect weekend project or a dish to prepare on a day when you want a highly rewarding culinary experience without rushing.
Step-by-Step Instructions
1. Prepare the Chilies: In a dry skillet, toast the ancho, guajillo, and arbol chilies over medium heat for 2-3 minutes until fragrant. Be careful not to burn them. Transfer to a bowl, cover with hot water, and let them rehydrate for 20-30 minutes. Once softened, drain, reserving some soaking liquid. Blend chilies with ¼ cup fresh water or reserved soaking liquid until a smooth paste forms. Strain through a fine-mesh sieve if you prefer a silkier texture.
2. Brown the Beef: Season the cubed beef chuck generously with salt and pepper. Heat avocado oil or lard in your Dutch oven over medium-high heat. Working in batches if necessary, brown the beef on all sides until a deep crust forms. Remove the browned beef and set aside.
3. Sauté Aromatics: Reduce heat to medium. Add chopped onion to the pot and cook until softened, about 5-7 minutes. Add minced garlic and cook for another minute until fragrant.
4. Build the Flavor Base: Stir in the chili paste, cumin powder, smoked paprika, and dried oregano. Cook for 2-3 minutes, stirring constantly, to toast the spices and deepen their flavor. Add cayenne pepper if desired.
5. Simmer the Texas Beef Chili: Return the browned beef to the pot. Stir in the crushed tomatoes, diced tomatoes, and beef broth. Bring the mixture to a gentle simmer. Reduce heat to low, cover, and cook for at least 2.5 to 3 hours, or until the beef is fork-tender. Stir occasionally to prevent sticking.
6. Thicken and Adjust: In the last 30 minutes of cooking, whisk the Masa Harina with ¼ cup water until smooth. Stir this slurry into the simmering Chili con carne. Continue to simmer, uncovered, for another 15-20 minutes, allowing it to thicken. Taste and adjust seasoning with salt and pepper as needed.
7. Rest and Serve: Remove from heat and let the chili rest for 15-30 minutes before serving. This allows the flavors to deepen and the chili to set. Serve hot with your favorite toppings.
Nutritional Benefits & Advantages
This homemade Texas Beef Chili is packed with goodness. Beef chuck is an excellent source of protein, iron, and B vitamins, vital for energy production and muscle health. Tomatoes contribute lycopene, a powerful antioxidant, along with Vitamin C. The various chilies offer capsaicin, known for its anti-inflammatory and metabolism-boosting properties. By making it from scratch, you avoid excessive sodium, preservatives, and unhealthy fats often found in store-bought options, allowing for a truly wholesome and satisfying meal.
Tips, Variations & Cooking Advice
- Boost Depth: For an even richer flavor, consider adding a square of dark chocolate (unsweetened) or a splash of strong coffee (espresso) during the last hour of simmering.
- Spice Level: Adjust the number of arbol chilies for more or less heat. For extreme heat, add a pinch of habanero or ghost pepper powder carefully.
- Vegetarian Option: Swap beef for a mix of mushrooms (cremini, shiitake), lentils, and black beans for a hearty plant-based version. Adjust cooking time accordingly.
- Smoky Flavor: If you don’t have smoked paprika, a dash of liquid smoke can be used sparingly.
- Pressure Cooker: For a faster cooking time, brown the beef and sauté aromatics, then transfer to a pressure cooker. Cook for 45-60 minutes on high pressure, then follow thickening steps.
Common Mistakes to Avoid
- Not Browning the Beef Properly: A good sear creates a flavorful crust crucial for the chili’s depth. Don’t rush this step.
- Skipping the Chili Rehydration: Using dried chilies improperly will result in a gritty texture and flat flavor. Ensure they are fully softened.
- Under-Seasoning or Over-Salting: Taste frequently throughout the cooking process, especially after adding the Masa Harina slurry.
- Adding Beans: A true Texas Beef Chili traditionally does not contain beans. If you prefer them, add cooked beans (pinto or kidney) in the last 30 minutes of simmering.
- Cooking Too Quickly: This is a slow-cooked dish for a reason. Rushing the simmer time will result in tough meat and undeveloped flavors.
Storage & Meal Prep Tips
Leftover Texas Beef Chili is often even better the next day as the flavors continue to meld. Store completely cooled chili in airtight containers in the refrigerator for up to 3-4 days. It freezes beautifully for up to 3 months. For best results when freezing, portion it into individual servings. Thaw overnight in the refrigerator and reheat gently on the stovetop or in the microwave, adding a splash of broth or water if needed to adjust consistency.
Conclusion
Crafting your own Texas Beef Chili from scratch is a rewarding culinary journey that pays off in incredibly rich, complex flavors. By following this guide, you’ve mastered the art of building layers of taste and achieved that perfect, fork-tender beef, delivering a robust and authentic bowl of Chili con carne. Don’t just make dinner; create an experience. Share your delicious results and tell us how your chili turned out – we can’t wait to hear about your Texan culinary adventure!
FAQs
1. Can I use ground beef instead of chuck roast?
While chuck roast offers a richer, more traditional texture, you can use 2 lbs of 80/20 ground beef. Brown it and drain excess fat before proceeding to the onion step.
2. What if I can’t find dried chilies?
You can substitute with good quality chili powder (a blend, not just cayenne), but the complexity of flavor will be different. Use 3-4 tablespoons of chili powder.
3. My chili is too thin, what can I do?
Ensure it’s had enough time to simmer. If still too thin, you can add another tablespoon of Masa Harina mixed with a small amount of water, or simply simmer uncovered for longer to allow some liquid to evaporate.
4. Can I make this dairy-free or gluten-free?
Absolutely! The recipe is naturally dairy-free (just avoid dairy toppings). It’s also gluten-free, as Masa Harina is corn-based. Ensure your beef broth is gluten-free.
5. How can I make this spicier without adding more chilies?
A pinch of red pepper flakes or a dash of your favorite hot sauce stirred in at the end can provide extra heat without altering the foundational chili flavor.