Mastering the Art of Homemade Sesame Chicken: Your Ultimate Guide
Are you tired of settling for mediocre takeout, or perhaps craving that perfectly balanced sweet and savory dish that consistently hits the spot? Imagine creating restaurant-quality Sesame Chicken right in your own kitchen, complete with that irresistible crispy coating and luscious sauce. This comprehensive guide will empower you to ditch the delivery menu and master an iconic dish, transforming your home cooking into a gourmet experience worthy of any Chinese Takeout establishment. Preparing this classic at home not only guarantees fresh, high-quality ingredients but also allows you to customize it to your exact preferences, ensuring a healthier and more satisfying meal. Getting started with this beloved recipe is easier than you think.
Ingredients & Kitchen Tools
Crafting the perfect Sesame Chicken requires a few essential ingredients and basic kitchen tools. This list is designed to set you up for success.
For the Chicken:
- Chicken Thighs or Breasts (1.5 lbs): Boneless, skinless, cut into 1-inch pieces. Thighs offer more flavor and moisture; breasts are leaner.
- Cornstarch (1/4 cup): For dredging the chicken, creating a crisp exterior.
- Egg (1 large): Whisked, to bind the cornstarch to the chicken.
- Salt & Black Pepper (to taste): Basic seasoning for the chicken.
- Vegetable Oil (2-3 cups): For shallow frying or deep frying. Can substitute with canola or peanut oil.
For the Sesame Sauce:
- Soy Sauce (1/2 cup): Low sodium preferred, for savory depth.
- Rice Vinegar (1/4 cup): Adds a tangy brightness.
- Honey or Maple Syrup (1/4 cup): For sweetness. Adjust to your preference.
- Brown Sugar (2 tbsp): Provides a rich, caramelized sweetness.
- Sesame Oil (1 tbsp): Crucial for that distinctive nutty sesame flavor.
- Fresh Ginger (1 tbsp, grated): Adds a pungent, zesty kick.
- Garlic (2 cloves, minced): Aromatic base for the sauce.
- Cornstarch Slurry (1 tbsp cornstarch + 2 tbsp water): To thicken the sauce.
For Garnish (Optional):
- Toasted Sesame Seeds: For a final flourish and nutty crunch.
- Green Onions (sliced): Adds freshness and color.
Kitchen Tools:
- Large Mixing Bowl: For marinating the chicken.
- Whisk: For combining sauce ingredients.
- Large Skillet, Wok, or Dutch Oven: For frying the chicken.
- Slotted Spoon or Spider Skimmer: For removing fried chicken from oil.
- Paper Towel-Lined Plate: For draining excess oil from fried chicken.
- Small Saucepan: For simmering the sauce.
Prep Time & Cooking Schedule
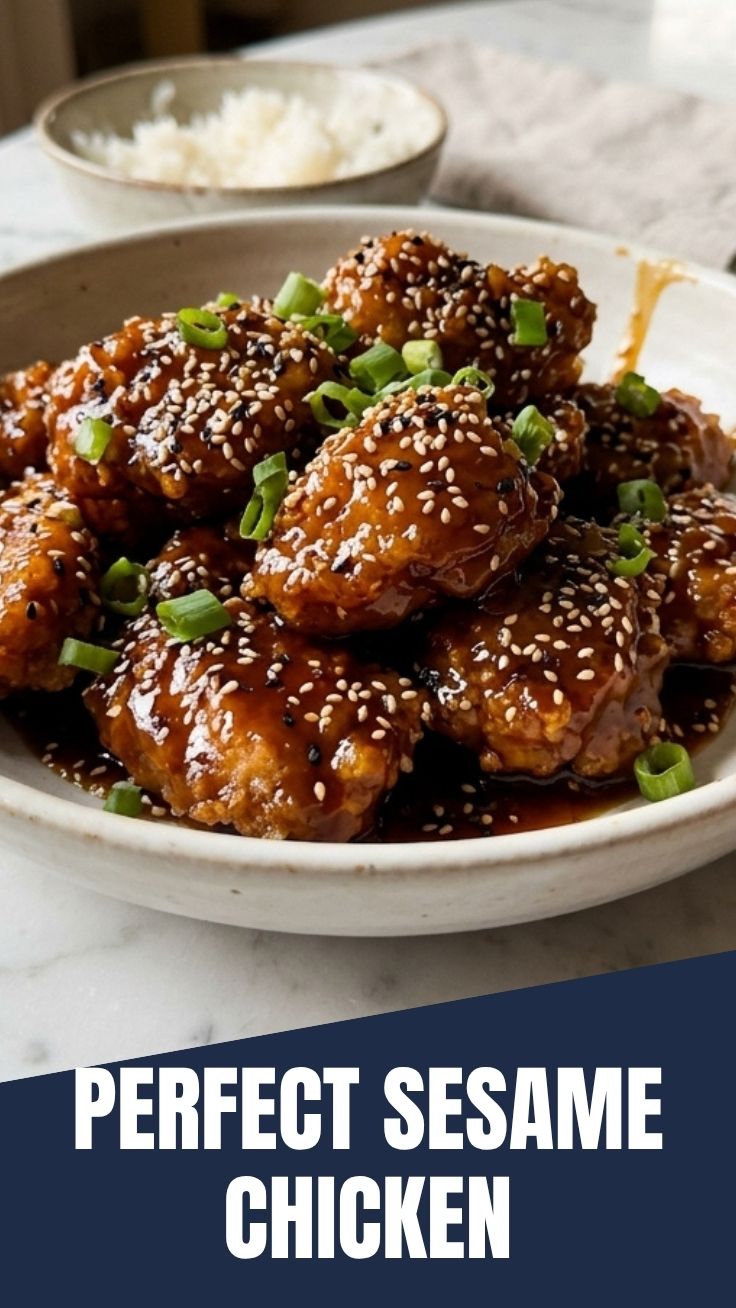
Efficient planning is key to a smooth cooking experience. Here’s a breakdown to help you manage your time effectively:
- Prep Time: 20 minutes (includes cutting chicken, mincing aromatics, and whisking sauce)
- Marinating Time (Optional but Recommended): 15-30 minutes for enhanced flavor and tenderness.
- Cooking Time: 15-20 minutes (frying chicken, simmering sauce, combining)
- Total Time: Approximately 50-70 minutes
This recipe is perfect for a weeknight meal if prepped ahead or a relaxing weekend cooking project. The marinating step isn’t strictly necessary but significantly improves the flavor profile of the chicken.
Step-by-Step Instructions
Follow these detailed steps to create an unforgettable homemade Sesame Chicken that rivals any take-out.
1. Prepare the Chicken: In a large bowl, whisk the egg. Add the chicken pieces, coating them evenly. In a separate shallow dish, combine cornstarch, salt, and pepper. Dredge each piece of egg-coated chicken thoroughly in the cornstarch mixture, ensuring it’s completely covered. This step is crucial for achieving that characteristic crispy texture found in quality Chinese Takeout dishes.
2. Fry the Chicken: Heat the vegetable oil in your skillet or wok over medium-high heat until it reaches 350-375°F (175-190°C). Carefully add the chicken pieces in batches, ensuring not to overcrowd the pan. Fry for 3-5 minutes per batch, or until golden brown and cooked through. Use a slotted spoon to transfer the fried chicken to a paper towel-lined plate to drain excess oil. Maintain the oil temperature between batches.
3. Prepare the Sesame Sauce: While the chicken fries, combine soy sauce, rice vinegar, honey/maple syrup, brown sugar, sesame oil, grated ginger, and minced garlic in a small saucepan. Whisk until well combined. Bring the mixture to a gentle simmer over medium heat.
4. Thicken the Sauce: In a small cup, whisk together the cornstarch and water to create a slurry. Slowly add the slurry to the simmering sauce, whisking constantly until the sauce thickens to your desired consistency. It should coat the back of a spoon. Taste and adjust sweetness or tanginess as needed.
5. Combine and Serve: Add the fried chicken directly into the saucepan with the thickened sesame sauce. Toss gently to ensure every piece is thoroughly coated. Serve immediately over steamed rice, garnished with toasted sesame seeds and sliced green onions.
Nutritional Benefits & Advantages
Homemade Sesame Chicken offers several nutritional advantages over its restaurant counterpart. By preparing it yourself, you gain control over the amount of sugar, sodium, and oil used, creating a healthier, yet equally delicious, meal. Chicken is an excellent source of lean protein, essential for muscle repair and growth. Sesame seeds add healthy fats, fiber, and important minerals like calcium and magnesium. Ginger and garlic contribute powerful antioxidants and anti-inflammatory properties.
Tips, Variations & Cooking Advice
- Air Fryer Option: For a lighter version, air-fry the cornstarch-coated chicken at 375°F (190°C) for 15-20 minutes, flipping halfway, until crispy and cooked through.
- Spice It Up: Add a pinch of red pepper flakes to the sauce for a delightful kick.
- Veggie Boost: Stir-fry some broccoli florets, bell peppers, or snow peas and add them to the chicken and sauce for a more complete and colorful meal.
- Gluten-Free: Use tamari instead of soy sauce and ensure your cornstarch is certified gluten-free.
- Vegan Option: Substitute chicken with extra-firm tofu (pressed and cubed), then follow the dredging and frying steps.
- Sauce Consistency: If your sauce is too thick, thin it with a little water or chicken broth. If it’s too thin, create another small cornstarch slurry and whisk it in gradually.
Common Mistakes to Avoid
- Overcrowding the Pan: This lowers the oil temperature, leading to greasy, soggy chicken instead of crispy perfection. Fry in batches if necessary.
- Not Draining Excess Oil: Failing to drain the fried chicken thoroughly will result in a heavy, oily dish. Use plenty of paper towels.
Burning the Garlic/Ginger: Add these aromatics to the sauce after* other liquids are combined, or ensure the heat is not too high to prevent them from burning and becoming bitter.
- Undercooking the Sauce: Ensure the sauce simmers gently for a few minutes after adding the slurry to fully cook out the cornstarch taste and achieve proper thickening.
Storage & Meal Prep Tips
Leftover Sesame Chicken can be stored in an airtight container in the refrigerator for up to 3-4 days. It’s an excellent meal prep option!
- Reheating: For best results, reheat in a skillet over medium heat or in a toaster oven until warmed through, which helps maintain some crispness. Microwaving is convenient but may result in softer chicken.
- Freezing: While possible, the texture of the fried coating might suffer after freezing and thawing. If you plan to freeze, it’s best to freeze the cooked chicken separately from the sauce, then combine after thawing and reheating. The sauce itself freezes well for up to 3 months.
Conclusion
You’ve successfully prepared a delectable Sesame Chicken that rivals the best, proving that restaurant-quality flavors are entirely achievable in your own kitchen! Mastering this recipe not only satisfies your cravings for an authentic Chinese Takeout experience but also empowers you with the skills to confidently tackle other beloved dishes. We encourage you to try this recipe and share your culinary triumphs in the comments below! What variations did you try? Did you uncover any new favorite techniques? Your journey into gourmet home cooking is just beginning.
FAQs
Q1: Can I bake or air fry the chicken instead of frying?
A1: Yes, absolutely! For a healthier option, air fry at 375°F (190°C) for 15-20 minutes, flipping halfway, or bake at 400°F (200°C) for 20-25 minutes until golden and cooked through. The crispiness won’t be identical to deep-frying, but it’s still delicious.
Q2: My sauce is too thick/thin. How do I fix it?
A2: If too thick, whisk in a tablespoon of water or chicken broth at a time until desired consistency is reached. If too thin, create another small cornstarch slurry (1 tsp cornstarch + 2 tsp cold water) and slowly whisk it into the simmering sauce until it thickens.
Q3: What can I serve with Homemade Sesame Chicken?
A3: Steamed white or brown rice is a classic pairing. You can also serve it with stir-fried vegetables, lo mein noodles, or a simple side salad.
Q4: Can I make the sauce ahead of time?
A4: Yes, the sesame sauce can be whisked together and stored in an airtight container in the refrigerator for up to 3-4 days. You can also simmer and thicken it, then reheat gently before combining with freshly fried chicken.
Q5: What’s the best way to get really crispy chicken?
A5: Ensure your oil is at the correct temperature (350-375°F / 175-190°C). Don’t overcrowd the pan, as this lowers the oil temperature and results in soggy chicken. Fry in batches and drain well on paper towels. A double dredge of cornstarch (cornstarch, then egg, then cornstarch again) can also enhance crispiness.