Homemade Peach Ice Cream: Your Summer Dream Dessert
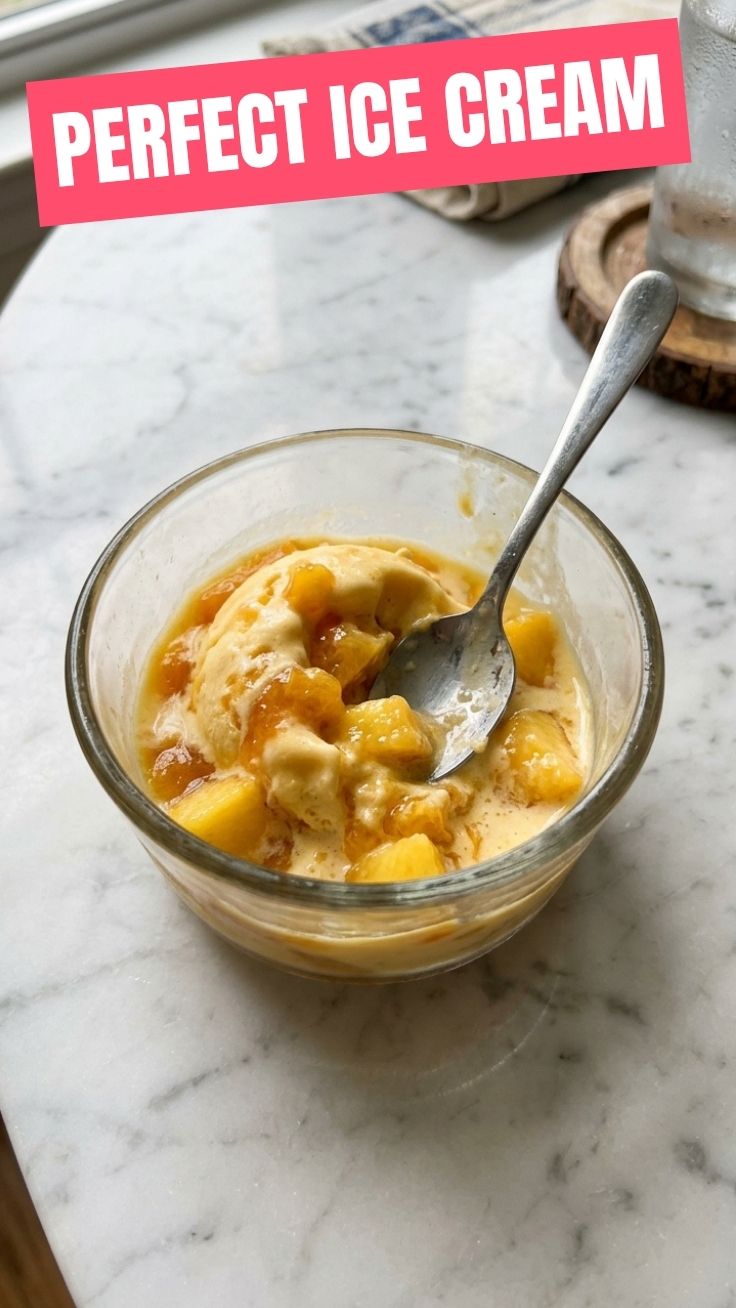
Ever wondered if you could capture the essence of a warm summer day in a single, creamy spoonful? Imagine indulging in a dessert that’s not just sweet, but bursting with the vibrant, sun-kissed flavor of ripe peaches. Preparing your own Peach Ice Cream at home offers an unparalleled experience, allowing you to control the freshness of ingredients and avoid artificial additives. This isn’t just about making ice cream; it’s about crafting a memory, a delightful treat that brings people together. Dive into the world of homemade desserts, and you’ll discover that a scoop of this creamy delight, perhaps even alongside a warm slice of Peach Cobbler, elevates any occasion.
Ingredients & Kitchen Tools
To embark on this delightful culinary journey, gather the following:
Ingredients:
- 4 ripe medium peaches: About 2 pounds, peeled, pitted, and diced for maximum flavor.
- 1 cup granulated sugar: For sweetness, adjustable to your peaches’ ripeness.
- 1/2 cup water: To create a light syrup for the peaches.
- 2 cups heavy cream: The base for a rich, luxurious texture.
- 1 cup whole milk: Adds to the creaminess without being overly heavy.
- 1 tsp vanilla extract: Enhances all the flavors, a must-have.
- Pinch of salt: Balances sweetness and brightens the peach flavor.
- Optional: 1-2 tablespoons lemon juice: A splash brightens the peach flavor and prevents browning.
- Optional: 1/4 tsp almond extract: For a subtle, sophisticated twist that complements peaches beautifully.
Kitchen Tools:
- Ice cream maker: Essential for achieving the perfect churned consistency.
- Large saucepan: For cooking down the peaches.
- Large mixing bowl: For combining the ice cream base.
- Fine-mesh sieve (optional): For a smoother ice cream base, if desired.
- Airtight freezer-safe container: For storing your finished ice cream.
- Spatula and whisk: For mixing.
Prep Time & Cooking Schedule
- Prep Time: 25 minutes (peeling, pitting, dicing peaches, and preparing base)
- Cook Time: 15 minutes (for peach puree)
- Chill Time: Minimum 4 hours, preferably overnight (for optimal churn)
- Churn Time: 20-25 minutes (varies by ice cream maker)
- Freeze Time: 2-4 hours (for firming up)
This schedule ensures each component is perfectly prepared, allowing the flavors to meld and the ice cream to achieve its ideal texture. The chill time is crucial; don’t skip it, as it prevents crystallization and results in a smoother, creamier Peach Ice Cream.
Step-by-Step Instructions
1. Prepare the Peaches: In a large saucepan, combine the diced peaches, 1/2 cup granulated sugar, and 1/2 cup water. Bring to a gentle simmer over medium heat, stirring occasionally. Cook for 10-15 minutes, or until the peaches are tender and the liquid has slightly thickened.
2. Cool and Puree: Remove the cooked peaches from the heat and let them cool completely. For a smoother ice cream, you can either mash them with a fork or use an immersion blender to create a chunky puree. If you prefer a completely smooth texture, press them through a fine-mesh sieve.
3. Create the Base: In a large mixing bowl, whisk together the heavy cream, whole milk, remaining 1/2 cup granulated sugar, vanilla extract, and a pinch of salt. Stir until the sugar is fully dissolved.
4. Combine and Chill: Fold the cooled peach puree into the cream mixture. Add lemon juice and/or almond extract if using. Cover the bowl and refrigerate for at least 4 hours, or ideally overnight, until thoroughly chilled. This chilling step is paramount for a perfectly churned Peach Ice Cream.
5. Churn: Pour the chilled peach mixture into your ice cream maker’s pre-frozen bowl. Churn according to the manufacturer’s instructions, typically 20-25 minutes, until it reaches the consistency of soft-serve ice cream.
6. Freeze: Transfer the soft ice cream to an airtight freezer-safe container. Press plastic wrap directly onto the surface of the ice cream to prevent ice crystals from forming. Freeze for another 2-4 hours, or until firm enough to scoop. Serve this delightful treat on its own or alongside a warm slice of Peach Cobbler for an ultimate dessert experience.
Nutritional Benefits & Advantages
Peaches are more than just delicious; they’re packed with essential nutrients. They are a good source of Vitamin C, an antioxidant that supports immune function, and Vitamin A, vital for vision and skin health. Peaches also provide dietary fiber, which aids digestion and promotes a feeling of fullness. Making homemade ice cream allows you to control sugar content and avoid the high fructose corn syrup and artificial flavors often found in commercial versions. This dessert combines wholesome fruit with the indulgence of dairy, offering a balanced treat.
Tips, Variations & Cooking Advice
- Roast the Peaches: For a deeper, more caramelized peach flavor, try roasting the peaches before pureeing. Toss diced peaches with a tablespoon of sugar and roast at 375°F (190°C) for 20-25 minutes.
- Spice it Up: A pinch of cinnamon, nutmeg, or cardamom can add a warm, comforting note to your peach ice cream. Add it to the peach mixture while cooking.
- Dairy-Free Option: Substitute heavy cream with full-fat coconut milk or cashew cream, and whole milk with a non-dairy alternative for a vegan version. Ensure your non-dairy milk is unsweetened.
- Add-ins: Swirl in some crumbled shortbread, graham crackers, or a touch of toasted pecans after churning for added texture and flavor.
- Sweetness Adjustment: Taste your peach puree before adding it to the cream base. If your peaches are very sweet, you might reduce the initial sugar in the cream mixture.
Common Mistakes to Avoid
- Not chilling the base enough: This is the most common mistake. A warm base will not churn properly, resulting in icy, rather than creamy, ice cream.
- Overfilling the ice cream maker: Leave room for expansion, as the mixture will increase in volume as it churns.
- Skipping the salt: A tiny pinch of salt enhances sweetness and balances flavors – don’t omit it!
- Not covering the ice cream tightly during freezing: This leads to freezer burn and ice crystal formation.
- Using under-ripe peaches: Under-ripe peaches lack the sweetness and flavor necessary for truly outstanding peach ice cream.
Storage & Meal Prep Tips
Store your homemade Peach Ice Cream in an airtight, freezer-safe container. For best results and to prevent ice crystal formation, press a piece of parchment paper or plastic wrap directly onto the surface of the ice cream before sealing the lid. It will stay fresh and delicious for up to two weeks in the freezer. To enjoy it at its creamiest, let it sit out at room temperature for 5-10 minutes before scooping. Unfortunately, ice cream isn’t ideal for meal prep in the traditional sense, but you can certainly make a large batch and store it for whenever a craving strikes!
Conclusion
Crafting your own Peach Ice Cream is a rewarding experience, transforming simple, fresh ingredients into a luxurious, flavor-packed dessert that truly captures the essence of summer. From the careful preparation of perfectly ripe peaches to the satisfying churn in your ice cream maker, every step contributes to a creation that’s far superior to anything store-bought. So go ahead, whip up a batch, perhaps pairing it with a comforting Peach Cobbler, and share this delightful treat with your loved ones. We’d love to hear about your homemade ice cream adventures in the comments below!
FAQs
Q1: Can I make this without an ice cream maker?
A1: While an ice cream maker yields the best results, you can try the “no-churn” method by folding the chilled peach puree into whipped heavy cream and then freezing. The texture will be different – usually denser and less airy – but still delicious.
Q2: How long does homemade peach ice cream last in the freezer?
A2: When stored properly in an airtight container, it will maintain its quality for up to two weeks. After that, ice crystals may become more prominent, though it will still be safe to eat.
Q3: My peaches aren’t very ripe; what should I do?
A3: If your peaches are slightly under-ripe, you can increase the amount of sugar slightly in the peach puree mixture. Alternatively, roasting them as suggested in the “Tips” section can help bring out their natural sugars and deepen their flavor.
Q4: Why did my ice cream turn out icy instead of creamy?
A4: The most common reasons for icy ice cream are insufficient chilling of the base before churning, or not chilling for long enough after churning. Ensure your ice cream maker’s bowl is thoroughly frozen, and the base is very cold before you start churning. Too much water content in the mixture can also contribute to iciness.
Q5: Can I reduce the sugar content in this recipe?
A5: Yes, you can adjust the sugar to your preference. Start with a slightly reduced amount and taste the base mixture before churning. Remember that sugar not only adds sweetness but also contributes to the ice cream’s creamy texture by lowering its freezing point.