Unlock the Secret to Effortless Sweetness: Your Guide to Perfect No-Bake Peanut Butter Bars
Ever dreamt of a dessert that tastes incredible, requires minimal effort, and caters to your sweet tooth without turning on the oven? If you’re nodding enthusiastically, then you’re in for a treat! Today, we’re diving into the delightful world of No-Bake Peanut Butter Bars – a true culinary gem that promises to satisfy cravings and simplify your kitchen routine. Crafting these delectable bars at home isn’t just about saving time; it’s about controlling ingredients, customizing flavors, and enjoying a sense of accomplishment with every bite. This recipe isn’t just easy; it’s a gateway to mastering a versatile and beloved sweet. Get ready to discover why these bars are a perfect addition to your repertoire of No-Bake Dessert Recipes, offering both convenience and irresistible taste.
Ingredients & Kitchen Tools
To embark on this delightful journey, gather the following:
- For the Base:
* 1 ½ cups graham cracker crumbs (or crushed digestive biscuits, for a slightly different texture)
* ½ cup unsalted butter, melted (crucial for binding the base)
* ¼ cup granulated sugar (adds a touch of sweetness to the crust)
- For the Filling:
* 1 cup creamy peanut butter (all-natural or conventional, your preference)
* 1 cup powdered sugar (confectioners’ sugar; ensures a smooth, non-gritty filling)
* ½ cup unsalted butter, softened (contributes to the creamy texture)
* 1 teaspoon vanilla extract (enhances overall flavor)
- For the Chocolate Topping:
* 1 ½ cups semi-sweet chocolate chips (or dark chocolate for a richer experience)
* 2 tablespoons unsalted butter (for a glossy, smooth ganache-like topping)
Kitchen Tools You’ll Need:
- 8×8-inch baking pan (or a similar size for desired thickness)
- Parchment paper (for easy removal)
- Large mixing bowls (2-3)
- Rubber spatula or sturdy spoon
- Measuring cups and spoons
- Whisk (optional, for smoothing the chocolate)
- Microwave-safe bowl or small saucepan (for melting butter and chocolate)
Prep Time & Cooking Schedule
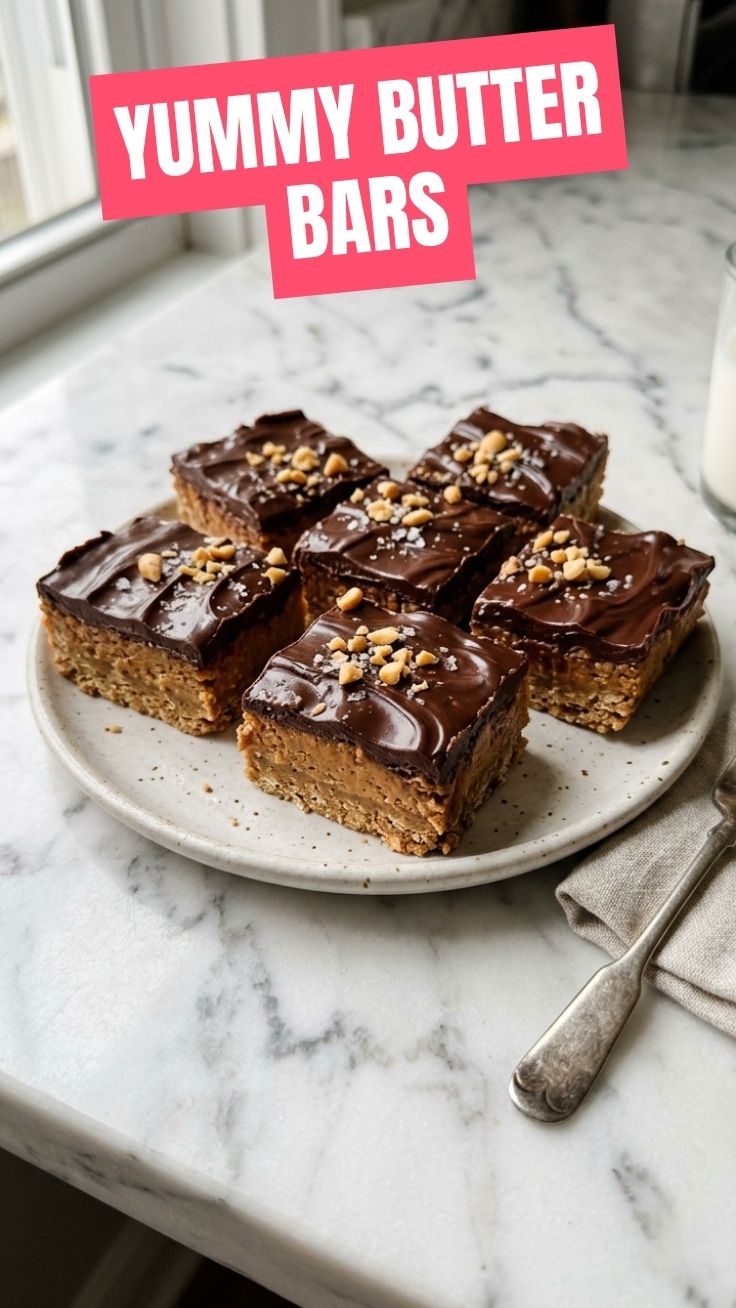
The beauty of this recipe lies in its minimal time commitment!
- Prep Time: 15-20 minutes (This is where most of your effort goes, mixing and layering.)
- Chill Time: 1-2 hours (Essential for setting the layers firmly, ensuring clean slices. Don’t skip this!)
- Total Time: Approximately 1 hour 15 minutes to 2 hours 20 minutes.
Plan to make these in advance for a potluck or party, or simply whip them up on a lazy afternoon for an evening treat. The chill time is hands-off, allowing you to relax while the magic happens!
Step-by-Step Instructions
Let’s get this deliciousness going! Follow these steps for perfect No-Bake Peanut Butter Bars every time, a staple among delightful No-Bake Dessert Recipes.
1. Prepare Your Pan: Line an 8×8-inch baking pan with parchment paper, leaving an overhang on two sides. This creates “handles” for easy removal later.
2. Make the Graham Cracker Base: In a large bowl, combine the graham cracker crumbs, granulated sugar, and melted butter. Mix until the crumbs are evenly moistened and resemble wet sand. Press this mixture firmly and evenly into the bottom of the prepared pan. Use the back of a spoon or your knuckles to ensure a compact base. Place in the freezer for about 10 minutes to firm up while you prepare the filling.
3. Prepare the Peanut Butter Filling: In another large bowl, using a rubber spatula or electric mixer, beat together the softened peanut butter, softened butter, powdered sugar, and vanilla extract until smooth and creamy. The texture should be thick but spreadable.
4. Layer the Filling: Remove the pan from the freezer. Evenly spread the peanut butter filling over the graham cracker base. Use the back of your spatula to smooth it out from edge to edge.
5. Create the Chocolate Topping: In a microwave-safe bowl, combine the chocolate chips and 2 tablespoons of butter. Microwave in 30-second intervals, stirring after each, until melted and smooth. Be careful not to overheat the chocolate, as it can seize. Alternatively, melt in a double boiler.
6. Pour and Spread Topping: Pour the melted chocolate evenly over the peanut butter layer. Gently tilt the pan to ensure the chocolate coats the entire surface.
7. Chill for Setting: Place the pan in the refrigerator for at least 1-2 hours, or until the chocolate topping is completely set and firm. This is crucial for clean, beautiful slices.
8. Slice and Serve: Once firm, use the parchment paper overhang to lift the entire slab out of the pan. Place it on a cutting board. Using a sharp knife, warmed under hot water and wiped dry (this helps with clean cuts), slice the bars into desired squares or rectangles. Enjoy!
Nutritional Benefits & Advantages
These bars aren’t just delicious; they offer some surprising benefits! Peanut butter is a great source of protein and healthy fats, providing sustained energy. While they are a treat, the use of whole ingredients means you’re avoiding many artificial additives found in store-bought options. Plus, the protein content helps with satiety, making a small square feel surprisingly satisfying. They are also incredibly convenient for portion control and quick energy boosts.
Tips, Variations & Cooking Advice
- Nut Butter Alternatives: Not a peanut butter fan? Almond butter, cashew butter, or even sunflower seed butter can be substituted. Adjust powdered sugar slightly if using a less sweet nut butter.
- Chocolate Choices: Experiment with milk chocolate chips for a sweeter topping, or use chopped baking chocolate for a richer, more intense flavor.
- Crunch Factor: Add a layer of chopped peanuts, pretzels, or even crispy rice cereal to the peanut butter filling for an extra textural dimension.
- Spice It Up: A pinch of cinnamon or a tiny dash of cayenne pepper in the peanut butter filling can add an unexpected and delightful warmth.
- Dietary Adaptations:
* Gluten-Free: Use gluten-free graham crackers or a crust made from gluten-free oat flour and butter.
* Dairy-Free: Substitute vegan butter for regular butter and use dairy-free chocolate chips. Ensure your graham crackers are also dairy-free.
Common Mistakes to Avoid
- Not Chilling Long Enough: This is the most common mistake. Rushing the chill time will result in gooey, messy bars that are impossible to cut neatly. Patience is key!
- Overheating Chocolate: When melting chocolate, do it slowly and stir frequently to prevent it from seizing and becoming grainy.
- Not Pressing the Base Firmly: A loose base will crumble apart when sliced. Make sure it’s packed tightly.
- Using Oily Peanut Butter Without Stirring: If using natural peanut butter, stir it thoroughly before measuring to ensure a consistent texture.
Storage & Meal Prep Tips
- Storage: Store No-Bake Peanut Butter Bars in an airtight container in the refrigerator for up to 1 week. They can also be stored at room temperature for 2-3 days, though the chocolate may soften.
- Freezing: For longer storage, freeze individual bars on a parchment-lined tray, then transfer them to a freezer-safe bag or container. They will last for up to 2-3 months. Thaw in the refrigerator or at room temperature until ready to eat.
- Meal Prep: These are fantastic for meal prep! Cut them into individual servings and store them for quick snacks or lunchbox treats throughout the week.
Conclusion
And there you have it – the ultimate guide to creating perfect, irresistible No-Bake Peanut Butter Bars. This recipe proves that you don’t need a hot oven or complex techniques to achieve culinary bliss. It’s a testament to the power of simplicity, delivering exceptional flavor and convenience, making it a star among your No-Bake Dessert Recipes. We encourage you to try this recipe, experiment with the variations, and share your delightful creations. Happy baking (or rather, no-baking)!
FAQs
Q1: Can I use crunchy peanut butter?
A1: Yes, absolutely! Crunchy peanut butter will add a delightful texture to the filling. Just ensure it’s well-stirred before use.
Q2: My chocolate topping isn’t smooth. What happened?
A2: This usually means the chocolate was overheated or got a speck of water in it. Melt chocolate slowly, either in 30-second microwave bursts or over a double boiler, stirring until just melted and smooth. Make sure all your utensils are completely dry.
Q3: How do I get clean cuts?
A3: Ensure the bars are thoroughly chilled. Before each cut, run a sharp knife under hot water and wipe it dry. This helps create a clean, crisp edge.
Q4: Can I make this in a larger pan?
A4: Yes, you can. For a 9×13-inch pan, you’ll need to increase all ingredient quantities by about 50%. Remember that the bars will be thinner, and chill time might vary slightly.
Q5: What if I don’t have parchment paper?
A5: You can grease the pan well with butter or cooking spray, but parchment paper makes removal significantly easier and helps achieve super clean edges. If you don’t have it, be extra meticulous with greasing and chilling.