Unveiling the Ultimate Green Bean Casserole: A Homemade Holiday Hero
Ever wondered what transforms a simple side dish into a beloved culinary tradition, a centerpiece that beckons families to the table year after year? It’s the magic of a homemade Green Bean Casserole. This isn’t just a recipe; it’s an heirloom in the making, a dish that evokes comfort, celebration, and the undeniable satisfaction of creating something truly delicious from scratch. While pre-made options exist, the depth of flavor and personal touch you achieve by crafting this classic yourself, especially when using fresh, vibrant green beans, is unparalleled. Prepare to elevate your holiday spread or weeknight dinner with a dish that’s both nostalgic and incredibly rewarding to prepare.
Ingredients & Kitchen Tools
Crafting the perfect casserole begins with quality ingredients and the right equipment. Here’s what you’ll need:
- Fresh green beans (1.5 lbs): Snap ends trimmed. Freshness makes a world of difference in texture and flavor.
- Cremini Mushrooms (8 oz): Sliced. These add an earthy, umami depth to the casserole.
- Yellow Onion (1 medium): Finely diced. The aromatic base for our creamy sauce.
- Garlic (3 cloves): Minced. Essential for layering flavor.
- Unsalted Butter (4 tbsp): For sautéing and creating a rich roux.
- All-Purpose Flour (4 tbsp): To thicken our creamy sauce.
- Chicken Broth (2 cups): Low sodium. Provides a savory liquid base. Vegetable broth can be substituted for a vegetarian version.
- Heavy Cream (1.5 cups): For unparalleled richness and a silky texture.
- Milk (0.5 cup): Whole or 2%. Adds to the creaminess without overwhelming.
- Crispy Fried Onions (1.5 cups): Divided. The iconic crunchy topping.
- Parmesan Cheese (0.5 cup): Grated. Adds a salty, nutty bite (optional, but highly recommended).
- Salt (to taste): Essential seasoning.
- Black Pepper (to taste): Freshly ground always tastes best.
- Nutmeg (pinch): Freshly grated. A secret ingredient for enhancing creamy sauces.
Kitchen Tools:
- 9×13 inch baking dish: The perfect size for this casserole.
- Large saucepan or Dutch oven: For preparing the creamy sauce.
- Large pot: For blanching the green beans.
- Colander: For draining.
- Whisk: To ensure a smooth, lump-free sauce.
- Cutting board and knife: For precision prep.
Prep Time & Cooking Schedule
- Prep Time: 25 minutes
- Cook Time: 30 minutes
- Resting Time: 10 minutes (after baking, before serving)
This schedule allows you to have this comforting dish on the table in just over an hour. The blanching of the green beans can even be done a day in advance to save time on the cooking day.
Step-by-Step Instructions
1. Blanch the Green Beans: Bring a large pot of salted water to a rolling boil. Add the trimmed green beans and cook for 3-5 minutes, until bright green and crisp-tender. Immediately drain and plunge into an ice bath to stop the cooking and preserve their vibrant color. Drain thoroughly.
2. Sauté Aromatics & Mushrooms: In your large saucepan or Dutch oven, melt 2 tbsp butter over medium heat. Add the diced onion and cook until softened and translucent, about 5-7 minutes. Stir in the minced garlic and sliced mushrooms, cooking for another 5-7 minutes until the mushrooms have released their moisture and browned nicely. Remove from pan and set aside.
3. Prepare the Velvety Sauce: Melt the remaining 2 tbsp butter in the same pan. Whisk in the flour to create a roux, cooking for 1-2 minutes until a pale golden color. Gradually whisk in the chicken broth, then the heavy cream and milk, ensuring no lumps form. Bring to a gentle simmer, stirring constantly, until the sauce thickens to your desired consistency (it should coat the back of a spoon).
4. Season and Combine: Stir the sautéed onion, garlic, and mushrooms back into the sauce. Season with salt, pepper, and a pinch of nutmeg. Taste and adjust seasoning as needed. Gently fold in the blanched green beans and half of the crispy fried onions.
5. Assemble and Bake: Pour the mixture into your prepared 9×13 inch baking dish. If using, sprinkle generously with grated Parmesan cheese.
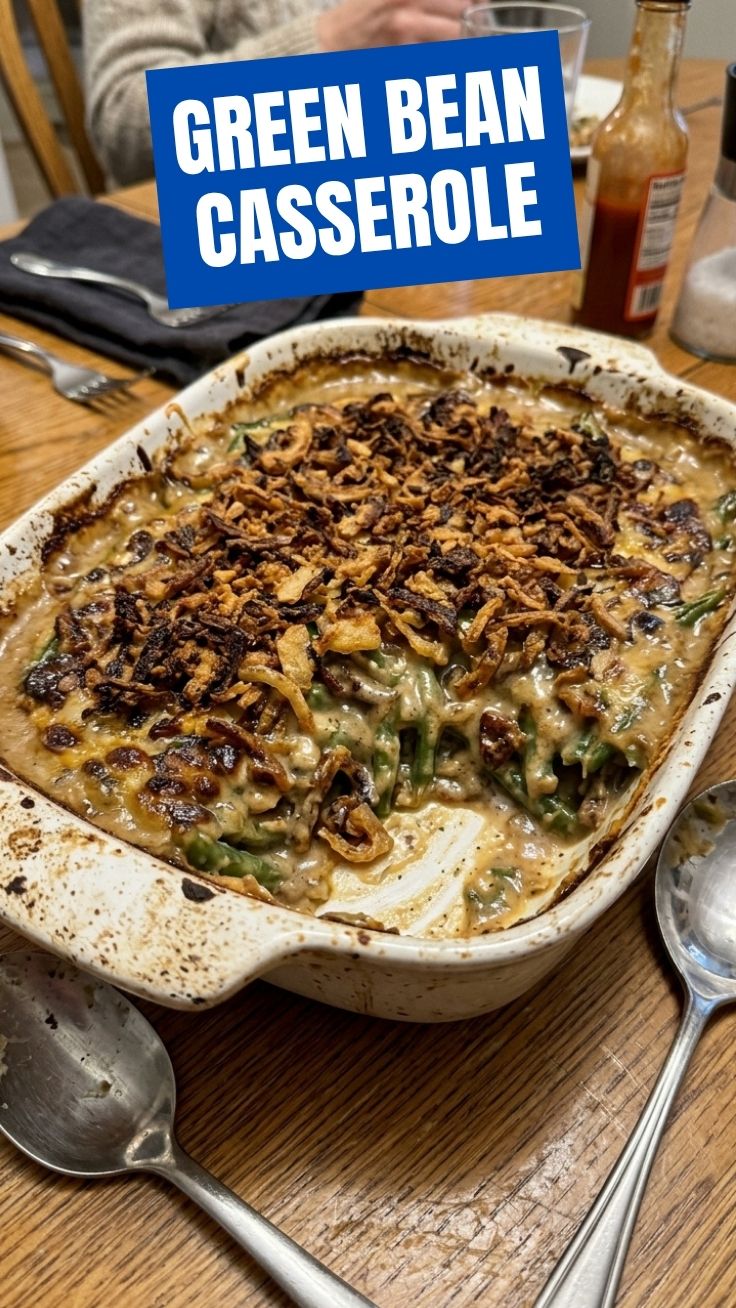
6. The Grand Finale: Bake in a preheated oven at 375°F (190°C) for 20 minutes, or until bubbly and heated through. Remove from oven, sprinkle the remaining crispy fried onions evenly over the top, and return to the oven for another 5-10 minutes, or until the onions are golden brown and toasted. Let it cool for 10 minutes before serving. This allows the sauce to set slightly. Your homemade Green Bean Casserole is ready to impress!
Nutritional Benefits & Advantages
This version of Green Bean Casserole, especially with fresh ingredients, offers more than just comfort. Green beans are an excellent source of dietary fiber, vitamins A, C, and K, and folic acid. Mushrooms contribute essential B vitamins and selenium, while garlic and onions provide antioxidants. By making it from scratch, you control the sodium levels and avoid artificial preservatives often found in canned versions, allowing you to enjoy a dish that’s both indulgent and wholesome.
Tips, Variations & Cooking Advice
- Spice it Up: Add a pinch of cayenne pepper or a dash of hot sauce to the creamy sauce for a subtle kick.
- Cheesy Goodness: Besides Parmesan, consider adding a sprinkle of shredded cheddar or Gruyere for extra complexity.
- Mushroom Medley: Experiment with different mushroom varieties like shiitake or oyster mushrooms for varied textures and flavors.
- Gluten-Free Option: Substitute all-purpose flour with a 1:1 gluten-free flour blend for thickening the sauce. Ensure broth is gluten-free.
- Dairy-Free Alternative: Use dairy-free butter, a plant-based milk (like unsweetened almond or soy), and a dairy-free heavy cream substitute. Nutritional yeast can offer a cheesy flavor.
- Make Ahead: The casserole can be assembled (without the top layer of crispy onions) a day in advance, covered, and refrigerated. Add the final crispy onions before baking.
Common Mistakes to Avoid
- Overcooked Green Beans: Mushy green beans are the enemy of a good casserole. Blanch until crisp-tender and shock in ice water immediately.
- Lumpy Sauce: Whisk consistently while adding liquids to the roux to prevent lumps. A smooth sauce is key to the casserole’s silky texture.
- Soggy Topping: Don’t add the final layer of crispy onions too early. They should be added for the last 5-10 minutes of baking to ensure maximum crispness.
- Bland Flavor: Don’t skimp on seasoning! Taste the sauce before adding the green beans and adjust salt and pepper. A pinch of nutmeg elevates cream-based dishes.
Storage & Meal Prep Tips
Leftover Green Bean Casserole can be stored in an airtight container in the refrigerator for up to 3-4 days. To reheat, cover with foil and bake at 350°F (175°C) until warmed through, then remove foil for the last few minutes to re-crisp the topping if desired (or add fresh crispy onions). This casserole generally does not freeze well due to the creamy sauce and crispy topping which can alter texture upon thawing.
Conclusion
There’s truly nothing quite like a homemade Green Bean Casserole. By taking the time to prepare it from scratch, using fresh, tender green beans and a rich, velvety sauce, you transform a classic side into an unforgettable culinary experience. This recipe promises not just a dish, but a moment of comfort and shared joy. We encourage you to try this recipe, savor every bite, and share your creations with us! What are your favorite additions to this holiday staple?
FAQs
Q1: Can I use frozen green beans instead of fresh?
A1: Yes, you can. Thaw them thoroughly and pat them dry before blanching. Adjust blanching time as frozen green beans often require less cooking.
Q2: What’s the best way to prevent the crispy onions from burning?
A2: Add the crispy fried onions only during the last 5-10 minutes of baking. If they start to brown too quickly, you can loosely tent the dish with foil.
Q3: Can I make this casserole ahead of time?
A3: Absolutely! You can assemble the casserole (without the final crispy onion topping) up to 24 hours in advance. Cover and refrigerate. Add the crispy onions and bake when ready to serve. You may need to add 5-10 minutes to the baking time if baking from cold.
Q4: How can I adjust the thickness of the sauce?
A4: If the sauce is too thick, whisk in a little more broth or milk until it reaches your desired consistency. If it’s too thin, simmer gently for a few more minutes, allowing it to reduce and thicken, or create a small slurry with flour/cornstarch and water/broth and whisk in gradually.