Master the Art of Flavor: Your Guide to Perfect Garlic Butter Chicken
Ever wondered how some home cooks effortlessly create dishes that taste like they came straight from a gourmet restaurant? The secret often lies in mastering fundamental yet incredibly flavorful recipes. Today, we’re diving into a culinary classic that promises to elevate your weeknight meals and impress any guest: Garlic Butter Chicken. This dish is not just a meal; it’s an experience, a symphony of savory garlic, rich butter, and perfectly cooked chicken that will leave your taste buds singing. Preparing it at home offers unparalleled freshness, control over ingredients, and the immense satisfaction of creating something truly delicious from scratch. Forget bland, uninspired dinners – with our comprehensive guide, you’ll unlock the secrets to a truly remarkable Garlic Butter Chicken that’s both exquisite and deceptively simple to prepare, making it the ultimate Easy Garlic Butter Chicken option for busy evenings.
Ingredients & Kitchen Tools
Gathering your mise en place is the first step to culinary success. Here’s what you’ll need:
- Boneless, Skinless Chicken Thighs (1.5 lbs): Thighs offer more flavor and stay juicier than breasts. Chicken breasts can be substituted, but adjust cooking time to prevent dryness.
- Unsalted Butter (4 tablespoons): Essential for that rich, golden-brown crust and luscious sauce. Unsalted allows you to control the sodium.
- Fresh Garlic (6-8 cloves): Minced, the star of the show! Use fresh for the best flavor; pre-minced jars are a convenience but lack the pungency.
- Chicken Broth (1/2 cup): Adds moisture and creates a flavorful pan sauce. Low-sodium is preferred.
- Lemon Juice (1 tablespoon): Freshly squeezed brightens the dish and cuts through the richness.
- Fresh Parsley (2 tablespoons): Chopped, for garnish and a touch of freshness.
- Salt & Black Pepper (to taste): Essential seasonings.
- Olive Oil (1 tablespoon): For searing the chicken.
- Large Skillet (oven-safe if finishing in the oven): Cast iron or stainless steel works best for even searing.
- Tongs: For handling chicken safely.
- Meat Thermometer: For ensuring chicken is cooked to a safe internal temperature (165°F/74°C).
- Cutting Board & Knife: For prepping ingredients.
Prep Time & Cooking Schedule
This recipe is designed for efficiency and maximum flavor development.
- Prep Time: 15 minutes (Includes mincing garlic, chopping parsley, and seasoning chicken).
- Cook Time: 20-25 minutes (Searing and simmering).
- Resting Time: 5 minutes (Crucial for juicy chicken!).
Plan about 40-45 minutes from start to finish, making it a fantastic option for a weeknight dinner. The hands-on cooking is minimal once prep is done.
Step-by-Step Instructions
Let’s turn those ingredients into a masterpiece! Follow these steps for an irresistible Garlic Butter Chicken:
1. Prep the Chicken: Pat the chicken thighs dry with paper towels. Season generously on both sides with salt and pepper. This ensures a good crust and even seasoning throughout.
2. Sear the Chicken: Heat olive oil in a large skillet over medium-high heat until shimmering. Add the chicken thighs to the hot skillet, skin-side down (if using skin-on), or presentation side down. Sear for 5-7 minutes per side, until golden brown and cooked through. The internal temperature should reach 165°F (74°C). Remove the chicken from the skillet and set aside on a plate, tented with foil. This allows the juices to redistribute, ensuring moist chicken.
3. Create the Garlic Butter Sauce: Reduce heat to medium. Add butter to the same skillet, allowing it to melt. Add the minced garlic and sauté for 1-2 minutes until fragrant. Be careful not to burn the garlic, as it can turn bitter.
4. Deglaze and Simmer: Pour in the chicken broth and lemon juice, scraping up any browned bits from the bottom of the skillet with a wooden spoon. These “fond” bits are packed with flavor. Bring the sauce to a gentle simmer and cook for 3-5 minutes, allowing it to slightly reduce and thicken.
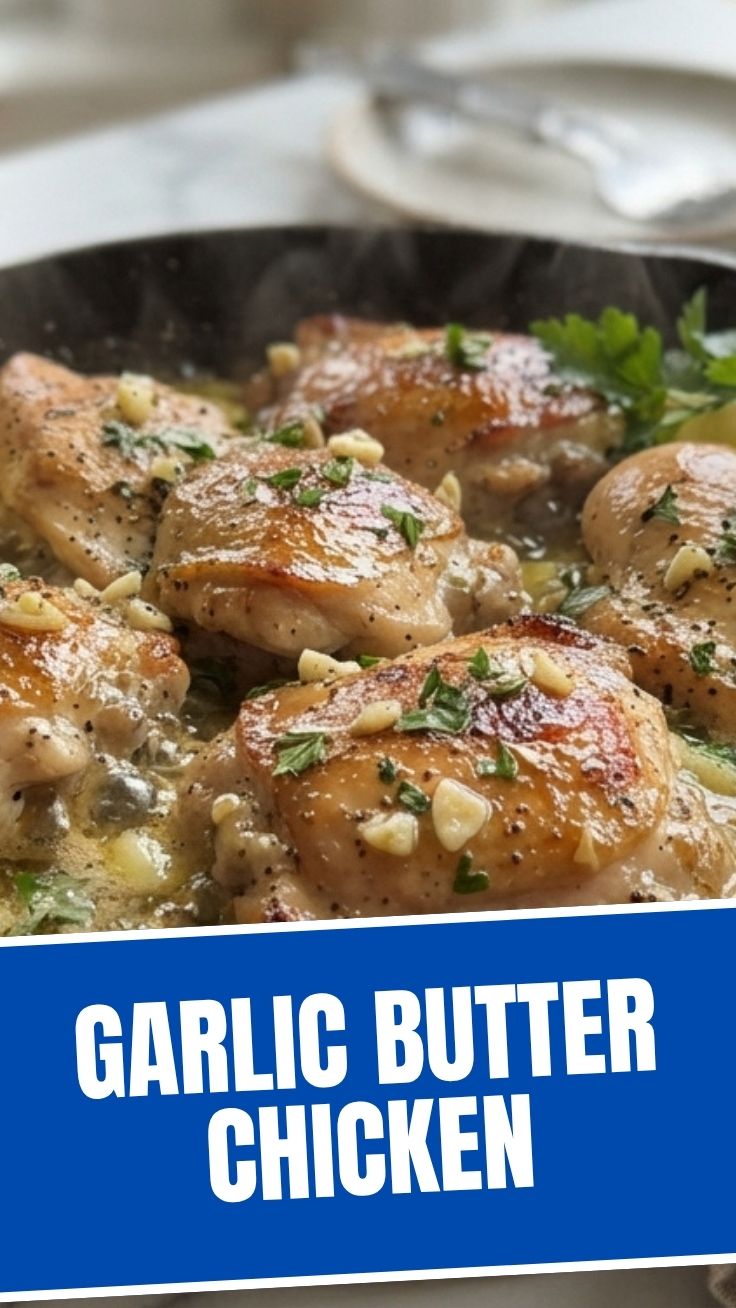
5. Combine and Finish: Return the cooked chicken to the skillet, spooning the luscious garlic butter sauce over each piece. Garnish generously with fresh chopped parsley. Serve immediately and enjoy your perfectly prepared Easy Garlic Butter Chicken!
Nutritional Benefits & Advantages
Beyond its incredible taste, this chicken dish offers several nutritional perks. Chicken thighs are a good source of lean protein, essential for muscle repair and growth. Garlic is renowned for its immune-boosting properties and contains beneficial antioxidants. While butter provides richness, in moderation, it contributes healthy fats and fat-soluble vitamins. This recipe is also naturally gluten-free and can be easily adapted to be dairy-free by using a plant-based butter substitute.
Tips, Variations & Cooking Advice
- Spice it Up: Add a pinch of red pepper flakes with the garlic for a subtle kick.
- Herb Power: Incorporate other fresh herbs like thyme or rosemary along with the parsley for different aromatic profiles.
- Creamy Sauce: Stir in a tablespoon or two of heavy cream at the end for an even richer, creamier sauce.
- Veggies in the Pan: Sauté spinach or asparagus in the sauce for a complete one-pan meal.
- Marinating: For an extra layer of flavor, marinate the chicken in a mixture of olive oil, lemon juice, salt, pepper, and a pinch of dried oregano for at least 30 minutes before cooking.
- Cooking Method Alternatives: This recipe is perfect for stovetop, but you can also finish the chicken in an oven-safe skillet after searing by transferring it to a preheated oven at 375°F (190°C) for 10-15 minutes until cooked through.
Common Mistakes to Avoid
- Overcrowding the Pan: Cooking too many chicken pieces at once lowers the skillet’s temperature, leading to steaming instead of searing. Cook in batches if necessary.
- Not Patting Chicken Dry: Moisture on the chicken skin prevents it from browning and getting crispy. Always pat it thoroughly dry.
- Burning the Garlic: Garlic burns quickly and becomes bitter. Keep the heat moderate and sauté just until fragrant.
- Skipping Resting Time: Resting the chicken allows the juices to redistribute, resulting in moist, tender meat. Cutting into it immediately will lead to dry chicken.
- Under-seasoning: Chicken needs generous seasoning. Don’t be shy with salt and pepper!
Storage & Meal Prep Tips
Leftovers of this delicious dish are fantastic!
- Refrigeration: Store cooked chicken and sauce in an airtight container in the refrigerator for up to 3-4 days.
- Freezing: For longer storage, transfer to a freezer-safe container and freeze for up to 2-3 months. Thaw overnight in the refrigerator before reheating.
- Reheating: Gently reheat in a skillet over medium-low heat, adding a splash of broth or water if needed to prevent drying out. You can also microwave, but be careful not to overcook.
Conclusion
There you have it – your definitive guide to creating a truly spectacular Garlic Butter Chicken. This recipe is a testament to how simple ingredients, when handled with care and a touch of culinary know-how, can yield extraordinary results. By following these steps and incorporating our tips, you’re not just cooking a meal; you’re mastering a technique that will serve you well in countless other dishes. Embrace the rich aromas and satisfying flavors, and discover just how effortless a gourmet meal can be. We encourage you to try this amazing dish tonight and experience the magic of Easy Garlic Butter Chicken for yourself! Share your culinary creations in the comments below – we’d love to see them!
FAQs
Q1: Can I use chicken breasts instead of thighs?
A1: Yes, chicken breasts work well. However, they tend to dry out more easily, so cook them for a shorter time, ensuring they reach an internal temperature of 165°F (74°C).
Q2: What can I serve with this Garlic Butter Chicken?
A2: This dish pairs beautifully with mashed potatoes, roasted vegetables (like asparagus or broccoli), rice, pasta, or a simple side salad to balance the richness.
Q3: How can I make the sauce thicker?
A3: To thicken the sauce, you can either reduce it further by simmering for a few more minutes, or create a quick slurry by mixing 1 teaspoon of cornstarch with 1 tablespoon of cold water, then stirring it into the simmering sauce until thickened.
Q4: Is this recipe spicy?
A4: No, the basic recipe is not spicy. If you enjoy heat, you can add a pinch of red pepper flakes when sautéing the garlic.
Q5: Can I prepare any part of this recipe in advance?
A5: You can mince the garlic and chop the parsley ahead of time. You can also season the chicken and store it in the refrigerator for up to 24 hours before cooking.