Unlocking the Secret to the Ultimate Fried Pickle Dip: Your Easy Guide to Homemade Bliss
Ever wondered if that craveable, tangy, and utterly addictive Fried Pickle Dip you devour at your favorite restaurant could be replicated, or even surpassed, in your own kitchen? The answer is a resounding YES! Preparing this sensational dip at home isn’t just about saving money; it’s about customizing flavors, ensuring ingredient freshness, and impressing your guests with a truly unforgettable appetizer. This guide will walk you through every step to create a consistently delicious and surprisingly simple batch of homemade Fried Pickle Dip, complete with those delightful pickle notes and a creamy texture that will have everyone asking for the recipe. Get ready to elevate your snack game and master the art of this crowd-plepleasing dip, a perfect alternative to a classic pickle brine dip.
Ingredients & Kitchen Tools
To embark on this culinary adventure, gather the following:
- Cream Cheese (8 oz block, softened): Provides the creamy, rich base. Full-fat is recommended for optimal texture.
- Sour Cream (1/2 cup): Adds a tangy counterpoint and helps with creaminess.
- Mayonnaise (1/4 cup): Contributes to the smooth texture and rich flavor.
- Dill Pickles (1 cup, finely diced): The star of the show. Use good quality, firm dill pickles.
- Dill Pickle Juice (2 tablespoons): Essential for intensifying the pickle flavor, setting this apart from a standard pickle brine dip.
- Fresh Dill (2 tablespoons, chopped): Enhances the fresh, herbaceous notes.
- Garlic Powder (1 teaspoon): Aromatic depth.
- Onion Powder (1/2 teaspoon): Adds subtle sweetness and savory undertones.
- Cayenne Pepper (1/4 teaspoon, optional): For a touch of heat if desired.
- Salt and Freshly Ground Black Pepper (to taste): Seasoning is key!
- Crispy Fried Onions (1 cup, crushed): For that essential “fried” texture and savory crunch. (Optional substitution: crushed potato chips or buttery crackers for an alternative crunch).
- Serving Bowl: For presentation.
- Mixing Bowls (large & small): For combining ingredients.
- Rubber Spatula or Spoon: For mixing.
- Measuring Cups & Spoons: For accurate ingredient portions.
- Sharp Knife & Cutting Board: For dicing pickles and chopping dill.
Prep Time & Cooking Schedule
- Prep Time: 15 minutes
- Chill Time: 30 minutes (minimum, for flavors to meld)
- Total Time: 45 minutes
This dip requires no cooking, making it an ideal last-minute snack or party addition. The chilling time is crucial for the flavors to fully develop and for the dip to firm up to the perfect consistency. Plan to make it at least 30 minutes before serving, or even a few hours ahead for optimal taste.
Step-by-Step Instructions
1. Soften Cream Cheese: Ensure your block of cream cheese is at room temperature. This is vital for a smooth, lump-free dip. You can leave it on the counter for about an hour or microwave it for 10-15 seconds if you’re short on time.
2. Combine the Base: In a large mixing bowl, add the softened cream cheese, sour cream, and mayonnaise. Use a rubber spatula or spoon to beat until smooth and well combined. This creamy foundation is what makes our Fried Pickle Dip so irresistible.
3. Add Flavor Powerhouses: Stir in the finely diced dill pickles, dill pickle juice, chopped fresh dill, garlic powder, onion powder, and cayenne pepper (if using). Mix thoroughly to ensure all ingredients are evenly distributed, creating a vibrant and tangy profile that differentiates it from a simpler pickle brine dip.
4. Season to Perfection: Taste the dip and season generously with salt and freshly ground black pepper. Remember, pickles are salty, so add salt gradually until it’s just right.
5. Incorporate the Crunch: Gently fold in about half of the crushed crispy fried onions. This adds an immediate textural contrast. Reserve the other half for garnishing.
6. Chill Out: Transfer the dip to a serving bowl, cover it with plastic wrap, and refrigerate for at least 30 minutes. This allows the flavors to meld and intensify, resulting in a more harmonious and delicious dip.
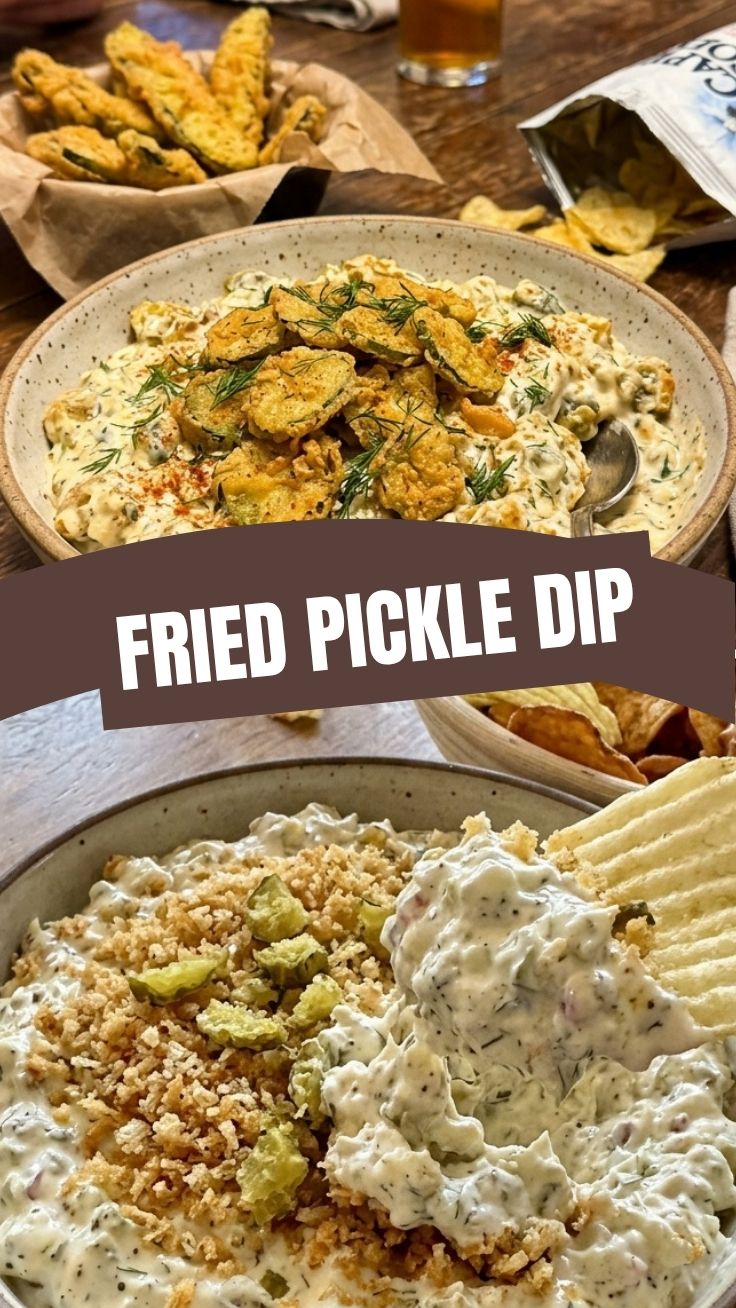
7. Garnish & Serve: Before serving, sprinkle the remaining crushed crispy fried onions over the top for a fresh crunch and appealing presentation. Serve with your favorite dippers!
Nutritional Benefits & Advantages
While this Fried Pickle Dip is undeniably indulgent, it also offers some surprising advantages. Dill pickles are a source of probiotics (if fermented) and antioxidants, contributing to gut health. Fresh dill adds vitamins and minerals. Portion control is key with rich dips, but enjoying homemade versions means you control the quality of ingredients, opting for fresher, less processed components compared to store-bought alternatives.
Tips, Variations & Cooking Advice
- Spice It Up: For extra heat, increase the cayenne pepper or add a dash of hot sauce.
- Cheesy Goodness: Fold in 1/4 cup of shredded sharp cheddar or Monterey Jack cheese for an extra layer of flavor and creaminess.
- Herbaceous Alternatives: Experiment with other fresh herbs like chives or parsley if you love a different green note.
- Vegan Version: Substitute cream cheese, sour cream, and mayo with their plant-based counterparts for a delicious vegan option.
- Gluten-Free Crunch: Ensure your crispy fried onions are certified gluten-free, or use gluten-free crackers for dipping.
Common Mistakes to Avoid
- Cold Cream Cheese: Using cold cream cheese leads to a lumpy dip. Always soften it first.
- Over-mixing: Once the base is smooth, be gentle when adding other ingredients, particularly the fried onions, to maintain their crunch.
- Not Draining Pickles: Ensure your diced pickles are well-drained to prevent a watery dip. Pat them dry with a paper towel if necessary.
- Skipping the Chill Time: This step is crucial for flavor development. Don’t rush it!
Storage & Meal Prep Tips
Store leftover Fried Pickle Dip in an airtight container in the refrigerator for up to 3-4 days. The crispy onions might soften over time, so if meal prepping, consider adding them just before serving. This dip does not freeze well due to the dairy components, which can separate upon thawing. It’s best enjoyed fresh!
Conclusion
Crafting this incredibly flavorful Fried Pickle Dip at home is a rewarding experience that promises to elevate any gathering or simply make your snack time extraordinary. With its creamy texture, tangy pickle punch, and satisfying crunch from the fried onions, it’s a guaranteed crowd-pleaser that outshines any basic pickle brine dip. We encourage you to try this recipe and discover your new favorite appetizer! Share your results and tag us on social media—we can’t wait to see your delicious creations.
FAQs
Q1: Can I use different types of pickles?
A1: While dill pickles are traditional and recommended for their tang and crunch, you could experiment with bread and butter pickles for a sweeter profile, but the classic “fried pickle” taste comes from dill.
Q2: What are the best dippers for this dip?
A2: Potato chips, pita chips, crackers, pretzels, raw vegetables like carrots and celery, or even toasted baguette slices are all excellent choices.
Q3: How can I make this dip spicier?
A3: Increase the amount of cayenne pepper, add a dash of your favorite hot sauce, or include a pinch of red pepper flakes for an extra kick.
Q4: Can I prepare this dip ahead of time for a party?
A4: Absolutely! In fact, preparing it a few hours or even a day in advance allows the flavors to deepen and meld beautifully. Just stir well and add fresh crispy fried onions just before serving.
Q5: My dip is too thick/thin. How can I fix it?
A5: If too thick, add small amounts of dill pickle juice or milk until it reaches your desired consistency. If too thin, try adding a bit more softened cream cheese or letting it chill longer to firm up.