From Scratch to Sensational: Your Guide to Perfect Homemade Dinner Rolls
Are you tired of bland, store-bought bread that crumbles disappointingly when you try to tear it? Imagine warm, fluffy Dinner Rolls, golden-brown and pillowy soft, emerging from your own oven, filling your kitchen with an irresistible aroma. There’s an unparalleled satisfaction that comes with creating something truly delicious from scratch, especially when it comes to the comforting art of bread baking. This comprehensive guide will empower you to master the craft of homemade dinner rolls, proving that gourmet results are entirely achievable in your home kitchen. Beyond the sheer joy of baking, preparing dinner rolls at home allows for complete control over ingredients, ensuring fresh, wholesome goodness free from unnecessary additives. Let’s embark on this delicious journey together and transform simple ingredients into extraordinary culinary delights.
Ingredients & Kitchen Tools
Gathering your supplies is the first step to successful baking. Here’s what you’ll need:
- All-Purpose Flour (4 cups, plus extra for dusting): The foundation of our rolls, providing structure. Unbleached is often preferred for better flavor.
- Active Dry Yeast (2 ¼ teaspoons or 1 packet): The leavening agent that makes our rolls rise and become fluffy. Ensure it’s fresh for optimal activation.
- Granulated Sugar (¼ cup): Feeds the yeast, aids in browning, and adds a touch of sweetness.
- Salt (1 ½ teaspoons): Enhances flavor and controls yeast activity. Don’t skip it!
- Warm Milk (1 cup, approximately 105-115°F / 40-46°C): Activates the yeast. Too hot will kill it, too cold won’t activate it.
- Warm Water (¼ cup, approximately 105-115°F / 40-46°C): Further aids yeast activation and hydration.
- Unsalted Butter (½ cup / 1 stick, melted): Adds richness, tenderness, and flavor.
- Large Mixing Bowl: Essential for combining and proofing the dough.
- Stand Mixer with Dough Hook (optional, but highly recommended): For effortless kneading. Can be done by hand.
- Measuring Cups & Spoons: For accurate ingredient measurement.
- Rubber Spatula: For scraping down the bowl.
- Kitchen Towel: For covering the dough during proofing.
- 9×13 inch Baking Pan: For baking your beautiful rolls.
- Pastry Brush (optional): For applying egg wash or melted butter.
Prep Time & Cooking Schedule
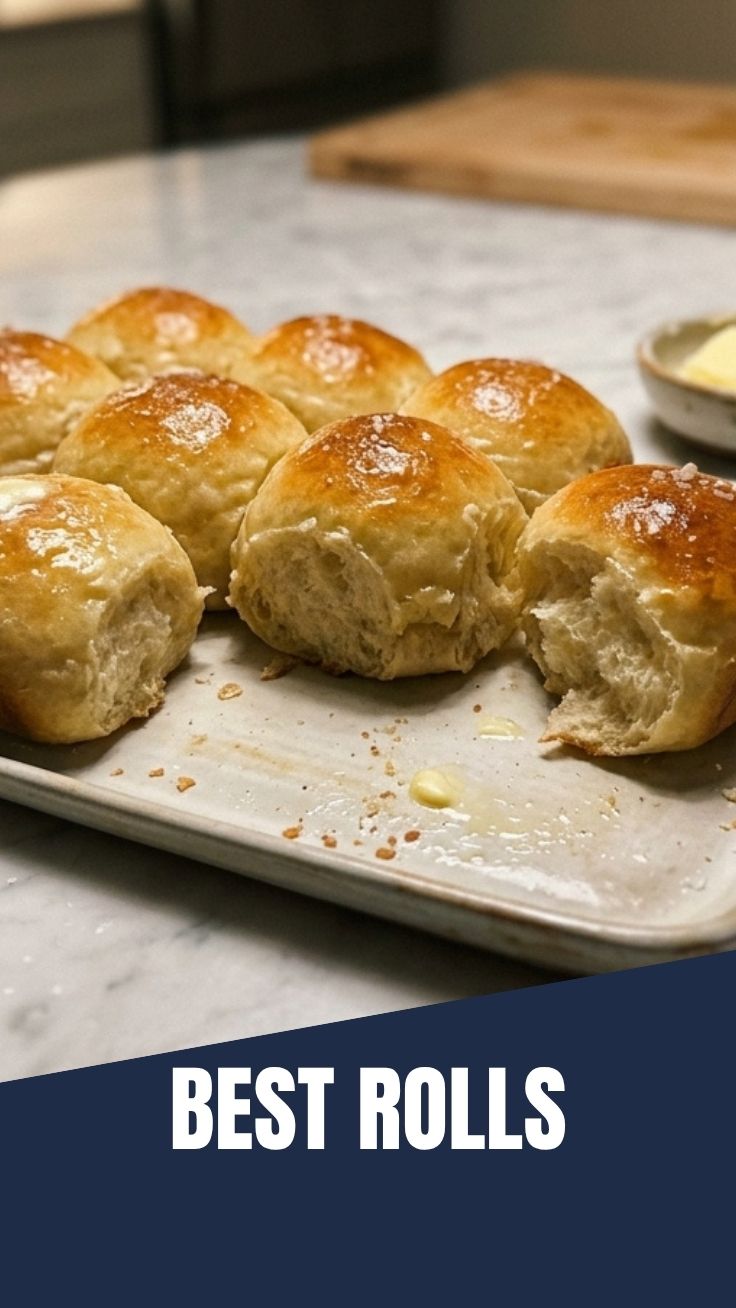
Planning your baking schedule ensures a stress-free experience and perfect results.
- Prep Time: 20 minutes (includes mixing ingredients)
- First Proofing: 60-90 minutes (until doubled in size)
- Shaping Time: 15 minutes
- Second Proofing: 30-45 minutes (until puffy)
- Bake Time: 15-20 minutes
Total Time: Approximately 2 hours 20 minutes to 2 hours 55 minutes.
This schedule allows ample time for the yeast to work its magic, leading to light and airy rolls. Plan to start approximately three hours before you want to serve them.
Step-by-Step Instructions
Follow these detailed steps for guaranteed success:
1. Activate the Yeast: In a large mixing bowl (or stand mixer bowl), combine warm milk, warm water, and a pinch of sugar. Sprinkle the active dry yeast over the top. Let sit for 5-10 minutes, until foamy. This “bloom” indicates your yeast is alive and ready.
2. Combine Wet Ingredients: Stir in the remaining sugar, melted butter, and salt into the yeast mixture.
3. Gradually Add Flour: Add 2 cups of flour to the wet ingredients and mix until just combined. Gradually add the remaining flour, ½ cup at a time, mixing until a shaggy dough forms.
4. Knead the Dough: If using a stand mixer, attach the dough hook and knead on medium-low speed for 8-10 minutes, until the dough is smooth, elastic, and pulls away from the sides of the bowl. If kneading by hand, turn the dough out onto a lightly floured surface and knead for 10-12 minutes, until smooth and elastic. The dough should pass the “windowpane test” (you can stretch a small piece thin enough to see light through it without tearing).
5. First Proofing: Lightly grease a clean large bowl with a little oil. Place the dough in the bowl, turning once to coat. Cover the bowl with a clean kitchen towel or plastic wrap and place in a warm, draft-free spot for 60-90 minutes, or until doubled in size.
6. Shape the Rolls: Gently punch down the risen dough to release the air. Turn it out onto a lightly floured surface. Divide the dough into 12-15 equal pieces. Shape each piece into a smooth ball by tucking the edges under or rolling it between your palm and the counter. Arrange the shaped Dinner Rolls in a greased 9×13 inch baking pan, leaving a little space between them.
7. Second Proofing: Cover the pan loosely with plastic wrap or a kitchen towel and let proof in a warm place for another 30-45 minutes, or until visibly puffy. This crucial step contributes to the light texture, a hallmark of excellent bread baking.
8. Preheat Oven & Bake: While the rolls are proofing, preheat your oven to 375°F (190°C). Bake for 15-20 minutes, or until golden brown on top. For an extra golden crust, you can brush with an egg wash (1 egg beaten with 1 tablespoon water) before baking.
9. Serve Warm: Remove from the oven and, if desired, brush the tops with a little melted butter for extra shine and flavor. Serve warm with your favorite meal.
Nutritional Benefits & Advantages
Homemade dinner rolls offer more than just exquisite taste. They provide a source of carbohydrates for energy, and depending on the flour used, can contribute some dietary fiber. By making them at home, you avoid the preservatives, artificial flavors, and excessive sodium often found in commercially produced breads. You also gain the peace of mind knowing exactly what ingredients are going into your family’s food.
Tips, Variations & Cooking Advice
- Flavor Boost: Add dried herbs like rosemary or garlic powder to the dough for savory rolls. For a sweeter touch, increase the sugar slightly or add a hint of cinnamon.
- Whole Wheat Option: Substitute up to half of the all-purpose flour with whole wheat flour for a heartier, more nutritious roll. You might need to add a touch more liquid as whole wheat absorbs more moisture.
- Gluten-Free (Advanced): For a gluten-free version, specialized gluten-free bread flour blends (which typically include xanthan gum) are necessary, and the liquid proportions will change significantly. This is a more advanced undertaking.
- Milk Alternatives: Dairy-free milk alternatives like almond or soy milk can be used, though the flavor and texture may vary slightly.
- Make Ahead: You can prepare the dough the day before and let it do its first proof in the refrigerator overnight. Punch it down in the morning, shape, and proceed with the second proof and baking.
Common Mistakes to Avoid
- Dead Yeast: Using expired or improperly stored yeast, or too hot/cold liquid, will result in dough that doesn’t rise. Always check for foamy activation.
- Too Much Flour: Adding too much flour makes for dry, dense rolls. The dough should be slightly tacky, but not sticky.
- Under-Kneading: Insufficient kneading won’t develop the gluten, leading to a weak structure and less fluffy rolls.
- Over-Proofing: While rising is good, letting dough over-proof can cause it to collapse during baking and result in a yeasty flavor.
- Incorrect Oven Temperature: An oven that’s too hot will burn the outside before the inside cooks, while too cool will result in pale, dense rolls. Use an oven thermometer if unsure.
Storage & Meal Prep Tips
- Freshness: Homemade dinner rolls are best enjoyed fresh, warm from the oven.
- Room Temperature: Store leftover rolls in an airtight container or bag at room temperature for up to 2-3 days.
- Freezing: For longer storage, allow cooled rolls to freeze individually on a baking sheet, then transfer to a freezer-safe bag or container. They can be frozen for up to 2-3 months. Thaw at room temperature or reheat directly from frozen.
- Reheating: To revive rolls, wrap them in aluminum foil and warm them in a 300°F (150°C) oven for 10-15 minutes, or microwave for 15-30 seconds.
Conclusion
Baking homemade Dinner Rolls is a rewarding and surprisingly simple process that elevates any meal. From the comforting aroma that fills your kitchen to the tender texture of each bite, the effort is truly worth it. Mastering the nuances of yeast activation, proper kneading, and patient proofing will unlock a world of delicious possibilities in your home bread baking. Don’t be afraid to experiment and personalize this recipe to your taste. We encourage you to try this recipe, share your magnificent creations with us in the comments, and continue exploring the joy of baking from scratch!
FAQs
Q1: My dough isn’t rising. What went wrong?
A1: The most common reasons are inactive yeast (ensure it’s fresh and bloomed correctly), liquid that’s too hot or cold, or a drafty environment during proofing.
Q2: Can I use instant yeast instead of active dry yeast?
A2: Yes, you can use instant yeast. You typically don’t need to bloom it in liquid first; you can mix it directly with the flour and other dry ingredients. Use the same amount if your recipe calls for active dry.
Q3: How do I know when the rolls are fully baked?
A3: They should be golden brown on top and sound hollow when tapped on the bottom. An internal temperature of 200-210°F (93-99°C) indicates they are done.
Q4: Can I make these rolls sweeter?
A4: Absolutely! You can increase the granulated sugar up to ½ cup in the dough, or brush the baked rolls with a simple sugar glaze or honey butter.
Q5: What’s the best way to get a soft top crust?
A5: Brushing the tops with melted butter immediately after they come out of the oven will keep the crust soft and add a lovely sheen and flavor.