Master the Art of Perfect Deviled Eggs: A Step-by-Step Guide
Ever wonder how some dishes, despite their simple appearance, can steal the show at any gathering? We’re talking about the humble, yet undeniably delightful, Deviled Eggs! These creamy, savory bites are a timeless classic, perfect for everything from potlucks to elegant brunches. But beyond their charm, preparing them at home offers unparalleled freshness and control over ingredients, making them a healthier and tastier choice than store-bought alternatives. Forget bland, watery imposters – this guide will equip you with all the knowledge to create the most irresistible Egg appetizers your friends and family have ever tasted. Let’s transform those everyday eggs into extraordinary culinary creations!
Ingredients & Kitchen Tools
Crafting the perfect Deviled Eggs requires a few essential ingredients and tools. Here’s what you’ll need:
- 12 large eggs: The star of the show. Freshness matters for easier peeling!
- ½ cup mayonnaise: Binds the yolk mixture. You can substitute with Greek yogurt for a lighter option or a high-quality, oil-based vegan mayonnaise.
- 1 ½ tablespoons Dijon mustard: Adds a zesty tang. Stone-ground mustard can also be used for a more rustic flavor.
- 1 tablespoon white vinegar or pickle juice: Brightens the flavor profile. Lemon juice is a good alternative.
- ¼ teaspoon salt: Enhances all the flavors. Adjust to taste.
- ⅛ teaspoon black pepper: A classic pairing with eggs. Freshly ground is always best.
- Paprika (for garnish): Adds a pop of color and a hint of smoky flavor. Smoked paprika is a fantastic variation.
- Fresh chives or dill (optional garnish): For an aromatic and visually appealing finish.
Kitchen Tools:
- Large saucepan: For boiling eggs.
- Slotted spoon: To safely transfer eggs.
- Large bowl (ice bath): Crucial for stopping the cooking process and facilitating peeling.
- Cutting board: For slicing eggs.
- Small bowl: For mixing the yolk filling.
- Fork or potato masher: To mash yolks.
- Rubber spatula or spoon: For mixing and scraping.
- Piping bag with a star tip (optional): For an elegant presentation. A simple Ziploc bag with a corner snipped off works too!
Prep Time & Cooking Schedule
- Prep Time: 15 minutes
- Cook Time: 12-15 minutes (for boiling eggs)
- Cooling Time: 10 minutes (for ice bath)
- Assembly Time: 10 minutes
Plan for about 40-45 minutes from start to finish. The cooling time in the ice bath is non-negotiable for perfect, easy-to-peel eggs. You can boil the eggs ahead of time (up to 2 days) and store them in the refrigerator, unpeeled, for even quicker assembly on the day of your event.
Step-by-Step Instructions
Achieving those picture-perfect Deviled Eggs is easier than you think! Follow these steps carefully for success:
1. Boil the Eggs: Place eggs in a large saucepan and cover with about an inch of cold water. Bring to a rolling boil over high heat. Once boiling, immediately remove from heat, cover with a lid, and let stand for 12 minutes. This method ensures perfectly cooked yolks without the green ring.
2. Ice Bath: While the eggs are resting, prepare a large bowl of ice water. Once the 12 minutes are up, use a slotted spoon to transfer the eggs from the hot water directly into the ice bath. Let them cool for at least 10 minutes. This stops the cooking process and helps the shells detach more easily.
3. Peel the Eggs: Gently tap each egg on a hard surface to crack the shell all over. Peel under cool running water; the water helps dislodge any stubborn shell fragments.
4. Halve and Separate: Carefully slice each egg in half lengthwise. Using a small spoon, gently scoop out the bright yellow yolks into a medium-sized bowl. Place the hollowed-out egg white halves on a platter.
5. Create the Filling: To the bowl of yolks, add mayonnaise, Dijon mustard, white vinegar (or pickle juice), salt, and black pepper. Mash with a fork or potato masher until completely smooth and creamy. Taste and adjust seasonings as needed; this is your chance to perfect the flavor of your delightful Egg appetizers!
6. Fill the Whites: You can spoon the yolk mixture into the egg white halves for a rustic look, or for a more elegant presentation, transfer the filling to a piping bag fitted with a star tip and pipe the mixture into each egg white.
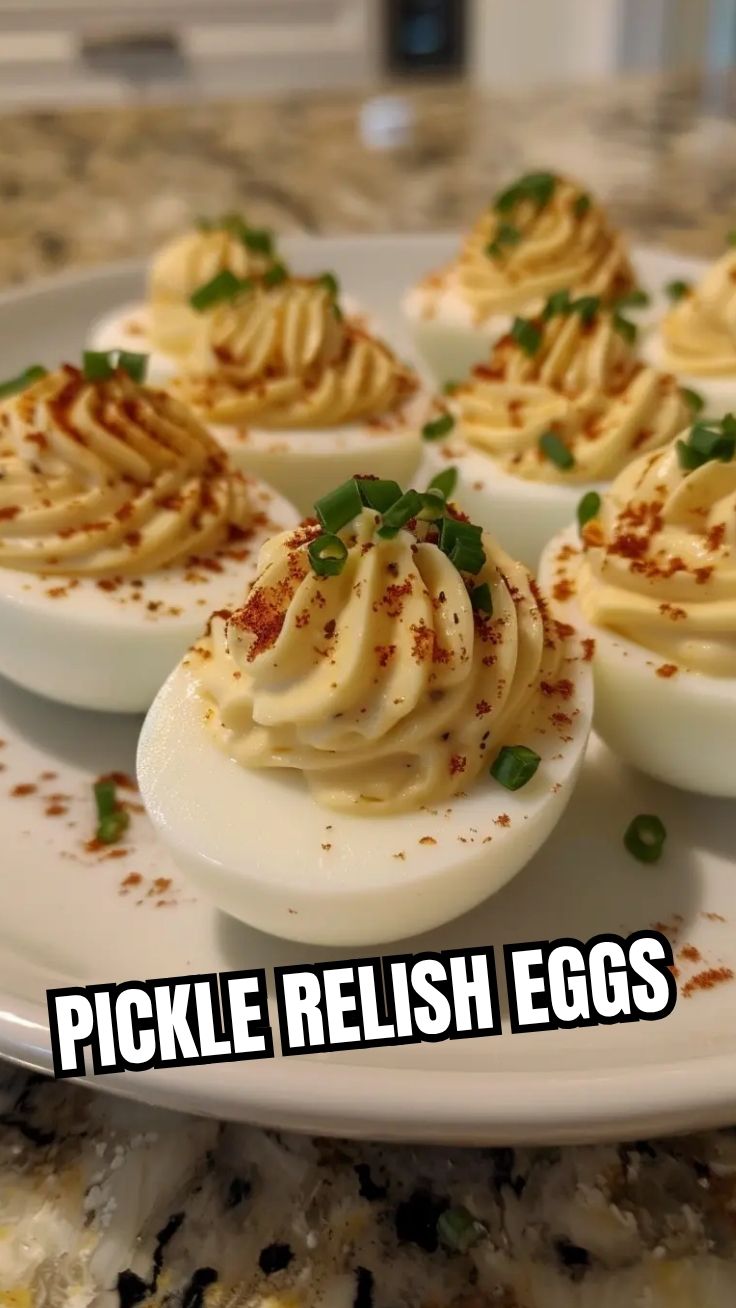
7. Garnish and Serve: Sprinkle generously with paprika and, if desired, fresh chives or dill. Serve immediately or refrigerate until ready to enjoy.
Nutritional Benefits & Advantages
Deviled Eggs are not just delicious; they offer several nutritional advantages. Eggs are a fantastic source of high-quality protein, essential for muscle repair and growth, and keeping you feeling full longer. They’re also packed with vital nutrients like Vitamin D, B vitamins (especially B12), and choline, which is crucial for brain health and metabolism. Opting for homemade means you control the quality of ingredients, like choosing healthier mayonnaise or even making your own, reducing unhealthy fats often found in store-bought versions.
Tips, Variations & Cooking Advice
- Spice it Up: Add a pinch of cayenne pepper, a dash of hot sauce, or finely minced jalapeños to the filling for a spicy kick.
- Herbaceous Delight: Incorporate finely chopped fresh herbs like parsley, tarragon, or chives directly into the yolk mixture.
- Smoky Twist: A tiny amount of liquid smoke or a sprinkle of smoked paprika can add a delightful depth.
- Creamy Avocado: For a healthier, vibrantly green variation, mash a ripe avocado into the yolk mixture along with a squeeze of lime juice.
- Crispy Bits: For texture, fold in crumbled cooked bacon bits, toasted breadcrumbs, or finely diced celery.
- Dietary Adaptations: For a dairy-free version, ensure your mayonnaise is dairy-free. This recipe is naturally gluten-free. For a lower-fat option, use Greek yogurt instead of mayonnaise.
Common Mistakes to Avoid
- Overcooking Eggs: This leads to that dreaded green ring around the yolk and a rubbery texture. Stick to the 12-minute covered stand time.
- Difficult Peeling: Skipping the ice bath is the main culprit here. The rapid temperature change helps the membrane separate from the egg white.
- Lumpy Filling: Ensure you mash the yolks completely and thoroughly mix the ingredients. Lumps can detract from the creamy texture.
- Over-seasoning: It’s easier to add more seasoning than to take it away. Start with the recommended amounts and taste as you go.
- Watery Filling: If your mixture seems too loose, you might have added too much vinegar or used a very high-water-content ingredient. Paprika helps absorb a tiny bit of moisture if it’s just slightly off.
Storage & Meal Prep Tips
Prepared Deviled Eggs are best enjoyed fresh, but they can be stored. Place them in an airtight container in the refrigerator for up to 2-3 days. To maintain freshness and prevent drying out, you can cover them loosely with plastic wrap before sealing the container. Freezing is not recommended as the texture of the whites will become rubbery upon thawing. For meal prep, consider boiling the eggs and preparing the yolk mixture separately, storing them in airtight containers. Assemble just before serving for the best taste and texture.
Conclusion
There you have it – the ultimate guide to crafting perfect Deviled Eggs, a quintessential party favorite and one of the most versatile Egg appetizers. By following these detailed steps, you’ll consistently achieve creamy, flavorful, and beautifully presented bites that will impress everyone. So, gather your ingredients, channel your inner chef, and give this timeless recipe a try. Don’t forget to share your culinary creations with us – we’d love to see your deviled masterpieces!
FAQs
Q1: Why do my egg yolks sometimes have a green ring?
A1: A green ring around the yolk indicates that the eggs were overcooked. The sulfur in the egg white reacts with the iron in the yolk, creating ferrous sulfide, which has a greenish color. The ice bath immediately after cooking helps prevent this.
Q2: Can I make the filling ahead of time?
A2: Yes, you can prepare the filling up to a day in advance. Store it in an airtight container in the refrigerator. For best results, fill the egg whites just before serving.
Q3: How do I make my deviled eggs less ‘eggy’ tasting?
A3: Adding a touch of acid like vinegar or lemon juice, and a good quality mustard, helps to brighten the flavors and balance the richness of the egg, making them less overwhelmingly ‘eggy’.
Q4: My eggs are hard to peel, what am I doing wrong?
A4: Very fresh eggs are often harder to peel. Using eggs that are about a week old (but still within their expiration date) can help. Also, ensuring a rapid transfer to an ice bath immediately after cooking is crucial for easier peeling.
Q5: What’s the best way to transport deviled eggs to a party?
A5: Invest in a deviled egg carrier, or use a large, shallow container where the eggs fit snugly. You can place a damp paper towel underneath to prevent sliding. Keep them chilled in a cooler during transport.