Unleash Your Inner Chef: Master the Art of Homemade Crispy Coconut Shrimp!
Are you ready to transform your kitchen into a tropical culinary haven? There’s something undeniably magical about the golden-brown crisp of a perfectly cooked Coconut Shrimp, especially when paired with a vibrant dipping sauce. While restaurant versions are tempting, mastering this dish at home offers a multitude of benefits: complete control over ingredients, an opportunity to impress your guests, and the immense satisfaction of creating a gourmet experience from scratch. Our detailed guide will walk you through every step, ensuring your homemade coconut shrimp recipe isn’t just good, but absolutely unforgettable. Get ready to elevate your appetizer game!
Ingredients & Kitchen Tools
Crafting the perfect Coconut Shrimp requires a thoughtful selection of fresh ingredients and the right tools to bring it all together.
- 1 lb Large Shrimp (21/25 ct), peeled and deveined, tails on: Opt for fresh or thawed frozen shrimp for best results. Tails on for aesthetic appeal and a handle for dipping.
- 1 cup All-Purpose Flour: Provides the initial coating for spices and adhesion.
- 1 tsp Garlic Powder: Adds a savory depth to the seasoning.
- 1 tsp Onion Powder: Complements the garlic with a subtle sweetness.
- ½ tsp Paprika: Offers a mild warmth and beautiful color.
- ¼ tsp Cayenne Pepper (optional): For a gentle kick, adjust to your spice preference.
- 2 large Eggs, beaten: Acts as the binder for the coconut coating.
- 1 ½ cups Panko Breadcrumbs: Essential for that extra crispy texture, superior to regular breadcrumbs.
- 1 ½ cups Shredded Sweetened Coconut Flakes: The star of the show, providing flavor and texture. Unsweetened can be used, but sweetened balances the savory shrimp beautifully.
- 4 cups Vegetable Oil (or other high smoke point oil), for frying: Such as canola, peanut, or sunflower oil. Avoid olive oil for deep frying.
Kitchen Tools:
- Three Shallow Bowls: For the dredging station (flour, egg, coconut mixture).
- Large Skillet or Deep Pot: For frying the shrimp. A Dutch oven works perfectly.
- Slotted Spoon or Spider Strainer: For safely removing shrimp from oil.
- Wire Rack with Paper Towels underneath: To drain excess oil and keep shrimp crispy.
- Tongs: For handling shrimp.
- Thermometer (Candy or Deep-Fry): Crucial for maintaining optimal oil temperature.
Prep Time & Cooking Schedule
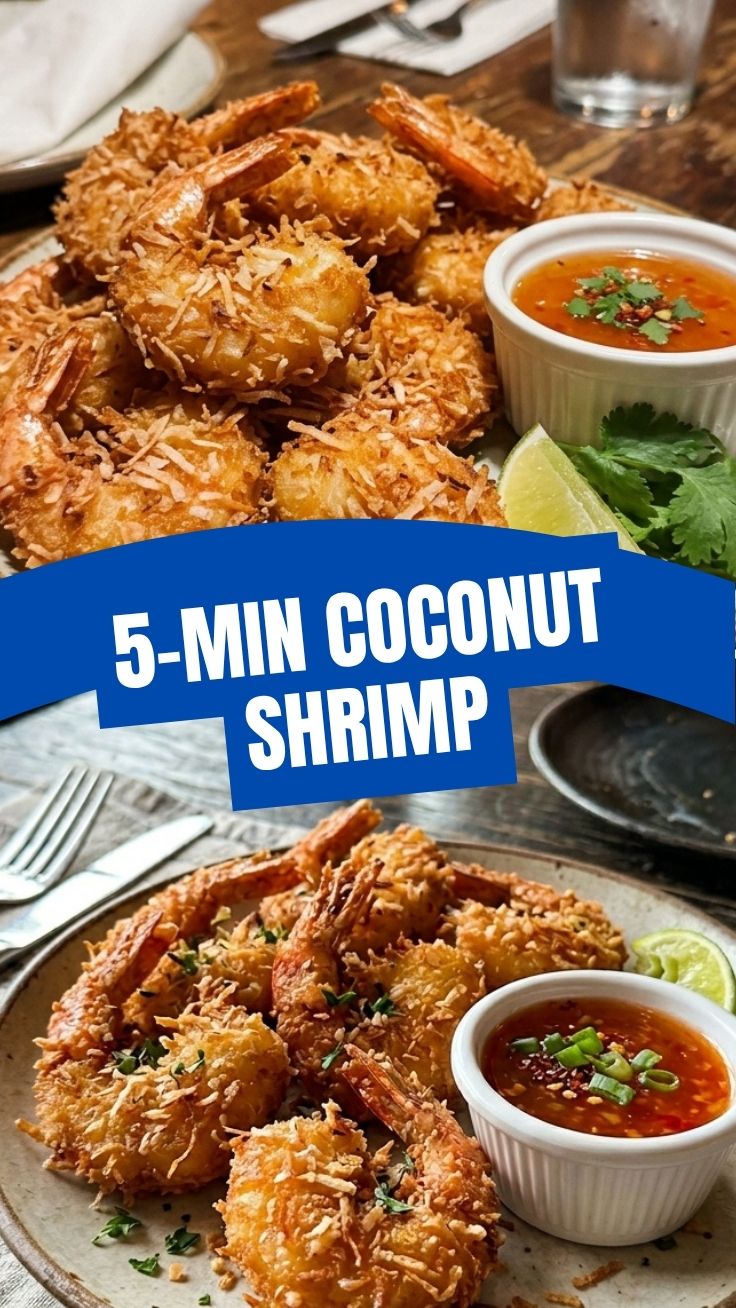
Planning is key to a stress-free cooking experience. This recipe is relatively quick, making it ideal for a last-minute appetizer or a weeknight treat.
- Prep Time: 20 minutes (includes shrimp preparation and setting up the dredging station).
- Cook Time: 10-15 minutes (frying in batches).
- Resting Time: 5 minutes (allowing excess oil to drain and shrimp to cool slightly before serving).
Total Time: Approximately 35-40 minutes. Ensure all your ingredients are prepped and laid out before you begin frying to maintain a smooth cooking flow.
Step-by-Step Instructions
Let’s dive into creating that perfect, golden Coconut Shrimp! Follow these steps carefully for a guaranteed delicious outcome.
1. Prepare the Shrimp: Pat the peeled and deveined shrimp thoroughly dry with paper towels. Excess moisture can make your coating soggy.
2. Set Up Dredging Station:
* In the first shallow bowl, combine flour, garlic powder, onion powder, paprika, and cayenne pepper (if using). Whisk well.
* In the second shallow bowl, whisk the eggs until well beaten.
* In the third shallow bowl, combine the Panko breadcrumbs and shredded coconut flakes. Mix thoroughly.
3. Coat the Shrimp: Working in small batches (3-4 shrimp at a time) to avoid overcrowding:
* First, dredge each shrimp in the flour mixture, ensuring it’s fully coated. Shake off any excess.
* Next, dip the floured shrimp into the beaten egg, letting excess egg drip off.
* Finally, press the shrimp firmly into the Panko and coconut mixture, making sure it’s completely covered. Place coated shrimp on a clean plate or baking sheet. Repeat with remaining shrimp.
4. Heat the Oil: Pour vegetable oil into your large skillet or deep pot to a depth of about 2-3 inches. Heat over medium-high heat until it reaches 350-375°F (175-190°C) on your thermometer. Maintaining this temperature is crucial for crispy, non-greasy coconut shrimp recipe.
5. Fry the Shrimp: Carefully place coated shrimp into the hot oil, ensuring not to overcrowd the pan. Fry for 2-3 minutes per side, or until golden brown and cooked through. Shrimp cooks quickly; don’t overcook or it will become tough.
6. Drain and Serve: Using a slotted spoon or spider strainer, transfer the cooked shrimp to the wire rack lined with paper towels to drain excess oil. Serve immediately with your favorite dipping sauce (e.g., sweet chili, orange marmalade).
Nutritional Benefits & Advantages
Beyond its irresistible taste, our Coconut Shrimp offers some surprising nutritional advantages. Shrimp is an excellent source of lean protein, essential for muscle repair and growth. It’s also packed with beneficial nutrients like selenium, which acts as an antioxidant, and B vitamins, vital for energy production. While fried, the Panko and coconut coating provides a satisfying crunch without excessive heaviness. Portion control and smart dipping sauce choices can keep this dish a delicious and relatively healthy treat.
Tips, Variations & Cooking Advice
- Air Fryer Option: For a lighter take, lightly spray the coated shrimp with cooking spray and air fry at 375°F (190°C) for 8-12 minutes, flipping halfway, until golden and crispy.
- Spicy Kick: Increase the cayenne pepper in the flour mixture or add a dash of hot sauce to the egg wash.
- Dipping Sauce Variety: Experiment with different sauces: mango salsa, pineapple chutney, or a classic sweet and sour.
- Gluten-Free: Substitute the all-purpose flour with a gluten-free flour blend and ensure Panko breadcrumbs are certified gluten-free.
- Dairy-Free: This recipe is naturally dairy-free!
- Make Ahead: You can bread the shrimp ahead of time and refrigerate for up to 4 hours. Fry just before serving for optimal crispiness.
Common Mistakes to Avoid
- Overcrowding the Pan: This lowers the oil temperature, leading to greasy, soggy shrimp instead of crispy ones. Fry in batches!
- Not Drying the Shrimp: Wet shrimp will cause the coating to slide off and result in splattering oil.
- Incorrect Oil Temperature: Too low, and the shrimp will be greasy; too high, and the coating will burn before the shrimp cooks through. Use a thermometer!
- Overcooking the Shrimp: Shrimp cooks very quickly. As soon as it turns pink and opaque, it’s done. Overcooked shrimp is rubbery.
- Skipping the Wire Rack: Draining on paper towels alone can make the bottom soggy. A wire rack allows air circulation, maintaining crispness.
Storage & Meal Prep Tips
While best enjoyed fresh, you can store leftover Coconut Shrimp.
- Refrigeration: Place cooled shrimp in an airtight container in the refrigerator for up to 2-3 days.
- Freezing: For longer storage, flash freeze cooked shrimp on a baking sheet until solid, then transfer to a freezer-safe bag for up to 1 month.
- Reheating: The best way to reheat is in an air fryer or oven at 350°F (175°C) for 5-10 minutes, until heated through and crispy again. Microwaving is not recommended as it will make them soggy.
Conclusion
There’s no doubt that mastering a delicious batch of homemade Coconut Shrimp is an incredibly rewarding culinary endeavor. By following these detailed steps, paying attention to oil temperature, and avoiding common pitfalls, you’ll be able to create a dish that rivals any restaurant offering. This coconut shrimp recipe isn’t just about frying; it’s about crafting an experience, a perfect balance of sweet, savory, and undeniably crispy. We encourage you to try this recipe, experiment with your favorite dipping sauces, and share your delightful creations with us! Happy cooking!
FAQs
Q1: Can I use pre-cooked shrimp for this recipe?
A1: While technically possible, it’s not recommended. Pre-cooked shrimp will become tough and rubbery if fried again. Always opt for raw, uncooked shrimp for best results.
Q2: What’s the best oil for deep-frying coconut shrimp?
A2: Neutral-flavored oils with high smoke points like vegetable, canola, peanut, or sunflower oil are ideal. They won’t impart unwanted flavors and can withstand the necessary high temperatures.
Q3: How can I make my coconut shrimp extra crispy?
A3: The key is a good Panko-to-coconut ratio, thorough coating, maintaining correct oil temperature (350-375°F), and draining on a wire rack immediately after frying. Don’t overcrowd the pan!
Q4: What are some good dipping sauces for coconut shrimp?
A4: Classic choices include sweet chili sauce, orange marmalade thinned with a little lime juice, or a spicy mango salsa. Get creative and find your favorite!
Q5: Can I bake or air fry the coconut shrimp instead of deep frying?
A5: Yes! For baking, place on a greased baking sheet and bake at 400°F (200°C) for 12-15 minutes, flipping halfway. For air frying, spritz with oil and air fry at 375°F (190°C) for 8-12 minutes, flipping as needed. Both methods yield tasty results, though deep-frying offers the ultimate crispness.