The Irresistible Aroma of Homemade Bliss: Your Guide to Perfect Cinnamon Rolls
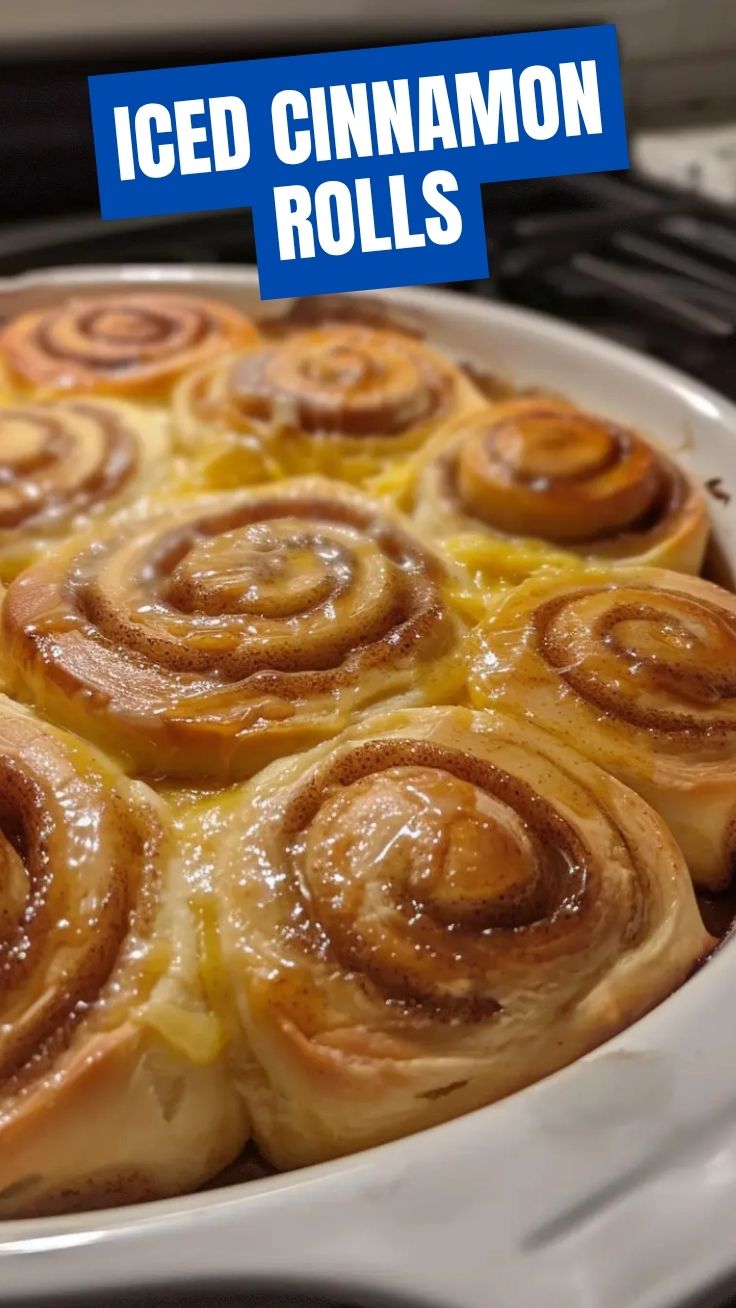
Ever wondered what makes a house feel like a home? Often, it’s the warm, comforting scent of something delicious baking in the oven. And few aromas capture that essence quite like freshly baked cinnamon rolls. Imagine: soft, fluffy dough, swirled with a generous ribbon of cinnamon-sugar, and drizzled with a decadent cream cheese frosting. Learning how to make Cinnamon Rolls (Homemade) isn’t just about baking; it’s about creating an experience, a moment of pure culinary joy. In this comprehensive guide, we’ll walk you through every step, ensuring your kitchen is filled with that delightful fragrance and your taste buds are dancing with delight. This isn’t just any guide; it’s your definitive resource for mastering the art of the perfect Cinnamon Roll Recipe.
Ingredients & Kitchen Tools
To embark on this delightful baking adventure, gather the following:
For the Dough:
- 1 cup warm milk (105-115°F): Activates the yeast; use whole milk for richness.
- 2 ¼ teaspoons active dry yeast (one packet): The leavening agent that makes them fluffy.
- ¼ cup granulated sugar: Feeds the yeast and adds sweetness to the dough.
- 1 large egg (room temperature): Adds richness and helps with texture.
- ¼ cup unsalted butter, melted: Keeps the dough tender and flavorful.
- ½ teaspoon salt: Balances sweetness and enhances flavor.
- 3 cups all-purpose flour, plus more for dusting: The structural foundation of our rolls.
For the Filling:
- ½ cup unsalted butter, softened: Spreads easily and creates a rich base.
- 1 cup packed light brown sugar: Provides a caramel-like sweetness.
- 2 tablespoons ground cinnamon: The star spice! Use fresh for best flavor.
For the Cream Cheese Frosting:
- 4 ounces cream cheese, softened: The tangy, creamy base of our frosting.
- ¼ cup unsalted butter, softened: Adds richness and smooth texture.
- 1 ½ cups powdered sugar (confectioners’ sugar): Sweetens and thickens the frosting.
- ½ teaspoon vanilla extract: Enhances the overall flavor.
- 1-2 tablespoons milk (as needed): Adjusts frosting consistency.
Kitchen Tools:
- Stand mixer with dough hook attachment (recommended) or large mixing bowl: For efficient dough mixing and kneading.
- Measuring cups and spoons: For accurate ingredient portions.
- Rolling pin: To flatten the dough evenly.
- 9×13 inch baking dish: The ideal size for baking a dozen rolls.
- Sharp knife or unflavored dental floss: For neatly slicing the rolls.
- Wire rack: For cooling the baked rolls.
- Microwave-safe bowl or small saucepan: For warming milk and melting butter.
Prep Time & Cooking Schedule
- Prep Time: 30 minutes
- Rising Time (First Proof): 1-1.5 hours
- Shaping & Second Proof: 20-30 minutes
- Bake Time: 20-25 minutes
- Cooling & Frosting: 10-15 minutes
This recipe involves two stages of rising, which are crucial for achieving that signature pillowy texture. Factor in enough time for these crucial resting periods to ensure a superior result. Starting in the morning ensures warm rolls for brunch, or you can prepare the dough the night before and refrigerate it for an easy breakfast bake.
Step-by-Step Instructions
1. Activate the Yeast: In the bowl of your stand mixer (or a large bowl), combine the warm milk, granulated sugar, and yeast. Whisk gently and let it sit for 5-10 minutes until foamy. This confirms your yeast is active.
2. Prepare the Dough: Add the melted butter, egg, and salt to the yeast mixture. Gradually add the flour, one cup at a time, mixing on low speed with the dough hook (or by hand) until a shaggy dough forms. Increase speed to medium-low and knead for 6-8 minutes until the dough is smooth and elastic. It should be slightly tacky but not sticky.
3. First Rise: Transfer the dough to a lightly oiled bowl, turning once to coat. Cover the bowl with plastic wrap or a clean kitchen towel and let it rise in a warm spot for 1 to 1.5 hours, or until doubled in size.
4. Prepare the Filling: While the dough rises, combine the softened butter, brown sugar, and ground cinnamon in a small bowl. Mix until well combined and spreadable.
5. Assemble the Rolls: Once the dough has doubled, gently punch it down. Turn it out onto a lightly floured surface and roll it into a large rectangle, approximately 12×18 inches. Spread the cinnamon-sugar filling evenly over the dough, leaving a small border free along one long edge. Evenly scattering this delectable interior is key to perfect Cinnamon Rolls (Homemade)!
6. Roll and Slice: Starting from the long edge opposite the clean border, tightly roll the dough into a log. Pinch the seam to seal. Using a sharp knife or unflavored dental floss, cut the log into 12 equal slices (about 1.5 inches thick).
7. Second Rise: Arrange the sliced rolls in your greased 9×13 inch baking dish, leaving a little space between them. Cover again and let them rise in a warm place for another 20-30 minutes, or until visibly puffy. This final proof is crucial for a light and tender Cinnamon Roll Recipe.
8. Bake: Preheat your oven to 375°F (190°C). Bake the rolls for 20-25 minutes, or until golden brown and cooked through. If they start to brown too quickly, you can loosely tent them with foil.
9. Prepare the Frosting: While the rolls are baking, beat together the softened cream cheese and butter in a medium bowl until smooth. Gradually add the powdered sugar and vanilla extract, mixing until fluffy. Add milk, one tablespoon at a time, until you reach your desired frosting consistency.
10. Frost and Serve: Once the rolls are out of the oven, let them cool for 5-10 minutes before generously spreading the cream cheese frosting over them. Serve warm and enjoy!
Nutritional Benefits & Advantages
While cinnamon rolls are undeniably an indulgence, making them at home offers several advantages. You control the quality of ingredients, opting for organic or whole-grain flours for added fiber. Cinnamon itself is a powerful antioxidant and has been linked to potential blood sugar regulation. Plus, the act of baking can be incredibly therapeutic, a mood-boosting activity that nourishes the soul as much as the body.
Tips, Variations & Cooking Advice
- Overnight Option: To make ahead, after arranging the rolls in the baking dish for their second rise, cover tightly with plastic wrap and refrigerate overnight. The next morning, let them come to room temperature for 30-60 minutes before baking as directed.
- Flavor Boosts: Add a pinch of nutmeg or cardamom to the cinnamon filling for extra warmth. For a citrusy twist, add orange zest to the frosting.
- Gluten-Free: Substitute the all-purpose flour with a 1:1 gluten-free baking flour blend (ensure it contains xanthan gum). You’ll likely need to adjust hydration slightly.
- Dairy-Free: Use plant-based milk and butter alternatives. Ensure your cream cheese substitute is dairy-free as well.
- Egg-Free: For the dough, replace the egg with a “flax egg” (1 tbsp ground flaxseed meal + 3 tbsp water, let sit for 5 minutes).
Common Mistakes to Avoid
- Killing the Yeast: Ensure your milk is warm, not hot. Too hot will kill the yeast; too cold won’t activate it. A thermometer is your best friend here!
- Over-flouring: Adding too much flour results in dry, dense rolls. The dough should be soft and slightly tacky.
- Uneven Rolling: An unevenly rolled dough will lead to rolls of varying sizes and inconsistent baking. Aim for a uniform rectangle.
- Not Enough Rise Time: Patience is key! Skimping on proofing time will give you dense, chewier rolls rather than light and airy ones.
- Overbaking: This dries out the rolls. Keep an eye on them; they should be golden brown, not dark.
Storage & Meal Prep Tips
Leftover cinnamon rolls can be stored in an airtight container at room temperature for 2-3 days, or in the refrigerator for up to a week. To reheat, pop them in the microwave for 15-30 seconds or warm them in a preheated oven at 300°F (150°C) for 5-10 minutes until warmed through. You can also freeze unfrosted, baked cinnamon rolls for up to 2 months. Thaw overnight in the refrigerator and frost before serving.
Conclusion
There’s nothing quite like the satisfaction of pulling a pan of warm, fragrant Cinnamon Rolls (Homemade) from your oven. This recipe, while requiring a little patience, rewards you with a truly spectacular treat that’s far superior to anything store-bought. By following these detailed steps, you’re not just baking; you’re creating beautiful memories and demonstrating your culinary prowess. We encourage you to try this ultimate Cinnamon Roll Recipe and share your delightful results! What are you waiting for? Your kitchen is calling!
FAQs
Q1: Can I make the dough in advance?
A1: Yes, you can prepare the dough through the first rise, then punch it down, cover, and refrigerate up to 24 hours. Let it come to room temperature for about 30 minutes before proceeding with rolling and shaping.
Q2: My rolls didn’t rise. What went wrong?
A2: The most common culprit is inactive yeast or milk that was too hot, which killed the yeast. Ensure your yeast is fresh and your milk temperature is between 105-115°F.
Q3: How do I ensure my cinnamon rolls are extra soft?
A3: Don’t over-flour the dough, ensure sufficient kneading for gluten development, and give them ample time for both rises. Also, avoid overbaking.
Q4: Can I use different types of sugar for the filling?
A4: Light brown sugar is recommended for its moist texture and caramel notes. Granulated sugar can be used, but it might make the filling slightly crunchier.
Q5: What if I don’t have a stand mixer?
A5: You can absolutely make these by hand! It will require more effort in kneading, usually 10-15 minutes, but the results will be just as delicious.