Ditch the Store-Bought: Craft Your Own Irresistible Chocolate Peanut Butter Cups!
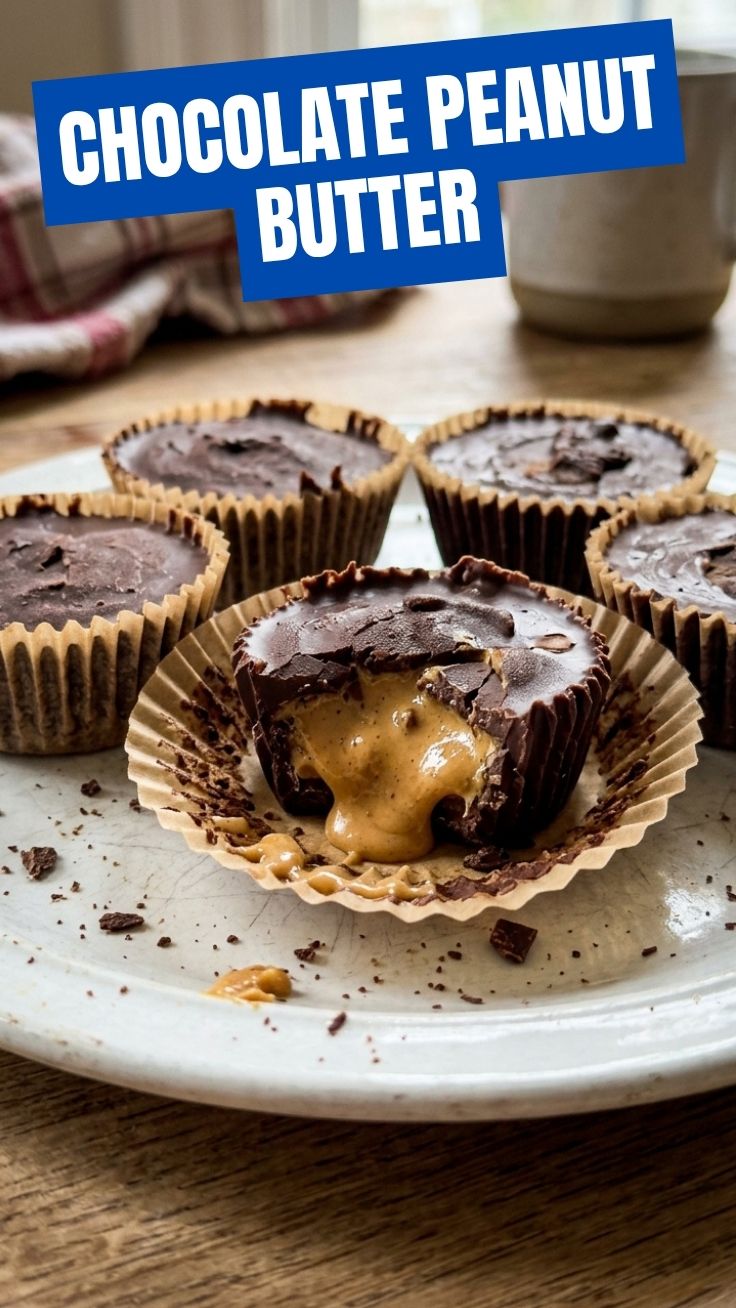
Ever wondered if you could replicate that iconic flavor, the perfect marriage of rich chocolate and creamy peanut butter, right in your own kitchen? The answer is a resounding YES! While store-bought Reese’s Peanut Butter Cups are a nostalgic delight, there’s something uniquely satisfying about creating your own homemade version. Not only do you control the quality of ingredients, but you can also tailor the sweetness, chocolate intensity, and even the texture to your exact preferences. This recipe for Chocolate Peanut Butter Cups promises a delightful culinary adventure, transforming simple ingredients into an extraordinary treat that will impress everyone.
Ingredients & Kitchen Tools
Here’s what you’ll need to embark on your delicious journey:
- For the Peanut Butter Filling:
* 1 cup creamy peanut butter: Opt for natural peanut butter for a less processed flavor, or traditional for that classic sweetness.
* 1/2 cup powdered sugar: Sifted to prevent lumps and ensure a silky-smooth filling.
* 1/4 cup unsalted butter, softened: Adds richness and helps bind the filling.
* 1 teaspoon vanilla extract: Enhances the overall flavor profile.
* Pinch of salt: Balances the sweetness and amplifies the peanut butter flavor.
- For the Chocolate Coating:
* 12 oz semi-sweet chocolate chips (or dark chocolate): High-quality chocolate makes all the difference! You can also use milk chocolate for a sweeter cup.
* 1 tablespoon coconut oil (optional): Helps thin the chocolate for a smoother coating and prevents it from seizing. You can substitute with a neutral-flavored oil.
- Kitchen Tools:
* Muffin tin: Standard or mini-muffin size, depending on your desired cup size.
* Paper liners (mini or regular): Essential for easy removal.
* Mixing bowls (2): One for the peanut butter filling, one for melting chocolate.
* Spatula or wooden spoon: For mixing.
* Microwave-safe bowl or double boiler: For melting chocolate.
* Small spoon or scoop: For dolloping chocolate and peanut butter.
* Parchment paper-lined baking sheet: For setting the cups.
Prep Time & Cooking Schedule
- Prep Time: 20 minutes
- Chill Time: 45 minutes – 1 hour (or until firm)
This recipe is perfect for an afternoon project or a quick treat. The hands-on time is minimal, but the chilling is crucial for achieving that perfect firm texture. You can make the peanut butter filling ahead of time and store it in the fridge for up to a week, making assembly even quicker when a craving strikes.
Step-by-Step Instructions
1. Prepare the Peanut Butter Filling: In a medium bowl, combine the creamy peanut butter, powdered sugar, softened unsalted butter, vanilla extract, and a pinch of salt. Mix thoroughly with a spatula or wooden spoon until well combined and smooth. The mixture should be firm enough to roll into balls.
2. Form the Peanut Butter Centers: Roll the peanut butter mixture into small balls, approximately 1-inch in diameter (adjust size based on your desired Chocolate Peanut Butter Cups size). Flatten each ball slightly into a disc. You can use a measuring spoon to ensure consistent sizing for your homemade Reese’s Peanut Butter Cups. Place these discs on a parchment paper-lined baking sheet and chill in the freezer for 15-20 minutes while you prepare the chocolate.
3. Melt the Chocolate: In a microwave-safe bowl, melt the semi-sweet chocolate chips with the coconut oil (if using) in 30-second intervals, stirring well after each, until smooth and fully melted. Alternatively, use a double boiler for a more controlled melting process. Ensure no water gets into the chocolate.
4. Assemble the Cups: Line your muffin tin with paper liners. Spoon about a teaspoon of melted chocolate into the bottom of each liner, spreading it to cover the base.
5. Add Peanut Butter Centers: Carefully place one chilled peanut butter disc on top of the chocolate layer in each liner.
6. Top with Chocolate: Spoon another teaspoon (or more, as needed) of melted chocolate over each peanut butter disc, ensuring it’s completely covered. Gently tap the muffin tin on the counter a few times to release any air bubbles and smooth the top.
7. Chill to Set: Place the muffin tin in the refrigerator for at least 30-45 minutes, or until the chocolate is completely set and firm.
8. Enjoy! Once firm, remove the paper liners and enjoy your homemade Chocolate Peanut Butter Cups!
Nutritional Benefits & Advantages
While a treat, these Chocolate Peanut Butter Cups offer a few advantages over highly processed store-bought versions. You’re getting healthy fats from the peanut butter and beneficial antioxidants from dark chocolate if you choose to use it. Making them at home also allows you to control sugar content and avoid artificial ingredients often found in commercial candies. Peanut butter is a good source of protein, making these a satisfying snack in moderation.
Tips, Variations & Cooking Advice
- Spice It Up: Add a pinch of cayenne pepper to the peanut butter filling for a surprising spicy kick.
- Texture Play: For a crunchier interior, mix some finely chopped roasted peanuts into the peanut butter filling.
- White Chocolate Bliss: Experiment with a white chocolate coating for a different flavor profile.
- Dairy-Free/Vegan: Use dairy-free chocolate chips and a vegan butter substitute for a plant-based version. Ensure your peanut butter is also vegan.
- Salt Sprinkle: A sprinkle of flaky sea salt on top of the finished chocolate cups enhances the flavors beautifully.
Common Mistakes to Avoid
- Over-melting Chocolate: Overheated chocolate becomes thick and difficult to work with. Melt in short intervals and stir frequently.
- Warm Peanut Butter Filling: If your peanut butter filling is too warm, it will be hard to handle and may cause the chocolate layers to blend. Ensure it’s adequately chilled.
- Water in Chocolate: Even a tiny drop of water can cause chocolate to seize and become clumpy. Use a dry bowl and spatula.
- Rushing the Chill Time: Patience is key! Don’t skip or shorten the chilling time, or your cups won’t set properly.
Storage & Meal Prep Tips
Store your homemade Chocolate Peanut Butter Cups in an airtight container in the refrigerator for up to 2 weeks. They can also be frozen for up to 3 months. If freezing, separate layers with parchment paper to prevent sticking. Thaw in the refrigerator or at room temperature for a few minutes before enjoying.
Conclusion
Crafting your own Chocolate Peanut Butter Cups is a rewarding experience, yielding a delicious treat that far surpasses their store-bought counterparts. With this guide, you now have all the tools to create perfect homemade versions rivaling even the famous Reese’s Peanut Butter Cups. Don’t hesitate – dive into your kitchen and whip up a batch or two. Share your creations or tag us in your sweet adventures!
FAQs
- Can I use chunky peanut butter?
While creamy peanut butter provides the smoothest texture, you can absolutely use chunky peanut butter for a delightful textural contrast.
- How do I prevent the chocolate from cracking when I remove the cups?
Ensure the chocolate is fully set and not too cold. If it’s too cold, let it sit at room temperature for a few minutes before peeling off the liners. Using a little coconut oil in your chocolate can also help with flexibility.
- My peanut butter filling is too sticky; what can I do?
If the filling is too sticky, gradually add more powdered sugar until it reaches a manageable consistency. Chilling it briefly can also help firm it up.
Absolutely! A sprinkle of flaky sea salt, a drizzle of white chocolate, or even some sprinkles before the chocolate sets can add a lovely touch.
- What if I don’t have a muffin tin?
You can use silicone candy molds or even just small paper liners placed on a flat tray. The muffin tin simply helps maintain their shape and uniformity.