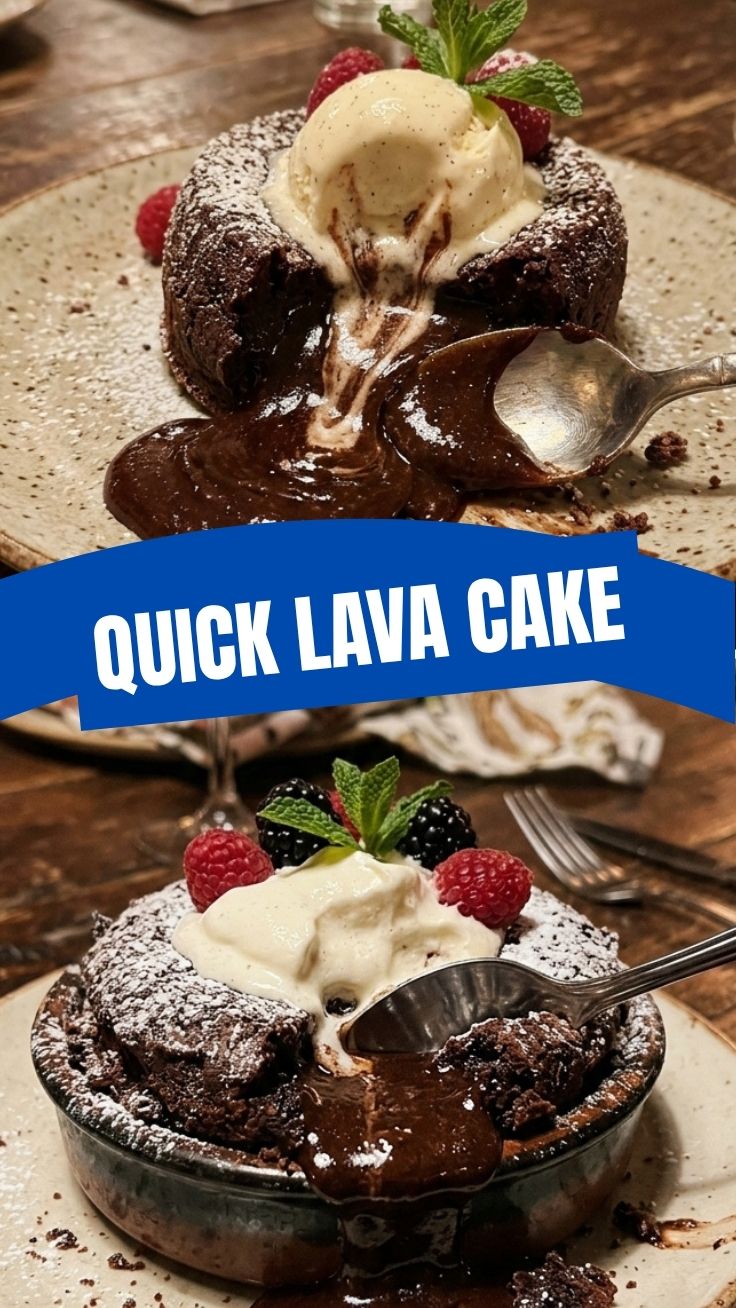
Unveiling the Secret to the Perfect Chocolate Lava Cake: A Home Baker’s Guide
Have you ever dreamt of serving a dessert that effortlessly combines sophistication with pure, unadulterated decadence? A treat that, with every spoonful, reveals a warm, gooey, molten chocolate core? Look no further, because today we’re diving deep into the art of creating the ultimate Chocolate Lava Cake right in your own kitchen. While often perceived as a restaurant-only delicacy, mastering this recipe at home is not only incredibly rewarding but also surprisingly straightforward. Imagine the delight on your guests’ faces as they cut into a perfectly baked shell, unleashing a luscious torrent of rich, flowing chocolate. This guide will walk you through every step, ensuring your homemade version rivals any professional confection, delivering that coveted molten chocolate cake experience with ease and confidence.
Ingredients & Kitchen Tools
Crafting this exquisite dessert requires a precise balance of quality ingredients and the right tools. Here’s what you’ll need:
- Unsalted Butter (1/2 cup / 113g): Essential for richness and flavor. Using unsalted allows you to control the salt content.
- High-Quality Dark Chocolate (6 oz / 170g): Opt for chocolate with 60-70% cacao content for the best flavor. Chips, bars, or couverture work well.
- Large Eggs (2 whole eggs + 2 egg yolks): The combination of whole eggs and extra yolks creates a richer custard-like interior.
- Granulated Sugar (1/4 cup / 50g): Sweetness and caramelization.
- All-Purpose Flour (2 tablespoons / 16g): Just enough to provide structure without making it cakey.
- Pinch of Salt: Balances the sweetness and enhances chocolate flavor.
- Vanilla Extract (1 teaspoon): Adds aromatic depth.
- Powdered Sugar (for dusting, optional): For garnish.
- Fresh Berries or Ice Cream (for serving, optional): Classic accompaniments.
Kitchen Tools:
- Ramekins (4-6 individual, 6-ounce): Crucial for individual portions and achieving the lava effect.
- Double Boiler or Heatproof Bowl over a Saucepan: For melting chocolate and butter gently.
- Whisk: For combining ingredients smoothly.
- Mixing Bowls (2): One for the chocolate mixture, one for eggs and sugar.
- Rubber Spatula: For scraping bowls and folding ingredients.
- Oven Mitts: For handling hot ramekins.
- Baking Sheet: To place ramekins on for easier handling in and out of the oven.
Prep Time & Cooking Schedule
Timing is key for the perfect lava cake!
- Prep Time: 15 minutes
- Cook Time: 12-15 minutes
- Resting Time: 2-3 minutes (after baking, before inverting)
This recipe is fantastic for dinner parties as much of the prep can be done ahead of time. You can prepare the batter and refrigerate it for up to 24 hours, then simply pour into ramekins and bake when guests arrive. This flexibility makes entertaining a breeze!
Step-by-Step Instructions
Follow these precise steps to achieve that dream dessert:
1. Preheat & Prepare Ramekins: Preheat your oven to 400°F (200°C). Generously butter and flour your ramekins, tapping out any excess flour. This prevents sticking and ensures easy unmolding.
2. Melt Chocolate & Butter: In a double boiler or a heatproof bowl set over a saucepan of simmering water (make sure the water doesn’t touch the bottom of the bowl), combine the butter and dark chocolate. Stir occasionally until completely melted and smooth. Remove from heat and let cool slightly.
3. Whisk Eggs & Sugar: In a separate large mixing bowl, whisk together the whole eggs, egg yolks, and granulated sugar until light, pale, and slightly thickened. This usually takes about 2-3 minutes.
4. Combine Wet Ingredients: Gradually pour the slightly cooled chocolate mixture into the egg mixture, whisking constantly until well combined. Stir in the vanilla extract and salt.
5. Fold in Flour: Gently fold in the all-purpose flour using a rubber spatula until just incorporated. Do not overmix; overmixing can develop gluten, leading to a tougher texture. Remember, the goal is a delicate and fluid center.
6. Fill Ramekins: Divide the batter evenly among the prepared ramekins. Place the filled ramekins on a baking sheet.
7. Bake: Bake for 12-15 minutes. The edges should be set, but the center should still be jiggly when gently shaken. This is the crucial stage for achieving that perfect Chocolate Lava Cake. For a truly ooey-gooey center, err on the side of underbaking slightly.
8. Rest & Serve: Remove the ramekins from the oven and let them rest for 2-3 minutes. This allows the internal structure to firm up slightly before unmolding. Carefully invert each cake onto a serving plate. Dust with powdered sugar, add fresh berries, or a scoop of vanilla ice cream to complete your exquisite molten chocolate cake.
Nutritional Benefits & Advantages
While primarily a decadent treat, chocolate lava cake offers some surprising perks. Dark chocolate, the star ingredient, is rich in antioxidants, which can help combat free radicals in the body. It also contains minerals like iron, magnesium, and copper. Enjoyed in moderation, this dessert can even be a source of mood-boosting compounds like phenylethylamine. Plus, making it yourself means you control the quality of ingredients, opting for high-cacao chocolate and fresh eggs, which is always an advantage over store-bought alternatives.
Tips, Variations & Cooking Advice
- Flavor Boosts: Add a pinch of espresso powder to the chocolate mixture to intensify the chocolate flavor without it tasting like coffee. A splash of orange liqueur or rum can also add a sophisticated twist.
- Gluten-Free Version: Substitute the all-purpose flour with a gluten-free all-purpose flour blend (one that contains xanthan gum) for a delicious gluten-free option.
- White Chocolate Lava Cake: For a delightful variation, swap dark chocolate for high-quality white chocolate, and consider adding lemon zest or raspberry purée for a contrasting flavor profile.
- Temperature Control: Your oven temperature is critical. An accurate oven thermometer can be a valuable tool to ensure consistent results.
- Don’t Overbake! This is the most common mistake. A slightly jiggly center is exactly what you want for that perfect molten core.
Common Mistakes to Avoid
- Overmixing the Batter: This can lead to a tougher cake texture and prevent the desired gooey center. Mix just until combined.
- Under-buttering/Under-flouring Ramekins: A poorly prepared ramekin will cause the cake to stick, making unmolding difficult and potentially ruining its presentation.
- Baking Too Long: The biggest culprit of a non-molten cake. Watch carefully; ovens vary, so your timing might differ slightly from the recipe.
- Not Resting After Baking: Giving the cakes a couple of minutes to rest helps them set enough to unmold cleanly without falling apart.
Storage & Meal Prep Tips
While best enjoyed immediately, leftover lava cakes can be stored:
- Refrigeration: Store cooled cakes loosely covered in the refrigerator for up to 2-3 days. The center will firm up significantly.
- Reheating: To reheat, place cakes in their ramekins in a preheated oven at 350°F (175°C) for 5-7 minutes, or microwave for 20-30 seconds, until the center is warm and slightly gooey again. Be careful not to overheat, or you’ll lose the molten effect.
Conclusion
Creating a sensational Chocolate Lava Cake at home is an achievable culinary triumph that will surely impress. With quality ingredients and careful adherence to these steps, you’ll consistently produce a dessert that’s rich, warm, and boasts that irresistible flowing core. This guide has equipped you with everything you need to craft the perfect molten chocolate cake, turning an ordinary evening into an extraordinary one. We encourage you to try this recipe, experiment with the variations, and share your delightful results!
FAQs
1. Can I make the batter ahead of time?
Yes, you can prepare the batter up to 24 hours in advance. Cover it tightly and store it in the refrigerator. Before baking, let it come to room temperature for about 20-30 minutes, then pour into prepared ramekins and bake as directed.
2. My lava cake didn’t have a molten center. What went wrong?
The most common reason is overbaking. Ovens can vary, so keep a close eye on the cakes. The edges should be set, but the center should still jiggle slightly. Next time, try reducing the baking time by 1-2 minutes.
3. What if I don’t have ramekins?
You can use other oven-safe individual ceramic dishes or even a muffin tin (though the timing might need adjustment and release can be trickier). Ensure whatever you use is buttered and floured thoroughly.
4. Can I use milk chocolate instead of dark chocolate?
While you technically can, dark chocolate is highly recommended for its superior flavor and less sugar content. Using milk chocolate may result in an overly sweet cake and a less intense chocolate experience.
5. How do I safely unmold the cakes?
After baking, let the cakes rest for 2-3 minutes. This allows the exterior to firm up. Then, run a thin knife around the edge of each ramekin, place a serving plate over the top, and carefully invert. They should slide out easily if adequately buttered and floured.