Unveiling the Ultimate Comfort Food: Your Guide to a Perfect Homemade Chicken Pot Pie
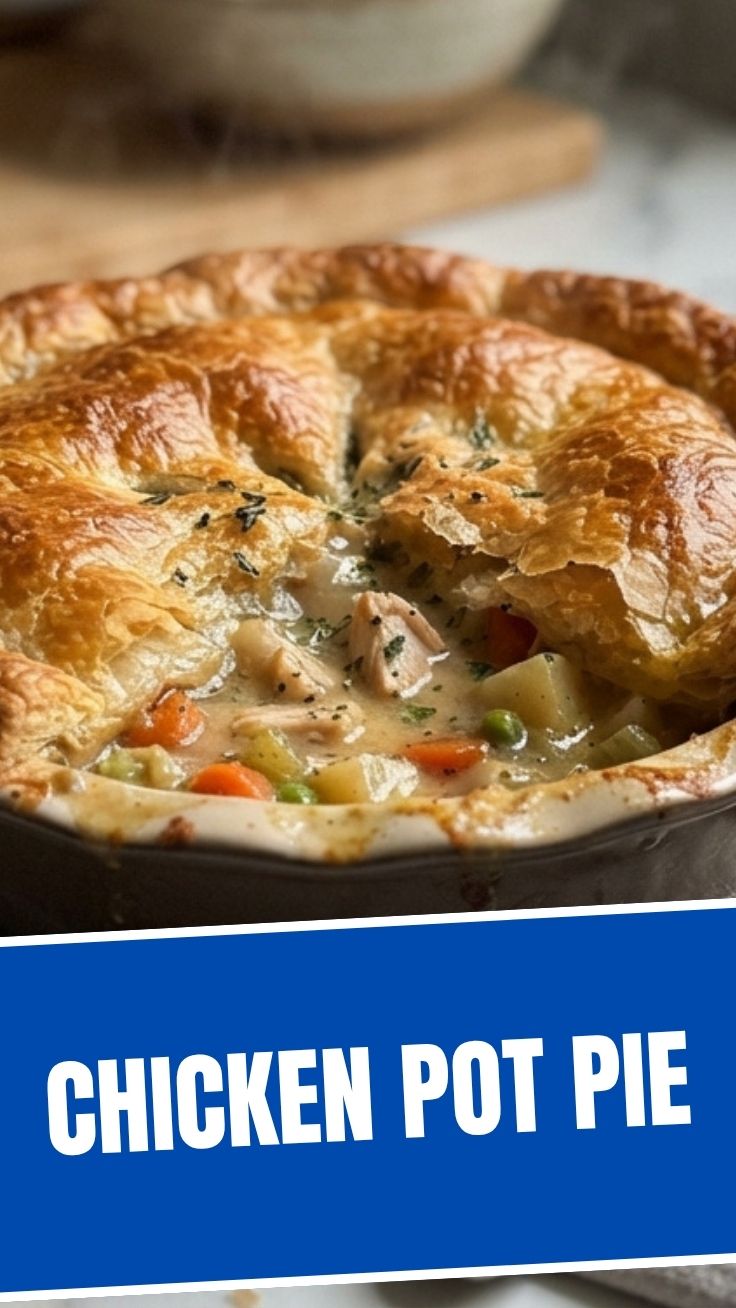
Ever wondered what truly defines culinary comfort? For many, it’s the warm, savory embrace of a homemade pie, and today, we’re diving deep into the art of creating the perfect Chicken Pot Pie. This isn’t just about following a recipe; it’s about crafting an experience, a dish that brings smiles and satisfaction with every spoonful. Preparing a delicious Chicken Pot Pie Recipe at home offers unparalleled freshness, customizable flavors, and the joy of sharing a truly heartwarming meal. Forget bland store-bought versions; we’re about to empower you to create a culinary masterpiece that will impress even the most discerning palates.
Ingredients & Kitchen Tools
Gathering your mise en place is the first step to culinary success. Here’s what you’ll need:
For the Filling:
- 2 tablespoons unsalted butter: For sautéing aromatics and building flavor.
- 1 cup chopped yellow onion: Adds a foundational sweetness.
- 1 cup chopped carrots: Essential for color, sweetness, and texture.
- 1 cup frozen green peas: A classic addition, adding vibrant color and mild sweetness.
- 1 cup diced potatoes: For heartiness and a creamy texture in the filling.
- 1/2 cup all-purpose flour: To thicken the sauce.
- 2 cups chicken broth: The liquid base for our savory gravy.
- 1 cup whole milk: Adds richness and creaminess to the sauce.
- 2 cups cooked shredded chicken: Leftover rotisserie chicken works beautifully here for convenience.
- 1/2 teaspoon dried thyme: Earthy and aromatic, a perfect complement to chicken.
- Salt and freshly ground black pepper to taste: Seasoning is key!
For the Crust:
- 1 box (14.1 ounces) refrigerated pie crusts (2 crusts): A convenient time-saver, but feel free to use your favorite homemade crust.
- 1 egg (beaten): For an egg wash, giving the crust a golden sheen.
Kitchen Tools:
- Large saucepan or Dutch oven: For preparing the filling.
- 9-inch pie dish: The vessel for your delicious creation.
- Measuring cups and spoons: For precise ingredient portions.
- Whisk: For smooth, lump-free gravy.
- Spatula or wooden spoon: For stirring.
- Cutting board and knife: For prepping vegetables.
- Rolling pin (if using homemade crust): For rolling out the dough.
- Pastry brush: For applying the egg wash.
Prep Time & Cooking Schedule
- Prep Time: 20 minutes (if chicken is pre-cooked)
- Cook Time: 35-45 minutes
- Resting Time: 10 minutes (essential for the filling to set and prevent spills)
This schedule allows you to get dinner on the table in just over an hour. If you’re using raw chicken, factor in an additional 20-25 minutes for cooking it before shredding. The resting time post-baking is crucial; it helps the filling thicken and prevents it from being too runny when sliced.
Step-by-Step Instructions
1. Preheat Oven & Prepare Crust: Preheat your oven to 400°F (200°C). If using store-bought crusts, unroll one and gently place it into your 9-inch pie dish. Trim any excess, leaving about a 1/2-inch overhang.
2. Sauté Aromatics: In a large saucepan or Dutch oven over medium heat, melt the butter. Add the chopped onion, carrots, and diced potatoes. Sauté for 5-7 minutes, or until the vegetables start to soften.
3. Thicken the Sauce: Sprinkle the flour over the softened vegetables, stirring constantly for 1-2 minutes to cook out the raw flour taste. Slowly whisk in the chicken broth and then the milk until the mixture is smooth and lump-free. Bring to a simmer, stirring frequently, until the sauce thickens.
4. Combine Filling Ingredients: Remove the saucepan from the heat. Stir in the cooked shredded chicken, frozen green peas, dried thyme, salt, and black pepper. Taste and adjust seasoning as needed. This robust Chicken Pot Pie filling is now ready.
5. Assemble the Pie: Pour the glorious Chicken Pot Pie Recipe filling into the pie crust-lined dish.
6. Top with Second Crust: Unroll the second pie crust and carefully place it over the filling. Trim the edges and crimp them together with the bottom crust to seal. Cut a few slits in the top crust to allow steam to escape. Brush the top with the beaten egg wash.
7. Bake to Perfection: Bake for 35-45 minutes, or until the crust is golden brown and the filling is bubbly. If the crust starts to brown too quickly, you can loosely tent it with aluminum foil.
8. Rest and Serve: Let the pie rest for at least 10 minutes before slicing and serving. This allows the filling to set properly, ensuring clean, beautiful slices.
Nutritional Benefits & Advantages
This dish isn’t just delicious; it’s packed with goodness! Chicken is an excellent source of lean protein, essential for muscle repair and growth. The vegetables – carrots, peas, and potatoes – contribute vital vitamins, minerals, and dietary fiber, promoting digestive health and providing sustained energy. The dairy adds calcium for bone health. Opting for homemade means you control the ingredients, reducing unnecessary sodium and unhealthy fats often found in convenience meals.
Tips, Variations & Cooking Advice
- Flavor Boosts: Add a pinch of nutmeg or a dash of Worcestershire sauce to the filling for extra depth. Fresh herbs like parsley or rosemary can also elevate the flavor profile.
- Vegetarian Option: Omit the chicken and double the amount of vegetables, adding mushrooms, corn, or bell peppers. Use vegetable broth instead of chicken broth.
- Gluten-Free: Use gluten-free all-purpose flour for the roux and a gluten-free pie crust.
- Dairy-Free: Substitute the butter with olive oil or a dairy-free butter alternative, and use a plant-based milk (like unsweetened almond or oat milk).
- Individual Portions: Bake in ramekins for adorable mini pot pies – perfect for portion control!
- Spice it Up: A pinch of red pepper flakes can add a subtle kick.
Common Mistakes to Avoid
- Overfilling the Pie: This can lead to spillage during baking and a soggy crust. Leave about a 1/2 inch space from the top.
- Not Cooking Flour Enough: Undercooked flour will leave a raw taste in your gravy. Ensure you stir it with the vegetables for at least a minute or two.
- Skipping the Vent Slits: Without these, steam will build up and potentially burst through your crust in an unsightly way.
- Cutting Too Soon: Patience is a virtue here! Letting the pie rest allows the filling to thicken and prevents a soupy mess.
Storage & Meal Prep Tips
Leftover Chicken Pot Pie can be stored in an airtight container in the refrigerator for up to 3-4 days. To reheat, warm individual slices in the microwave or a preheated oven (350°F/175°C) until heated through. For longer storage, freeze cooled, individual portions for up to 2-3 months. Thaw overnight in the refrigerator before reheating. This is an excellent dish for meal prepping; you can prepare the filling ahead of time and assemble and bake when ready.
Conclusion
There’s nothing quite like the comforting aroma and taste of a homemade Chicken Pot Pie. This comprehensive guide provides everything you need to create a truly unforgettable meal, transforming simple ingredients into a culinary triumph. Mastering this Chicken Pot Pie Recipe is not just about cooking; it’s about creating memories and sharing warmth. We encourage you to try this recipe and discover the joy of crafting your own perfect pot pie. Share your creations and any delicious variations in the comments below – happy cooking!
FAQs
Q1: Can I use raw chicken in the filling?
A1: Yes, you can. Dice raw chicken and sauté it in the pan before adding vegetables until cooked through, then proceed with the recipe.
Q2: My pie crust is browning too quickly, what should I do?
A2: Loosely tent the pie with aluminum foil during baking to prevent over-browning while allowing the filling to cook.
Q3: How can I make my filling thicker?
A3: If your filling is too thin, you can return it to the stove and simmer for a few more minutes, stirring frequently, or add a cornstarch slurry (1 tablespoon cornstarch mixed with 1 tablespoon cold water) to the simmering filling.
Q4: Can I freeze the assembled, unbaked pie?
A4: Yes, you can! Assemble the pie, cover it tightly with plastic wrap and then foil, and freeze for up to 1-2 months. When ready to bake, remove from the freezer, remove coverings, brush with egg wash, and bake directly from frozen, adding an extra 20-30 minutes to the baking time.