Unlock the Secret to Restaurant-Quality Chicken Piccata at Home
Ever dream of bringing the vibrant, zesty flavors of fine dining into your own kitchen? What if you could master a dish that’s both elegant and surprisingly simple to prepare, captivating your family and friends with every forkful? Today, we’re peeling back the layers on one of the culinary world’s most beloved classics: Chicken Piccata. This delightful dish, often a highlight of exquisite Italian recipes, offers a symphony of bright, savory, and tangy notes that are incredibly satisfying. Preparing it at home not only saves you a trip to a fancy establishment but also allows you to control the quality of your ingredients and tailor the flavors precisely to your liking. Get ready to transform ordinary chicken breasts into an extraordinary meal that truly shines.
Ingredients & Kitchen Tools
Here’s everything you’ll need to create this culinary masterpiece. Substitutions are provided for your convenience!
- Boneless, Skinless Chicken Breasts (4, about 1.5 lbs total): Choose organic or free-range for best flavor. (Substitute: turkey cutlets or pork tenderloin medallions for a different protein).
- All-Purpose Flour (1/2 cup): For dredging, creates a light crust. (Substitute: gluten-free flour blend for a gluten-free option).
- Salt & Freshly Ground Black Pepper (to taste): Essential seasoning.
- Unsalted Butter (4 tbsp, divided): Adds richness and aids in browning. (Substitute: margarine or a dairy-free butter alternative).
- Olive Oil (2 tbsp): High heat cooking. (Substitute: avocado oil).
- Dry White Wine (1/2 cup): Such as Pinot Grigio or Sauvignon Blanc, for deglazing and depth of flavor. (Substitute: chicken broth with a splash of white wine vinegar for an alcohol-free version).
- Chicken Broth (1 cup, low-sodium): Forms the base of the sauce. (Substitute: vegetable broth).
- Fresh Lemon Juice (1/4 cup, from 1-2 lemons): The star of the show for that iconic zesty kick. (Substitute: bottled lemon juice, though fresh is highly recommended).
- Capes (2 tbsp, drained and rinsed): Briny and essential to piccata’s unique flavor. (Substitute: finely chopped green olives for a different briny element).
- Fresh Parsley (1/4 cup, chopped): For garnish and fresh herbaceous notes. (Substitute: dried parsley, 1 tbsp).
- Cooking Tongs: For turning chicken.
- Shallow Dishes (2): One for flour, one for chicken.
- Large Skillet (oven-safe, if possible): Preferably stainless steel or cast iron for even heat distribution.
- Whisk: For emulsifying the sauce.
- Measuring Cups & Spoons: For accurate ingredient amounts.
Prep Time & Cooking Schedule
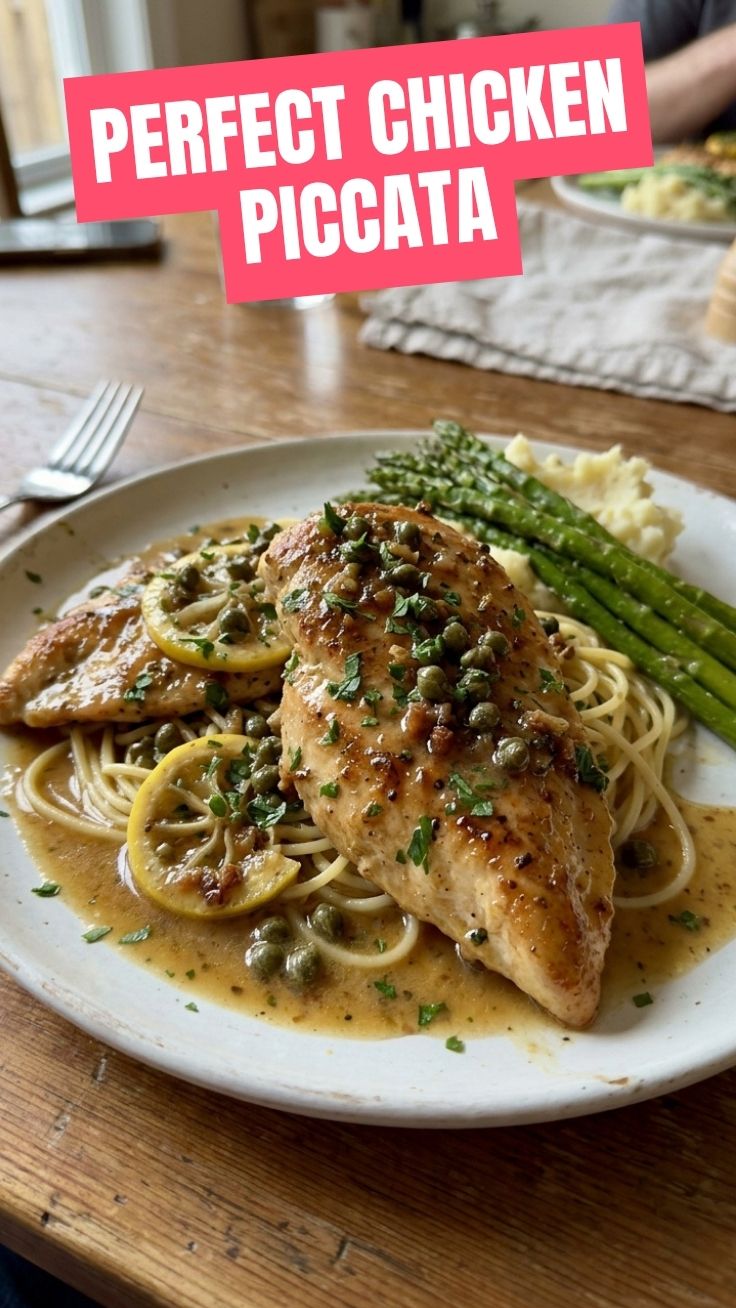
This elegant dish comes together quite quickly, making it ideal for both weeknight dinners and special occasions.
- Prep Time: 15 minutes
- Cook Time: 20-25 minutes
- Total Time: 35-40 minutes
The short prep and cook times mean you can have a truly gourmet meal on the table in under an hour. Plan to have all your ingredients prepped and laid out (mise en place) before you start cooking, as the steps move relatively quickly.
Step-by-Step Instructions
Follow these detailed steps to achieve the perfect Chicken Piccata:
1. Prepare the Chicken: Pat your chicken breasts completely dry with paper towels. Place each breast between two sheets of parchment paper or plastic wrap. Using a meat mallet or rolling pin, pound them to an even 1/2-inch thickness. This ensures even cooking and tenderness.
2. Dredge the Chicken: In a shallow dish, combine the all-purpose flour with salt and pepper. Dredge each chicken breast, ensuring it’s lightly and evenly coated, then shake off any excess flour.
3. Sear the Chicken: Heat 2 tbsp unsalted butter and 1 tbsp olive oil in a large skillet over medium-high heat until the butter is melted and sizzling. Add the floured chicken breasts and sear for 3-4 minutes per side, or until golden brown and cooked through. The internal temperature should reach 165°F (74°C). Cook in batches if necessary to avoid overcrowding the pan. Remove the cooked chicken and set aside on a plate, tented with foil to keep warm.
4. Deglaze and Build the Sauce: Reduce heat to medium. Add the remaining 2 tbsp unsalted butter and 1 tbsp olive oil to the same skillet. Once melted, pour in the dry white wine, scraping up any browned bits from the bottom of the pan with a wooden spoon. This is a crucial step for flavor! Let it simmer for 1-2 minutes until slightly reduced.
5. Finish the Sauce: Stir in the chicken broth and fresh lemon juice. Bring the sauce to a gentle simmer and cook for 3-5 minutes, allowing it to reduce and thicken slightly. The richness will develop beautifully.
6. Add Capers & Serve: Stir in the drained capers. Return the seared chicken breasts to the skillet, spooning the sauce over them to coat. Garnish generously with fresh chopped parsley. Serve immediately with your favorite side dishes. This classic Italian recipes staple is best enjoyed right off the stove.
Nutritional Benefits & Advantages
Chicken Piccata, when prepared thoughtfully, offers several nutritional advantages. Chicken breast is an excellent source of lean protein, essential for muscle repair and growth. Lemon juice provides a significant boost of Vitamin C, an antioxidant crucial for immune health. Capers add a briny flavor without a large calorie count and contain small amounts of Vitamin K. By controlling the amount of butter and using low-sodium broth, you can keep the dish heart-healthy. This dish can easily fit into a balanced diet, offering a delicious and satisfying meal that is relatively low in saturated fat compared to many restaurant preparations.
Tips, Variations & Cooking Advice
- Even Thickness is Key: Pounding the chicken ensures it cooks evenly and quickly, preventing some parts from drying out while others are still raw.
- Don’t Overcrowd the Pan: Cooking chicken in batches allows for proper searing and browning, leading to a better crust and more flavorful outcome.
- Garlic Boost: For an extra layer of flavor, sauté 1-2 minced garlic cloves after the chicken is removed and before adding the wine.
- Creamy Piccata: For a richer sauce, stir in 2-3 tablespoons of heavy cream or a non-dairy creamer at the end, just before adding the capers.
- Vegetable Inclusions: Consider adding sautéed spinach, asparagus, or sun-dried tomatoes to the sauce for added color and nutrients.
- Gluten-Free: Use a good quality gluten-free flour blend for dredging.
- Dairy-Free: Substitute dairy-free butter and ensure your chicken broth is dairy-free.
Common Mistakes to Avoid
- Not Pounding Chicken Evenly: Leads to uneven cooking and dry spots. Always aim for consistent thickness.
- Overcrowding the Skillet: This lowers the pan temperature, steaming the chicken instead of searing it, resulting in a pale, flabby crust.
- Skipping the Deglazing: Those browned bits (fond) in the pan are pure flavor! Deglazing with wine or broth is essential for a rich sauce.
- Overcooking the Chicken: Chicken breast cooks quickly. Use a food thermometer to ensure it reaches 165°F (74°C) and remove it promptly to prevent dryness.
- Adding Capers Too Early: Capers can lose their potency if cooked for too long. Add them near the end to preserve their distinct flavor.
Storage & Meal Prep Tips
Leftover Chicken Piccata can be stored in an airtight container in the refrigerator for up to 3-4 days. It is not recommended to freeze this dish, as the sauce can separate and the chicken texture may become less appealing upon reheating. To reheat, gently warm the chicken and sauce in a skillet over medium-low heat until heated through, adding a splash of broth if the sauce seems too thick. Avoid high heat, which can dry out the chicken. This dish pairs wonderfully with pasta, rice, or steamed vegetables for an easy meal prep option throughout the week.
Conclusion
There you have it – a magnificent journey into crafting homemade Chicken Piccata, a true star among Italian recipes. We’ve explored everything from precise ingredients and tools to step-by-step instructions and valuable tips for culinary success. This dish proves that restaurant-quality flavor is well within reach, even for the home cook. Its bright, tangy, and savory profile makes it an instant classic that’s sure to impress. Don’t hesitate to whisk out your skillet and give this recipe a try. Share your delicious results with us in the comments below, or tell us your favorite family hacks for making this timeless dish even better!
FAQs
Q1: Can I make this a gluten-free dish?
A1: Yes, simply substitute the all-purpose flour for a cup-for-cup gluten-free flour blend when dredging the chicken.
Q2: What can I use if I don’t have white wine?
A2: You can substitute the dry white wine with an equal amount of low-sodium chicken broth, adding a splash (about a teaspoon) of white wine vinegar or apple cider vinegar for that touch of acidity.
Q3: My sauce isn’t thickening. What should I do?
A3: If your sauce isn’t thickening enough, try simmering it a bit longer to allow more liquid to evaporate. Alternatively, you can mix 1 teaspoon of cornstarch with 1 tablespoon of cold water, then whisk this slurry into the simmering sauce.
Q4: Can I use chicken thighs instead of breasts?
A4: Absolutely! Chicken thighs would also work wonderfully. They tend to be more forgiving and stay moister, though they may require a few extra minutes of cooking time per side.
Q5: How can I make this dish spicier?
A5: For a touch of heat, you can add a pinch of red pepper flakes to the sauce when you’re simmering the broth and lemon juice. Start with a small amount and adjust to your preference.