Crispy, Golden Breadsticks: Your Ultimate Guide to Homemade Perfection
Ever wondered how restaurants achieve those perfectly crispy, irresistibly golden Breadsticks? What if we told you that creating them in your own kitchen is not only achievable but surprisingly simple, and far more rewarding than any store-bought alternative? Imagine the aroma filling your home, the satisfying crunch with every bite, and the knowledge that you crafted this delicious accompaniment from scratch. This comprehensive guide will empower you to master the art of homemade breadstick making, transforming humble ingredients into a culinary delight. We’ll delve into everything from basic dough preparation to achieving that coveted golden crust, even showing you how to craft delectable Garlic breadsticks that will elevate any meal. Get ready to impress your family and friends with your newfound baking prowess!
Ingredients & Kitchen Tools
Crafting the perfect breadstick requires a few simple ingredients and essential kitchen tools.
- All-Purpose Flour (3 cups): The foundation of our dough, providing structure.
- Warm Water (1 cup, 105-115°F/40-46°C): Activates the yeast. Ensure it’s not too hot, or it will kill the yeast.
- Active Dry Yeast (2 ¼ teaspoons or 1 packet): The leavening agent that makes our breadsticks light and airy.
- Granulated Sugar (1 teaspoon): Feeds the yeast, promoting its activity.
- Salt (1 teaspoon): Enhances flavor and controls yeast activity.
- Olive Oil (2 tablespoons, plus more for brushing): Adds richness to the dough and helps with a golden crust.
- Optional Toppings:
* Garlic Powder (1 teaspoon): For savory Garlic breadsticks.
* Parmesan Cheese (¼ cup, grated): Adds a salty, umami kick.
* Italian Seasoning (1 teaspoon): For an herbaceous aroma.
* Coarse Sea Salt: For a rustic finish.
Kitchen Tools:
- Large Mixing Bowl: For combining ingredients and dough proofing.
- Measuring Cups and Spoons: For accurate ingredient quantities.
- Whisk: To combine dry ingredients.
- Rubber Spatula or Wooden Spoon: For initial mixing.
- Clean Kitchen Towel or Plastic Wrap: To cover the dough during proofing.
- Baking Sheet: To bake the breadsticks.
- Parchment Paper or Silicone Baking Mat: Prevents sticking and aids in cleanup.
- Pastry Brush: For applying olive oil and toppings.
Prep Time & Cooking Schedule
Planning is key to successful baking. This recipe involves active prep time and crucial resting periods.
- Prep Time: 20 minutes (includes mixing and shaping)
- Proofing Time: 1 hour (first rise) + 20 minutes (second rise after shaping)
- Cook Time: 15-20 minutes
- Total Time: Approximately 1 hour 55 minutes
Allow ample time for the dough to proof. Rushing this process can result in dense, tough breadsticks. The two proofing stages are essential for developing flavor and achieving a light, airy texture.
Step-by-Step Instructions
1. Activate the Yeast: In your large mixing bowl, combine the warm water, sugar, and yeast. Stir gently and let it sit for 5-10 minutes until foamy. This confirms your yeast is active.
2. Combine Dry Ingredients: In a separate small bowl, whisk together the flour and salt.
3. Form the Dough: Pour the activated yeast mixture into the flour and salt. Add the 2 tablespoons of olive oil. Mix with a rubber spatula or wooden spoon until a shaggy dough forms.
4. Knead the Dough: Transfer the dough to a lightly floured surface. Knead for 5-7 minutes until the dough is smooth and elastic. It should spring back when gently poked.
5. First Proof: Lightly grease the mixing bowl with olive oil. Place the dough in the bowl, turning it once to coat. Cover with a clean kitchen towel or plastic wrap and let it rise in a warm place for 1 hour, or until doubled in size.
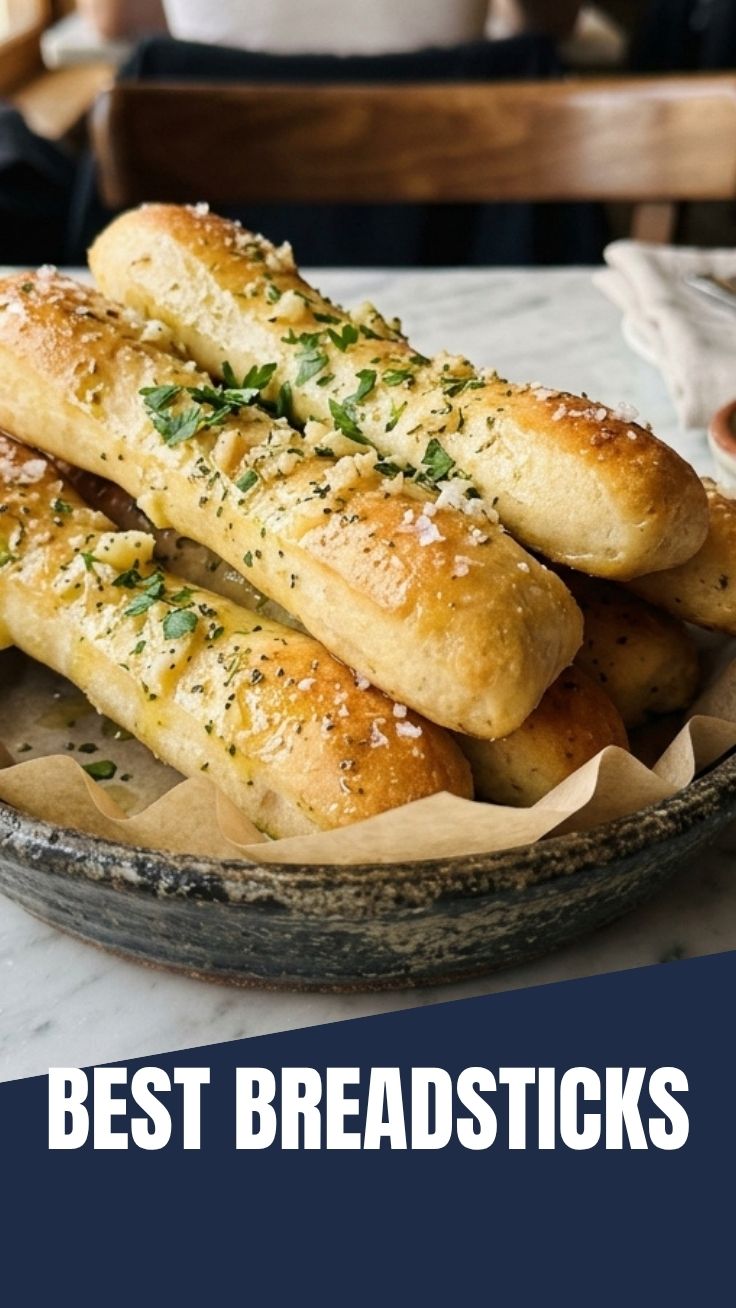
6. Shape the Breadsticks: Punch down the risen dough to release the air. Transfer it to a lightly floured surface. Divide the dough into 16-20 equal pieces. Roll each piece into a rope about 8-10 inches long and ½ inch thick. For a savory twist, sprinkle garlic powder, Parmesan, and Italian seasoning over half the ropes before baking to make incredible Garlic breadsticks.
7. Second Proof: Arrange the shaped breadsticks on a baking sheet lined with parchment paper, leaving some space between them. Cover loosely with plastic wrap and let them rise for another 20 minutes.
8. Preheat and Prepare: Preheat your oven to 400°F (200°C). Lightly brush the risen breadsticks with olive oil. If desired, sprinkle with coarse sea salt.
9. Bake: Bake for 15-20 minutes, or until golden brown and crispy. Keep an eye on them to prevent over-browning.
10. Serve: Let the breadsticks cool slightly on a wire rack before serving. Enjoy warm!
Nutritional Benefits & Advantages
These homemade Breadsticks offer more than just deliciousness. By making them at home, you control the ingredients, avoiding unwanted preservatives and excess sodium often found in store-bought versions. Flour provides complex carbohydrates for sustained energy, while olive oil contributes heart-healthy monounsaturated fats. Depending on your choice of toppings, you can boost their nutritional profile further. For instance, adding fresh herbs can introduce antioxidants, and a sprinkle of Parmesan provides a good source of calcium.
Tips, Variations & Cooking Advice
- Flavor Variations: Experiment with different herbs like rosemary or thyme. Add a pinch of red pepper flakes for a spicy kick.
- Ingredient Swaps: For a whole-wheat version, substitute half of the all-purpose flour with whole wheat flour. The texture will be denser, but the fiber content will increase.
- Alternative Cooking Methods: While baking is traditional, you can also grill breadsticks for a smoky flavor. Brush with olive oil and grill over medium heat until golden.
- Dietary Adaptations:
* Gluten-Free: Use a high-quality gluten-free all-purpose flour blend (ensure it contains xanthan gum) and follow the recipe. The texture may be slightly different but still enjoyable.
* Dairy-Free: This recipe is naturally dairy-free unless you add Parmesan cheese. For a dairy-free cheesy flavor, nutritional yeast can be a good substitute.
Common Mistakes to Avoid
- Water too Hot/Cold: Water that is too hot will kill the yeast, and water that is too cold won’t activate it effectively, leading to a dense dough.
- Not Kneading Enough: Insufficient kneading results in a weak gluten structure and a less airy breadstick.
- Not Proofing Long Enough: Rushing the rise times will lead to a dense, flavorless result. Patience is key!
- Over-baking: Keep a close eye on the breadsticks. Over-baking can make them dry and hard.
Storage & Meal Prep Tips
Leftover Breadsticks store well and can be a fantastic meal prep staple.
- Storage: Store cooled breadsticks in an airtight container at room temperature for up to 3 days. For longer storage, freeze them.
- Freezing: Place cooled breadsticks in a single layer on a baking sheet and freeze until solid. Transfer to a freezer-safe bag or container and store for up to 2 months.
- Reheating:
* From Room Temperature: Reheat in a preheated oven at 350°F (175°C) for 5-7 minutes, or until warmed through and crispy.
* From Frozen: Bake directly from frozen at 350°F (175°C) for 10-15 minutes.
Conclusion
Mastering homemade Breadsticks is an incredibly rewarding culinary journey. From the simple satisfaction of working with dough to the intoxicating aroma filling your kitchen, this recipe promises delightful results. Whether you stick to the classic golden crunch or venture into the savory world of Garlic breadsticks, you’ll find that fresh is undeniably best. Don’t be afraid to experiment with flavors and enjoy the process of bringing these delicious creations to life. Give this recipe a try, share your triumphs, and let us know your favorite variations in the comments below!
FAQs
Q1: Can I make the dough ahead of time?
A1: Yes, you can prepare the dough up to the first proofing stage, then refrigerate it overnight. Let it come to room temperature for about 30-60 minutes before shaping and the second proof.
Q2: What if my yeast doesn’t foam?
A2: If your yeast mixture doesn’t become foamy after 10 minutes, your yeast might be old or the water wasn’t the right temperature. Discard and start again with fresh yeast and properly warmed water.
Q3: How do I get extra crispy breadsticks?
A3: For maximum crispiness, brush generously with olive oil before baking and ensure your oven is preheated to the correct temperature. You can also bake them slightly longer at a lower temperature (e.g., 375°F for 20-25 minutes).
Q4: Can I use a stand mixer to knead the dough?
A4: Absolutely! Use the dough hook attachment on medium-low speed for 5-7 minutes, or until the dough is smooth and elastic.
Q5: What are some good dipping sauces for breadsticks?
A5: Classic marinara sauce, warm cheese dip, olive oil with balsamic vinegar, or even a creamy pesto are all fantastic accompaniments.