Craving Restaurant-Quality Breadsticks at Home? Your Ultimate Guide Awaits!
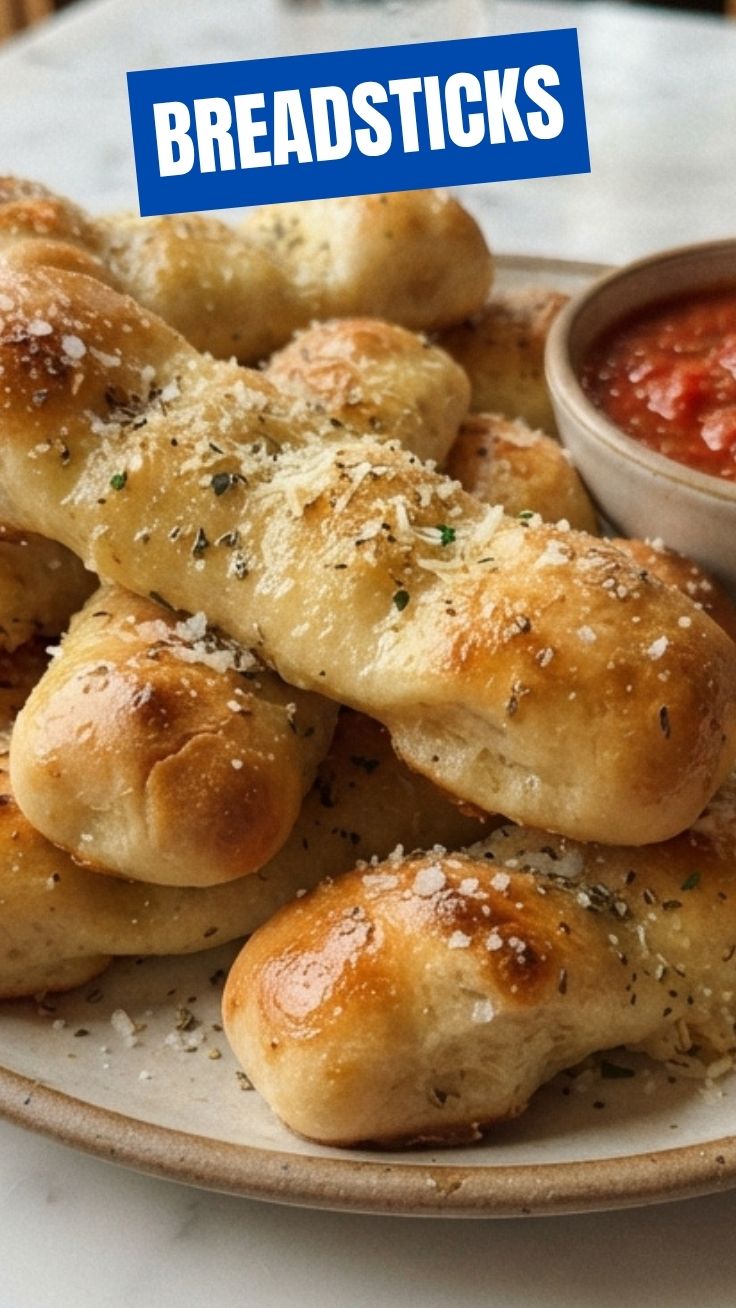
Imagine biting into a warm, chewy, and perfectly seasoned Breadsticks, fresh from your oven. The aroma fills your kitchen, promising a delightful culinary experience that far surpasses anything you can buy pre-made. Preparing homemade Breadsticks isn’t just about saving money; it’s about control over ingredients, customizing flavors, and the immense satisfaction of creating something delicious from scratch. And when those Garlic breadsticks emerge golden brown, infused with aromatic garlic and herbs, you’ll wonder why you ever settled for anything less. This comprehensive guide will empower you to master the art of homemade breadsticks, elevating your mealtime experience with a touch of warmth and flavor.
Ingredients & Kitchen Tools
- All-Purpose Flour (3 cups): The structural base for our breadsticks. You can substitute with bread flour for a chewier texture.
- Active Dry Yeast (2 ¼ teaspoons or 1 packet): The leavening agent that makes our breadsticks light and airy. Ensure it’s fresh for optimal rise.
- Warm Water (1 cup, 105-115°F / 40-46°C): Activates the yeast. Too hot will kill it, too cold won’t activate it.
- Granulated Sugar (1 tablespoon): Feeds the yeast, helping it to proof.
- Salt (1 teaspoon): Enhances flavor and controls yeast activity.
- Olive Oil (3 tablespoons + 1 tablespoon for brushing): Adds richness to the dough and helps with browning and flavor.
- Melted Butter (¼ cup): For brushing the finished breadsticks, adding richness and a golden sheen.
- Garlic Powder (1 teaspoon): Essential for that classic Garlic breadsticks flavor.
- Dried Oregano or Italian Seasoning (1 teaspoon): Adds aromatic depth.
- Parmesan Cheese (¼ cup, grated, optional): For an extra cheesy, savory topping.
- Large Mixing Bowl: For combining ingredients.
- Stand Mixer with Dough Hook (optional): Makes kneading easier, but hand kneading is perfectly fine.
- Measuring Cups & Spoons: For accurate ingredient portions.
- Baking Sheet(s): For baking the breadsticks.
- Parchment Paper or Silicone Baking Mat: Prevents sticking and makes cleanup a breeze.
- Pastry Brush: For applying butter and garlic topping.
Prep Time & Cooking Schedule
- Prep Time: 20 minutes
- Rising Time: 1 hour
- Cook Time: 12-15 minutes
- Total Time: Approximately 1 hour 35 minutes
Plan to start your breadsticks about 1.5 to 2 hours before you want to serve them. The rising time is crucial for achieving that fluffy, airy texture, so don’t rush it! While the dough rises, you can prepare the rest of your meal or simply relax.
Step-by-Step Instructions
1. Activate the Yeast: In your large mixing bowl, combine the warm water, sugar, and yeast. Stir gently and let it sit for 5-10 minutes until foamy. This indicates your yeast is active and ready to work its magic on our Breadsticks.
2. Combine Wet & Dry: Add 3 tablespoons of olive oil and salt to the activated yeast mixture. Gradually add the all-purpose flour, one cup at a time, mixing until a shaggy dough forms.
3. Knead the Dough: Turn the dough out onto a lightly floured surface. Knead for 7-10 minutes until it’s smooth and elastic. If using a stand mixer, use the dough hook on medium speed for 5-7 minutes.
4. First Rise: Lightly grease your mixing bowl with a little olive oil. Place the dough in the bowl, turning it once to coat. Cover the bowl with plastic wrap or a clean kitchen towel and let it rise in a warm place for 1 hour, or until doubled in size.
5. Shape the Breadsticks: Gently punch down the risen dough to release air. Turn it out onto a lightly floured surface and divide it into two equal pieces. Roll each piece into a rectangle (about 12×8 inches). Cut each rectangle into 1-inch wide strips. If you’re making Garlic breadsticks, you can twist these strips before placing them on the baking sheet for a more rustic look.
6. Second Rise: Line your baking sheet(s) with parchment paper. Arrange the breadsticks on the prepared sheet, leaving a little space between them. Cover loosely with plastic wrap or a towel and let them rise for another 20-30 minutes. Preheat your oven to 400°F (200°C) during this time.
7. Bake: Bake for 12-15 minutes, or until golden brown.
8. Garlic Butter Topping: While the breadsticks are baking, melt the ¼ cup of butter. Stir in the garlic powder and dried oregano/Italian seasoning.
9. Finish & Serve: As soon as the breadsticks come out of the oven, brush them generously with the garlic butter mixture. If desired, sprinkle with grated Parmesan cheese. Serve warm and enjoy!
Nutritional Benefits & Advantages
Homemade breadsticks offer several advantages over their store-bought counterparts. By making them yourself, you control the amount of sodium and unhealthy fats. They provide a good source of carbohydrates for energy. Using whole wheat flour (as a variation) can boost fiber content. Plus, the satisfaction of baking from scratch can be incredibly therapeutic!
Tips Variations & Cooking Advice
- Cheesy Breadsticks: Add ½ cup shredded mozzarella or cheddar cheese to the dough during the kneading stage for cheesy goodness.
- Herby Delight: Experiment with different dried herbs like rosemary, thyme, or a blend of Italian herbs for varied flavor profiles.
- Spicy Kick: Add a pinch of red pepper flakes to your garlic butter topping for a subtle heat.
- Gluten-Free: For a gluten-free version, use a high-quality gluten-free all-purpose flour blend (ensure it contains xanthan gum). Adjust water as needed, as GF flours can absorb liquids differently.
- Vegan Option: Use a plant-based butter alternative and omit the Parmesan cheese for a delicious vegan treat.
- Browning Perfection: For an even golden brown crust, you can lightly mist the breadsticks with water before baking.
Common Mistakes to Avoid
- Incorrect Water Temperature: Using water that’s too hot will kill the yeast, preventing your breadsticks from rising. Too cold, and the yeast won’t activate. Aim for 105-115°F (40-46°C).
- Not Kneading Enough: Insufficient kneading will result in dense, tough breadsticks. Kneading develops the gluten, which gives bread its structure and chewiness.
- Over-flouring: Adding too much flour can make the dough dry and difficult to work with, leading to dense breadsticks. Add flour gradually until the dough is just slightly tacky.
- Under-proofing: Rushing the rising time will result in less airy and flavorful breadsticks. Let the dough rise until it’s visibly doubled.
Storage & Meal Prep Tips
Leftover breadsticks can be stored in an airtight container at room temperature for up to 2-3 days. For longer storage, freeze them in a freezer-safe bag for up to 2 months. To reheat, thaw if frozen, then warm them in a preheated oven at 350°F (175°C) for 5-7 minutes, or until heated through and slightly crispy. A quick brush with butter before reheating will help restore their fresh-baked flavor and texture.
Conclusion
There’s nothing quite like the warmth and aroma of freshly baked Breadsticks. This recipe empowers you to create perfectly fluffy, flavorful, and customizable breadsticks that will impress everyone at your table. Whether you’re serving them alongside a hearty pasta dish or simply enjoying them as a standalone snack, these homemade Garlic breadsticks are sure to become a beloved staple in your kitchen. Don’t hesitate – give this recipe a try and share your delicious creations with us! We can’t wait to hear about your breadstick baking adventures.
FAQs
Q1: Can I make the dough ahead of time?
A1: Yes! You can prepare the dough up to the first rise, then punch it down, cover it tightly, and refrigerate for up to 24 hours. Let it come to room temperature for about 30 minutes before shaping and proceeding with the second rise.
Q2: My breadsticks are too dense. What went wrong?
A2: This usually indicates either insufficient kneading or under-proofing (not letting the dough rise long enough). Ensure you knead the dough until it’s smooth and elastic, and allow it to double in size during the first rise.
Q3: Can I use fresh garlic instead of garlic powder?
A3: Absolutely! Mince 2-3 cloves of fresh garlic and sauté it gently in the melted butter for a minute or two before brushing onto the breadsticks for a more pungent garlic flavor.
Q4: How can I make my breadsticks extra crispy?
A4: For crispier breadsticks, bake them for an additional 2-3 minutes or until they reach your desired level of crispness. You can also brush them with egg wash (one egg beaten with a tablespoon of water) before baking for a shinier, crispier crust.
Q5: What’s the best way to serve these breadsticks?
A5: These breadsticks are fantastic on their own, with marinara sauce for dipping, alongside pasta dishes, or as an accompaniment to soups and salads.