Master the Art of Blackened Chicken: Your Ultimate Guide
Ever wondered how restaurants achieve that perfectly seared, flavor-packed chicken with a delightful crust? The secret often lies in a technique called blackening, and mastering it at home is more rewarding than you think. This guide will walk you through creating an amazing Blackened Chicken that’s juicy on the inside and boasts a savory, smoky exterior, all thanks to the magic of custom Blackened Seasoning. Say goodbye to bland chicken and hello to a culinary adventure that’s both impressive and surprisingly simple to achieve in your own kitchen. Preparing this dish yourself not only guarantees fresh, high-quality ingredients but also allows you to customize the spice level to your exact liking.
Ingredients & Kitchen Tools
To embark on your blackening journey, you’ll need the following:
- 1.5 lbs Boneless, Skinless Chicken Breasts or Thighs: Chicken breasts offer a leaner option, while thighs provide more moisture and flavor. Cut into 1-inch thick cutlets for even cooking.
- 2-3 tbsp Unsalted Butter (preferably clarified butter or ghee): Provides a high smoke point crucial for blackening. Clarified butter prevents burning and adds a rich flavor.
* 1 tbsp Smoked Paprika: Adds depth and a beautiful reddish hue.
* 1 tsp Garlic Powder: Essential for savory notes.
* 1 tsp Onion Powder: Sweetens and enriches the savory profile.
* 1 tsp Dried Thyme: Earthy and aromatic.
* 1/2 tsp Dried Oregano: Pungent and slightly peppery.
* 1/2 tsp Cayenne Pepper (adjust to taste): Provides the signature heat.
* 1/2 tsp Black Pepper: Freshly ground for best flavor.
* 1/4 tsp Salt (or to taste): Balances the flavors.
- Cast Iron Skillet (essential): Its high heat retention is key to achieving the perfect crust. A well-seasoned skillet is non-stick.
- Tongs: For safely flipping the chicken without piercing it.
- Meat Thermometer: To ensure the chicken is cooked to a safe internal temperature (165°F / 74°C).
- Cutting Board & Knife: For preparing the chicken.
- Shallow Dish/Plate: For dredging the chicken in seasoning.
- Ventilation Fan: Strongly recommended, as blackening produces a good amount of smoke.
Prep Time & Cooking Schedule
- Prep Time: 15 minutes (includes making the seasoning and preparing the chicken).
Marinating Time (Optional): 30 minutes to 2 hours for deeper flavor penetration. Pat the chicken dry before* marinating with the seasoning, then refrigerate.
- Cook Time: 6-8 minutes per side, depending on thickness.
- Resting Time: 5 minutes. This is crucial for juicy results. Juices redistribute throughout the meat as it rests.
Plan to start your prep about 30-45 minutes before you want to serve, especially if you opt for a short marination. The actual cooking is surprisingly fast!
Step-by-Step Instructions
1. Prepare the Chicken: If using full breasts, slice them lengthwise to create uniform 1-inch thick cutlets. Pat them thoroughly dry with paper towels. This is a critical step for achieving a crispy crust.
2. Make the Blackened Seasoning: In a small bowl, combine smoked paprika, garlic powder, onion powder, dried thyme, dried oregano, cayenne pepper, black pepper, and salt. Mix well.
3. Season the Chicken: Lightly brush each side of the chicken cutlets with a thin layer of melted butter (or dip quickly in melted butter). Then, dredge each piece generously in the homemade Blackened Seasoning, ensuring an even coating. Press the seasoning gently onto the meat.
4. Heat the Skillet: Place your cast iron skillet over high heat. Let it get very hot – you should see wisps of smoke just starting to appear. Add 1-2 tablespoons of clarified butter or ghee to the hot pan. It should immediately sizzle vigorously.
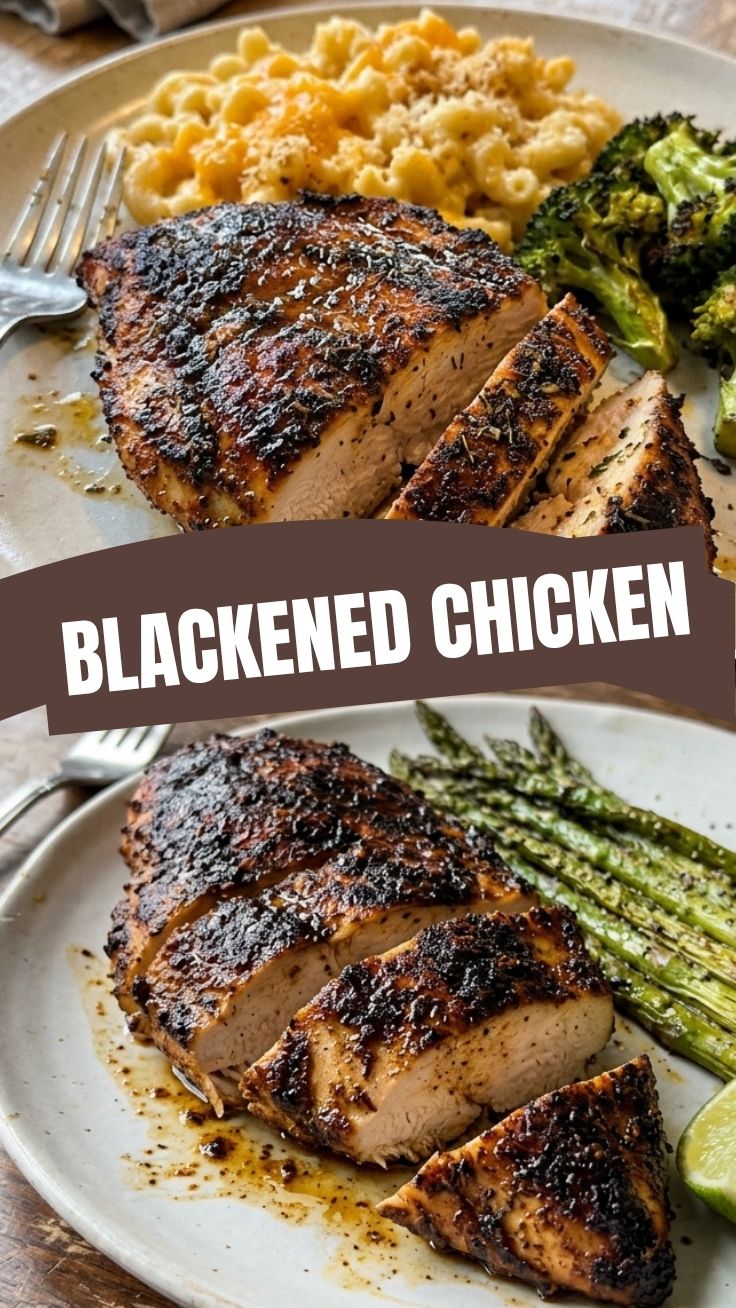
5. Cook the Blackened Chicken: Carefully place the seasoned chicken into the hot skillet. Do not overcrowd the pan; cook in batches if necessary. Cook for 2-4 minutes per side. You’re looking for a deep, dark brown, almost black crust. The pan will smoke, so ensure good ventilation.
6. Check for Doneness: Use a meat thermometer to ensure the thickest part of the chicken reaches an internal temperature of 165°F (74°C).
7. Rest and Serve: Transfer the cooked Blackened Chicken to a cutting board and let it rest for 5 minutes before slicing. This allows the juices to redistribute, yielding a more tender and flavorful result.
Nutritional Benefits & Advantages
Blackened Chicken is a fantastic source of lean protein, essential for muscle repair and satiety. The use of spices in the Blackened Seasoning, like paprika, garlic, and cayenne, offers more than just flavor. Paprika is rich in antioxidants, while garlic and onion possess anti-inflammatory properties. Cayenne pepper contains capsaicin, which can boost metabolism. This cooking method, which uses minimal oil, allows the natural flavors of the chicken and spices to shine, making it a flavorful yet healthy meal option.
Tips, Variations & Cooking Advice
- Spice Level: Adjust the cayenne pepper in the Blackened Seasoning to your preference. For extra heat, add a pinch of dried chili flakes. For milder flavor, reduce the cayenne or omit it.
- Butter vs. Oil: While clarified butter is traditional, you can use a high smoke point oil like avocado oil or grapeseed oil. Regular butter will burn quickly.
- Alternative Meats: This blackening technique works wonders with fish (like redfish or salmon), shrimp, or pork tenderloin. Adjust cooking times accordingly.
- Smoky Flavor Boost: A tiny pinch of liquid smoke can be added to the seasoning mix for an even more intense smoky flavor, but use sparingly.
- Serving Suggestions: Serve with a fresh coleslaw, rice, roasted vegetables, or a squeeze of fresh lime juice for brightness.
Common Mistakes to Avoid
- Not Drying the Chicken: Wet chicken will steam, not sear, preventing that delicious crust from forming.
- Overcrowding the Pan: Too much chicken at once lowers the pan’s temperature, leading to steaming instead of blackening. Cook in batches.
- Not Heating the Skillet Enough: A lukewarm pan won’t achieve the crucial high-heat sear needed for blackening.
- Skipping the Rest Time: This is a common error that results in dry chicken. A quick rest makes all the difference.
- Poor Ventilation: Blackening produces significant smoke. Open windows and use your exhaust fan!
Storage & Meal Prep Tips
Cooked Blackened Chicken can be stored in an airtight container in the refrigerator for up to 3-4 days. It’s excellent for meal prep! For longer storage, you can freeze it for up to 2-3 months. Thaw overnight in the refrigerator. To reheat, gently warm in a skillet over medium-low heat or in a microwave. Be careful not to overcook, as this can dry out the chicken. It’s also delicious cold or at room temperature in salads or wraps.
Conclusion
Mastering the art of Blackened Chicken is a culinary game-changer, bringing restaurant-quality flavor right into your kitchen. With the perfect blend of spices in our custom Blackened Seasoning and the right technique, you’ll consistently create a dish that’s both healthy and incredibly satisfying. We encourage you to try this recipe and experience the rich, smoky, and spicy flavors that make this chicken a true standout. Share your creations in the comments below – we’d love to see them!
FAQs
Q1: Can I make Blackened Seasoning in advance?
A1: Absolutely! Mix a larger batch of the seasoning and store it in an airtight container in a cool, dark place for up to 6 months.
Q2: What if I don’t have a cast iron skillet?
A2: While a cast iron skillet is ideal, a heavy-bottomed stainless steel skillet can be used, but it might not retain heat as effectively, potentially requiring slightly longer cooking times or higher heat.
Q3: My chicken looks burnt, not blackened. What went wrong?
A3: If it’s truly burnt and acrid, your heat might have been too high or the butter burned. Ensure you’re using clarified butter or high-smoke-point oil, and watch the chicken closely. Blackening results in a very dark, but flavorful, crust, not a charcoal-like burn.
Q4: Can I use bone-in chicken?
A4: Yes, but bone-in chicken will take longer to cook. We recommend boneless for this recipe for quicker, more even cooking. If using bone-in, monitor internal temperature carefully.
Q5: What’s the best way to reduce the amount of smoke?
A5: Good ventilation is key. Turn on your exhaust fan to its highest setting, open windows, and consider using a large fan to direct smoke outdoors. Cooking smaller batches can also help manage smoke.