Master the Art of Homemade Banana Bread: A Definitive Guide
Craving that comforting aroma of freshly baked goods wafting through your kitchen? Ever wondered how to elevate a simple Banana Bread into an extraordinary culinary experience? Preparing this timeless treat at home isn’t just about baking; it’s about crafting warmth, nostalgia, and a genuinely delicious snack that truly outperforms anything store-bought. Forget complicated steps; we’re breaking down the ideal banana bread recipe to ensure your success, delivering a moist, flavorful loaf every single time. This guide is your passport to mastering the art of homemade banana bread.
Ingredients & Kitchen Tools
Gathering your mise en place is the first step to baking success. Here’s what you’ll need:
- Ripe Bananas (3-4 medium): The browner and spottier, the better! These provide natural sweetness and moisture.
- All-Purpose Flour (1 ½ cups): The structural backbone of our bread.
- Granulated Sugar (½ cup): Adds sweetness and aids in browning. Can be adjusted to taste.
- Brown Sugar (¼ cup packed): Contributes to moisture and a richer, caramel-like flavor.
- Large Egg (1): A binder that adds richness and helps with leavening.
- Unsalted Butter (½ cup / 1 stick, melted): Adds tenderness and flavor. Salted butter can be used, just reduce added salt slightly.
- Milk (¼ cup): Any milk (dairy or non-dairy) works to adjust consistency.
- Baking Soda (1 teaspoon): A leavening agent that helps the bread rise and gives it a tender crumb.
- Salt (½ teaspoon): Balances sweetness and enhances overall flavor.
- Vanilla Extract (1 teaspoon): A flavor enhancer that complements the banana.
- Optional Add-ins: Chocolate chips, walnuts, pecans, cinnamon, nutmeg (½ cup total) – customize to your heart’s content!
Kitchen Tools:
- Large Mixing Bowl: For combining wet and dry ingredients.
- Whisk: For dry ingredients.
- Spatula or Wooden Spoon: For mixing the batter.
- Fork or Potato Masher: For mashing bananas.
- Loaf Pan (8.5 x 4.5 inches or 9 x 5 inches): The essential baking vessel. Grease and flour or line with parchment paper.
- Measuring Cups & Spoons: For accurate ingredient portions.
Prep Time & Cooking Schedule
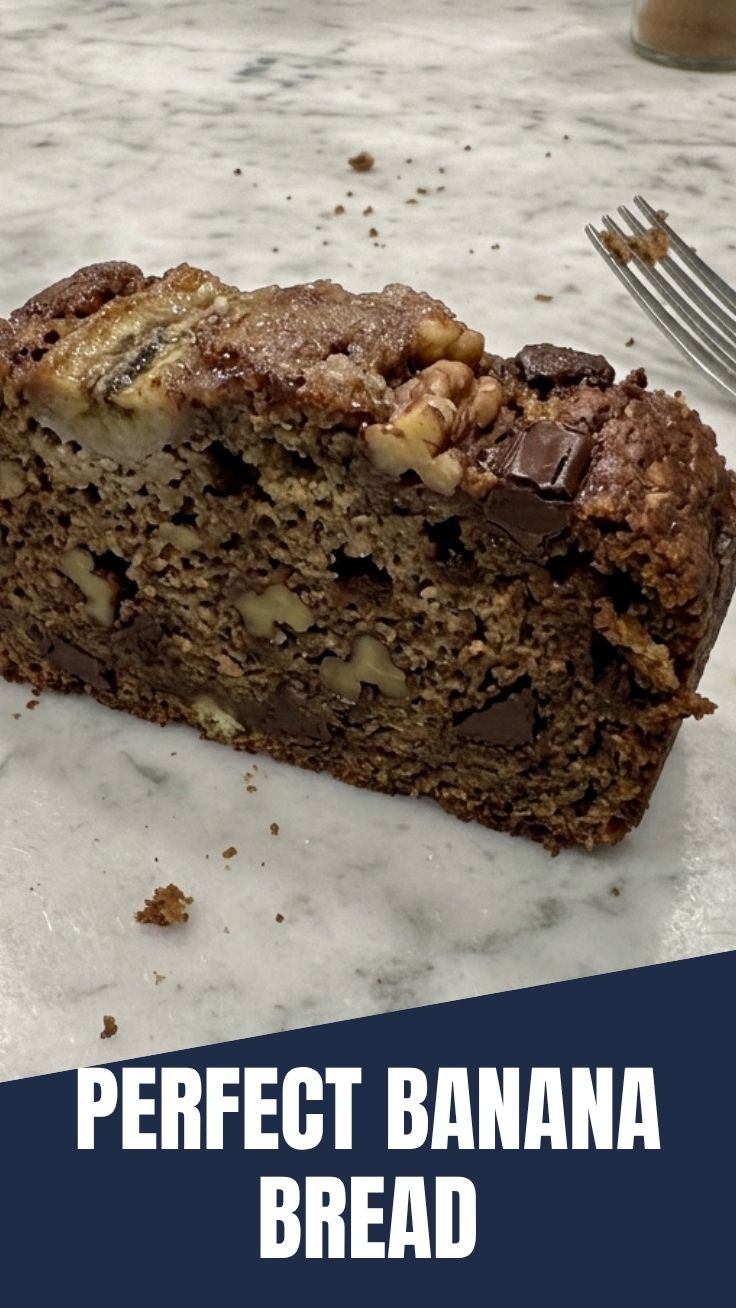
Achieving perfection requires a bit of planning. Allocate your time effectively for a stress-free baking experience.
- Prep Time: 15 minutes
- Cook Time: 55-65 minutes
- Resting Time: 10-15 minutes (after baking, before slicing)
This schedule allows you to have warm bread ready in just over an hour and a half, making it perfect for a weekend breakfast or an afternoon snack.
Step-by-Step Instructions
Follow these precise steps for a perfectly moist and flavorful loaf:
1. Preheat & Prepare: Preheat your oven to 350°F (175°C). Grease and flour your loaf pan, or line it with parchment paper, leaving an overhang on the sides for easy removal.
2. Mash Bananas: In a large bowl, mash your ripe bananas with a fork or potato masher until mostly smooth with a few small lumps remaining. This texture adds character.
3. Combine Wet Ingredients: Add the melted butter, both sugars, egg, milk, and vanilla extract to the mashed bananas. Whisk until well combined. The mixture will be slightly lumpy.
4. Combine Dry Ingredients: In a separate medium bowl, whisk together the flour, baking soda, and salt. Ensure these are thoroughly mixed to distribute the leavening agents evenly.
5. Combine Wet and Dry: Pour the dry ingredients into the wet ingredients. Mix gently with a spatula or wooden spoon just until combined. Overmixing will develop the gluten, leading to a tough bread. A few streaks of flour are acceptable.
6. Fold in Add-ins (Optional): If using chocolate chips, nuts, or spices, gently fold them into the batter now.
7. Bake: Pour the batter into your prepared loaf pan and spread evenly. Bake for 55-65 minutes, or until a wooden skewer or toothpick inserted into the center comes out clean. If the top browns too quickly, tent loosely with foil.
8. Cool: Once baked, remove the loaf from the oven and let it cool in the pan for 10-15 minutes. This allows it to set and makes it easier to remove without breaking.
9. Serve: Carefully lift the Banana Bread out of the pan and transfer it to a wire rack to cool completely before slicing. Enjoy this delightful banana bread recipe warm or at room temperature.
Nutritional Benefits & Advantages
Beyond its delicious taste, banana bread offers some surprising benefits. Bananas are an excellent source of potassium, which is vital for heart health and muscle function. They also provide dietary fiber, aiding in digestion and promoting satiety. When made with whole wheat flour or reduced sugar, banana bread can be a healthier alternative to many processed baked goods, delivering sustained energy without a sugar crash. It’s a fantastic way to utilize overripe fruit, reducing food waste while making a treat rich in natural sweetness and nutrients.
Tips, Variations & Cooking Advice
- Brown Butter: For an extra layer of nutty flavor, brown your butter before adding it to the wet ingredients.
- Spices: A pinch of cinnamon, nutmeg, or allspice can significantly enhance the flavor profile.
- Fruit & Nut Swaps: Experiment with dried cranberries, blueberries, shredded coconut, or different nuts like pecans or almonds.
- Gluten-Free: Substitute the all-purpose flour with a 1:1 gluten-free baking blend.
- Dairy-Free: Use a non-dairy milk alternative (almond, soy, oat) and swap butter for an equal amount of melted coconut oil or a dairy-free butter substitute.
- Muffin Conversion: This recipe can easily be adapted for muffins. Reduce baking time to 20-25 minutes.
Common Mistakes to Avoid
- Overmixing: The number one culprit for dense, tough banana bread. Mix only until the dry ingredients are just incorporated.
- Under-ripe Bananas: Green or yellow bananas won’t provide the necessary sweetness or moisture, resulting in a bland loaf. Wait for those brown spots!
- Not Greasing the Pan Properly: A sticky situation you want to avoid. Ensure the pan is thoroughly greased and floured, or use parchment paper.
- Opening Oven Door Too Soon: This can cause the bread to sink in the middle. Resist the urge until at least 45 minutes into baking.
Storage & Meal Prep Tips
Homemade banana bread stores beautifully.
- Countertop: Store at room temperature in an airtight container for up to 3-4 days. This helps maintain moisture.
- Refrigeration: While not strictly necessary for short-term storage, refrigeration can extend freshness and is recommended in warmer climates. Store in an airtight container for up to a week.
- Freezing: Banana bread freezes exceptionally well. Wrap individual slices or the entire loaf tightly in plastic wrap, then an additional layer of aluminum foil. It can be frozen for up to 3 months. Thaw at room temperature or gently reheat in the microwave or oven.
Conclusion
Baking your own Banana Bread is a rewarding experience, transforming simple ingredients into a comforting and wholesome delight. With this comprehensive guide, you now possess all the knowledge to create an unforgettable loaf. This isn’t just any banana bread recipe; it’s a foundation for countless delicious memories. So go ahead, preheat that oven, embrace the aroma, and share the joy of homemade goodness with those you love. Don’t forget to tell us about your baking triumphs in the comments below!
FAQs
Q1: Can I use frozen bananas for this recipe?
A1: Yes! Thaw them completely and drain any excess liquid before mashing. They will be very soft and often more flavorful.
Q2: My banana bread is dense. What went wrong?
A2: Most likely, you overmixed the batter. Mix only until the ingredients are just combined.
Q3: How do I know when my banana bread is fully baked?
A3: Insert a wooden skewer or toothpick into the center of the loaf. It should come out clean, with no wet batter clinging to it.
Q4: Can I reduce the sugar in this recipe?
A4: Yes, you can subtly reduce the sugar, especially if your bananas are very ripe. Start by reducing by ¼ cup and adjust to your preference in future batches.
Q5: What’s the best way to reheat frozen banana bread?
A5: For individual slices, microwave for 20-30 seconds. For a whole loaf, wrap in foil and reheat in an oven at 300°F (150°C) for about 15-20 minutes, or until warmed through.