The Secret to Perfectly Juicy Baked Chicken Thighs Every Time?
Ever wonder how some home cooks manage to churn out consistently succulent, flavor-packed meals with minimal fuss? The answer often lies in mastering fundamental dishes. And few recipes offer the sheer versatility and ease of Baked Chicken Thighs. This isn’t just another weeknight staple; it’s a culinary cornerstone that, once perfected, opens up a world of delicious possibilities for all your chicken dinner recipes. Whether you’re a seasoned chef or a kitchen novice, understanding the nuances of baking chicken thighs at home is incredibly valuable. It’s a dish that embodies comfort, economy, and incredible flavor, proving that simple ingredients can yield extraordinary results.
Ingredients & Kitchen Tools
To embark on your journey to perfectly baked chicken, gather these essentials:
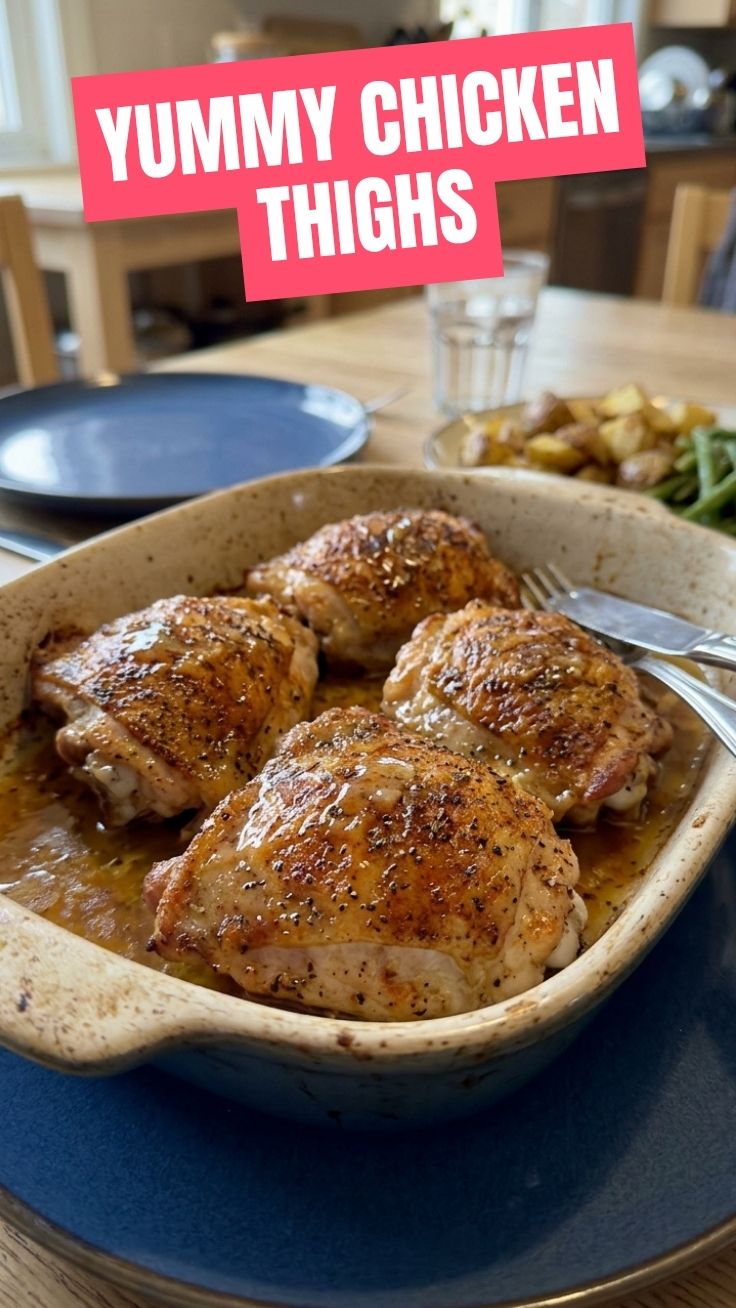
- Bone-in, Skin-on Chicken Thighs (4-6): These offer the best flavor and juiciness. Skin crisps up beautifully, and bones contribute to moisture.
- Olive Oil (2 tbsp): A healthy fat crucial for browning and flavor adhesion. You can substitute with avocado oil.
- Smoked Paprika (1 tsp): Adds a rich, savory depth and beautiful color.
- Garlic Powder (1 tsp): A foundational flavor enhancer. Fresh minced garlic (2 cloves) works too.
- Onion Powder (1/2 tsp): Complements garlic, adding an umami layer.
- Dried Thyme (1/2 tsp): A classic poultry herb, lending an earthy aroma.
- Salt (1 tsp, or to taste): Essential for seasoning and bringing out flavors. Use kosher salt for better control.
- Black Pepper (1/2 tsp, freshly ground): Adds a pungent kick.
- Optional – Lemon Wedges: For serving, a squeeze of fresh lemon brightens the flavors.
- Baking Sheet: A sturdy sheet pan is essential for even heat distribution.
- Wire Rack (optional, but recommended): Elevates chicken for crispier skin all around.
- Meat Thermometer: Crucial for ensuring doneness and food safety.
- Mixing Bowl: For generously seasoning your chicken.
Prep Time & Cooking Schedule
- Prep Time: 10-15 minutes (active seasoning)
- Cook Time: 30-40 minutes
- Resting Time: 5-10 minutes (crucial for juicy results)
Plan to begin your preparation about an hour before you intend to serve. This allows ample time for seasoning, thorough cooking, and the all-important resting period that locks in those delectable juices.
Step-by-Step Instructions
1. Preheat & Prepare: Preheat your oven to 400°F (200°C). If using, place a wire rack on a baking sheet. This setup promotes superior air circulation for incredibly crispy skin.
2. Pat Dry: Using paper towels, thoroughly pat the chicken thighs dry. This is a critical step for achieving wonderfully crispy skin. Moisture inhibits browning.
3. Season Generously: In a medium-sized bowl, combine the olive oil, smoked paprika, garlic powder, onion powder, dried thyme, salt, and black pepper. Add the Baked Chicken Thighs to the bowl and toss them until each piece is evenly coated in the seasoning mixture. Don’t be shy; ensure every nook and cranny is flavored.
4. Arrange for Success: Place the seasoned chicken thighs, skin-side up, on the prepared baking sheet with the wire rack (if using). Ensure there’s adequate space between each thigh for even cooking and browning. This method helps elevate your chicken dinner recipes to a new level.
5. Bake to Perfection: Transfer the baking sheet to the preheated oven and bake for 30-40 minutes. The cooking time will vary depending on the size of your thighs and your oven.
6. Check for Doneness: The most accurate way to determine doneness is by using a meat thermometer. Insert it into the thickest part of the thigh, avoiding the bone. The internal temperature should register 175°F (80°C).
7. Rest & Serve: Once cooked, remove the chicken from the oven and let it rest on the baking sheet for 5-10 minutes before serving. This allows the juices to redistribute throughout the meat, ensuring maximum tenderness and flavor.
Nutritional Benefits & Advantages
Chicken thighs are a fantastic source of lean protein, essential for muscle repair and growth. Being a darker meat, they contain slightly more iron and zinc than chicken breast. The skin, while often seen as indulgent, actually provides healthy monounsaturated fats. This recipe promotes nutrient retention through baking, avoiding excessive oils from frying. It’s a naturally gluten-free and dairy-free dish, fitting a variety of dietary needs.
Tips, Variations & Cooking Advice
- Spice It Up: Add a pinch of cayenne pepper or red pepper flakes for a spicier kick.
- Herbal Infusion: Experiment with fresh herbs like rosemary or sage for a more aromatic profile.
- Citrus Zest: Include lemon or orange zest in your seasoning blend for a bright, vibrant flavor.
- Marinade Magic: For deeper flavor penetration, let the seasoned thighs marinate in the refrigerator for at least 30 minutes, or even overnight.
- Veggie Medley: Add chopped root vegetables (potatoes, carrots, onions) to the baking sheet during the last 20-25 minutes of cooking for a complete sheet-pan meal. Ensure the veggies are coated in a little oil and seasoning too.
- Crispier Skin Hack: For extra-crispy skin, broil for the last 2-3 minutes, watching carefully to prevent burning.
Common Mistakes to Avoid
- Not Patting Dry: This is the number one culprit for soggy skin. Always pat dry!
- Overcrowding the Pan: Too many thighs on one sheet leads to steaming, not roasting, resulting in less crispy skin and uneven cooking.
- Skipping the Rest: Cutting into the chicken too soon lets all the delicious juices escape. Patience is a virtue here.
- Guessing Doneness: Relying solely on visual cues can lead to undercooked or overcooked chicken. A meat thermometer is your best friend.
- Under-Seasoning: Chicken thighs can handle a good amount of seasoning. Don’t be afraid to be generous.
Storage & Meal Prep Tips
Leftover Baked Chicken Thighs store beautifully. Once cooled to room temperature (within 2 hours of cooking), place them in an airtight container in the refrigerator for up to 3-4 days. For longer storage, freeze individual thighs in freezer-safe bags or containers for up to 3 months. To reheat, thaw overnight if frozen, then warm gently in the oven at 300°F (150°C) until heated through to maintain moisture, or slice and microwave for quicker reheating (though this may compromise crispiness). They’re excellent in salads, sandwiches, or even shredded for tacos and casseroles, making delicious chicken dinner recipes easy to prepare.
Conclusion
Mastering the art of Baked Chicken Thighs is a game-changer for any home cook. This recipe provides a simple yet incredibly satisfying path to consistently juicy, flavorful meat with irresistibly crispy skin. It’s a fundamental technique that elevates not just this dish, but countless other chicken dinner recipes in your repertoire. We encourage you to try this straightforward method and experience the joy of perfectly cooked chicken. Share your results in the comments below – we’d love to hear your experiences and any personalized twists you add!
FAQs
Q1: Can I use boneless, skinless chicken thighs?
A1: Yes, but the cooking time will be shorter (around 20-25 minutes), and the meat may be slightly less juicy without the bone and skin. Adjust seasoning and monitor carefully.
Q2: How do I get the skin extra crispy?
A2: Patting the chicken very dry, using a wire rack, and baking at a higher temperature (like 425°F/220°C for the last 10 minutes) can enhance crispiness. A quick broil at the very end can also help, but watch it closely.
Q3: What side dishes pair well with baked chicken thighs?
A3: Roasted vegetables (broccoli, asparagus, root veggies), mashed potatoes, rice pilaf, a simple green salad, or quinoa are all excellent accompaniments.
Q4: Can I prepare this recipe ahead of time for meal prep?
A4: Absolutely! Cooked chicken thighs are perfect for meal prepping. You can store them in the fridge for up to 3-4 days and reheat as needed, making quick meals a breeze.
Q5: My chicken thighs are cooking unevenly. What went wrong?
A5: This often happens if the thighs are not of similar size, or if the oven has hot spots. Try to use thighs that are roughly the same size and rotate the baking sheet halfway through cooking for more even results. Using a wire rack also helps with airflow.