Unveiling the Golden Secret: Your Ultimate Guide to Homemade Dessert Perfection
Ever wondered how to capture that quintessential taste of autumn in a dessert that’s both comforting and exquisitely flavorful? There’s something undeniably magical about a homemade treat, especially when it comes to classic American desserts. Beyond the delightful aroma filling your kitchen, preparing dishes from scratch offers a profound sense of accomplishment and allows you to control every ingredient, ensuring a healthier and more personalized experience. Today, we’re diving deep into the art of creating a truly unforgettable Apple Crisp, a dessert that often stands shoulder to shoulder with the beloved Apple pie in the hearts of dessert enthusiasts. Get ready to master this timeless classic!
Ingredients & Kitchen Tools
Crafting the perfect crisp requires a thoughtful selection of ingredients and the right culinary arsenal.
- For the Filling:
* 6-8 medium apples: (e.g., Honeycrisp, Granny Smith, Fuji) – A mix offers a balanced flavor and texture. Granny Smith provides tartness, while Honeycrisp adds sweetness and crispness.
* ½ cup granulated sugar: For sweetness, adjust to your apple’s natural sugar content.
* ¼ cup all-purpose flour: Thickens the apple juices. Can substitute with cornstarch for a gluten-free option.
* 1 tsp ground cinnamon: Classic spice that complements apples beautifully.
* ¼ tsp ground nutmeg: Adds warmth and depth.
* 2 tbsp fresh lemon juice: Prevents apples from browning and brightens the flavors.
* Pinch of salt: Enhances all the other flavors.
- For the Topping:
* 1 cup old-fashioned rolled oats: Provides the characteristic crisp texture. Avoid instant oats.
* ½ cup all-purpose flour: Binds the topping ingredients.
* ½ cup packed light brown sugar: Adds a rich, caramel-like sweetness.
* ½ tsp ground cinnamon: Reinforces the apple filling’s spice profile.
* ¼ tsp pinch of salt: Balances the sweetness.
* ½ cup (1 stick) unsalted butter: Cold and cut into small pieces; essential for that crumbly texture.
- Kitchen Tools:
* 9×13 inch baking dish: Or a similar-sized oven-safe dish.
* Large mixing bowls: Two are recommended, one for the filling, one for the topping.
* Pastry blender or your fingertips: For incorporating butter into the topping.
* Vegetable peeler and corer: For efficient apple preparation.
* Whisk or spoon: For mixing ingredients.
Prep Time & Cooking Schedule
- Prep Time: 20-25 minutes
- Cook Time: 45-55 minutes
- Resting Time: 15-20 minutes (crucial for setting the juices)
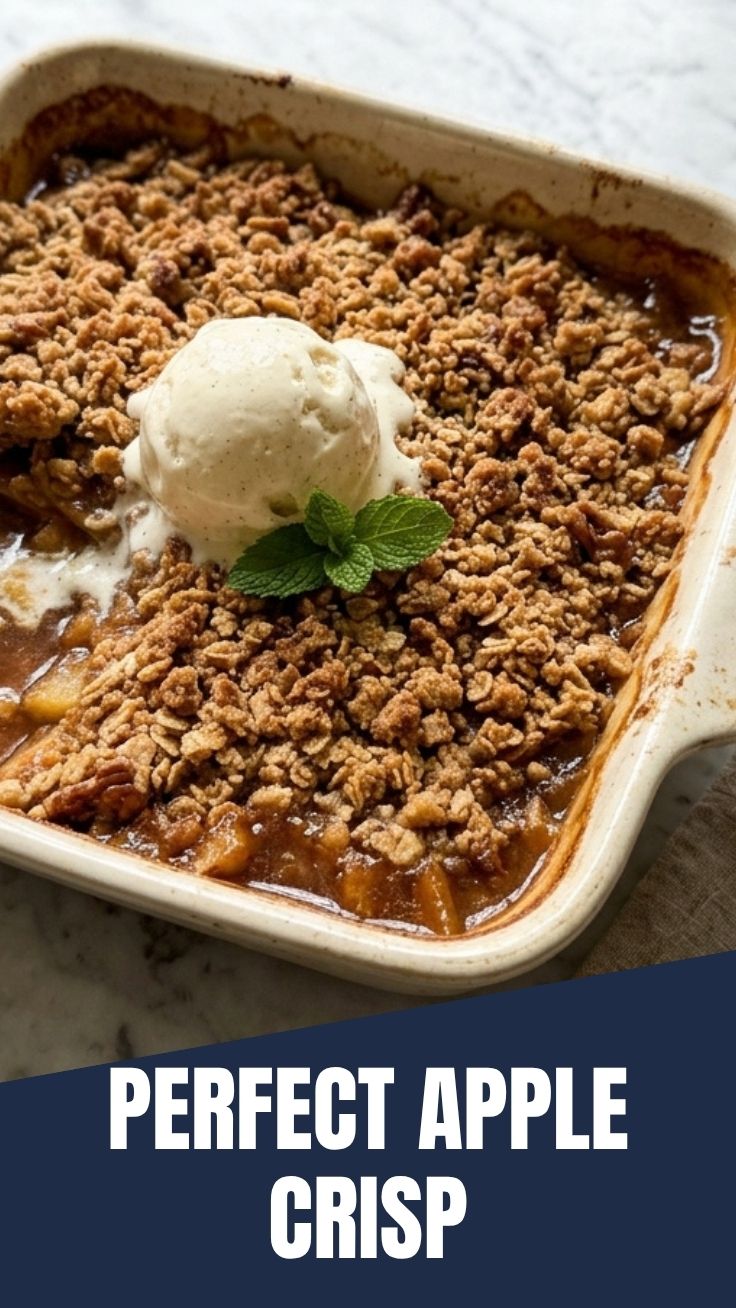
This recipe is perfect for an afternoon baking session, allowing you to enjoy the aromas as it bakes and letting it cool just enough before serving warm with a scoop of vanilla ice cream. Start slicing those apples while your oven preheats!
Step-by-Step Instructions
1. Preheat Oven & Prepare Apples: Preheat your oven to 375°F (190°C). Peel, core, and slice your apples into ½-inch thick pieces. Place them in a large mixing bowl.
2. Combine Filling Ingredients: To the sliced apples, add the granulated sugar, ¼ cup all-purpose flour, 1 tsp ground cinnamon, nutmeg, lemon juice, and a pinch of salt. Toss gently until the apples are evenly coated. Pour the mixture into your prepared 9×13 inch baking dish. This perfectly seasoned fruit base is what differentiates a good Apple Crisp from a truly spectacular one, offering a delightful counterpoint to the more elaborate crust of a traditional Apple pie.
3. Prepare the Topping: In a separate medium-sized bowl, combine the rolled oats, ½ cup all-purpose flour, brown sugar, ½ tsp ground cinnamon, and ¼ tsp salt. Add the cold, diced butter. Using a pastry blender or your fingertips, work the butter into the dry ingredients until coarse crumbs form. Avoid overmixing to maintain that desirable crumbly texture.
4. Assemble and Bake: Evenly sprinkle the oat topping sugar mixture over the apple filling in the baking dish. Bake for 45-55 minutes, or until the topping is golden brown and the apple filling is bubbling. The apples should be tender when pierced with a fork.
5. Cool and Serve: Remove from the oven and let it cool on a wire rack for at least 15-20 minutes. This allows the juices to thicken and prevents a runny crisp.
Nutritional Benefits & Advantages
Apples are a powerhouse of nutrition, rich in dietary fiber, which aids digestion and promotes satiety. They also provide essential vitamins like Vitamin C and various antioxidants that contribute to overall health. Compared to some richer desserts, an apple crisp offers a relatively wholesome option, especially when prepared with less sugar and whole grain oats. The oats in the topping add soluble fiber, beneficial for heart health.
Tips, Variations & Cooking Advice
- Spice It Up: Experiment with a pinch of ground ginger or cardamom for a different flavor profile.
- Nutty Crunch: Add ½ cup of chopped pecans or walnuts to the topping for extra texture and flavor.
- Gluten-Free: Use certified gluten-free oats and substitute the flour in both the filling and topping with a gluten-free all-purpose flour blend.
- Dairy-Free: Substitute butter with a plant-based butter alternative.
- Smaller Portions: Halve the recipe and bake in an 8×8 inch baking dish.
Common Mistakes to Avoid
- Overcooking the Apples: This results in mushy apples. They should be tender but still hold their shape.
- Undercooking the Topping: A pale, soft topping misses the “crisp” in apple crisp. Ensure it’s golden brown.
- Not Resting: Rushing to serve it hot from the oven can lead to a watery filling. Patience is key!
- Using Instant Oats: Instant oats can become mushy and won’t provide the desired texture. Stick to old-fashioned rolled oats.
Storage & Meal Prep Tips
Leftover apple crisp can be covered tightly with plastic wrap or aluminum foil and stored in the refrigerator for up to 3-4 days. To reheat, warm individual portions in the microwave or place the entire dish in a preheated oven (350°F/175°C) for 15-20 minutes, or until warmed through and the topping is crisp again. For longer storage, freeze cooled portions in an airtight container for up to 3 months. Thaw overnight in the refrigerator before reheating.
Conclusion
Mastering the homemade Apple Crisp is a delightful journey that promises a warm, inviting aroma and an even more satisfying taste. This recipe, with its tender spiced apples beneath a golden, crunchy oat topping, truly embodies comfort food at its finest. While the intricate layers of a classic Apple pie have their place, the simplicity and rustic charm of a crisp make it an equally beloved, easy-to-achieve dessert perfection. Don’t hesitate – gather your ingredients and try this recipe today! Share your results in the comments below, or tell us your favorite apple variety for crisp-making.
FAQs
1. Can I use frozen apples for this recipe?
Yes, but you’ll need to thaw them first and drain any excess liquid to prevent a watery crisp.
2. How do I know when the apples are perfectly cooked?
The apples should be tender when pierced with a fork, but not mushy. The filling should also be bubbling vigorously around the edges.
3. My topping isn’t getting crispy, what went wrong?
Ensure your butter was cold and cut into small pieces, and avoid overmixing the topping. Also, make sure your oven temperature is accurate, and don’t cover the crisp while baking.
4. Can I make this ahead of time?
You can assemble the crisp a day in advance, cover it, and refrigerate it. Add an extra 10-15 minutes to the baking time if baking a cold crisp.
5. What’s the best way to serve apple crisp?
Warm, with a scoop of vanilla bean ice cream, a dollop of whipped cream, or a drizzle of caramel sauce for an extra touch of indulgence.