Unlocking the Sweet Secrets of Homemade Blackberry Jam
Have you ever savored the vibrant burst of summer captured in a jar? There’s an undeniable magic in Blackberry Jam (Homemade), a culinary endeavor that transcends mere cooking to become an act of artisanal creation. Preparing this delightful spread from scratch isn’t just about crafting a delicious condiment; it’s about connecting with nature’s bounty, controlling the ingredients that nourish your family, and experiencing the profound satisfaction of a truly homemade product. Beyond the exquisite taste, you gain a deeper appreciation for the journey from vine to table. For those seeking an authentic and deeply flavorful Blackberry preserves recipe, this guide is your definitive starting point.
Ingredients & Kitchen Tools
Gathering your provisions is the first step to crafting a magnificent batch of Blackberry Jam (Homemade). Here’s what you’ll need:
- Fresh Blackberries (4 cups): Ripe, plump, and free from blemishes. Frozen blackberries can be used, but fresh offers superior flavor.
- Granulated Sugar (4 cups): The essential sweetener and preservative. Adjust to taste, but for proper set, this ratio is crucial.
- Lemon Juice (1/4 cup): Freshly squeezed is best. The pectin in lemon juice helps the jam set, and its acidity brightens the flavor.
- Pectin (1 packet, 1.75 oz/49g): Optional, but highly recommended for a consistent set. Look for “low-sugar” or “no-sugar” pectin if you wish to reduce the sugar content, adjusting the recipe accordingly.
- Large Stainless Steel Pot or Dutch Oven: Non-reactive material prevents metallic taste.
- Potato Masher or Fork: For crushing berries.
- Long-Handled Spoon or Ladle: For stirring and transferring hot jam.
- Canning Jars (Half-pint or pint, 4-5): Sterilized. Essential for safe preservation.
- Lids and Bands: New lids are recommended for each canning session.
- Canning Funnel: Makes filling jars easier and tidier.
- Jar Lifter: For safely handling hot jars.
- Clean Kitchen Towels: For wiping jar rims.
- Water Bath Canner (Optional, but recommended for long-term storage): Ensures proper sealing.
Prep Time & Cooking Schedule
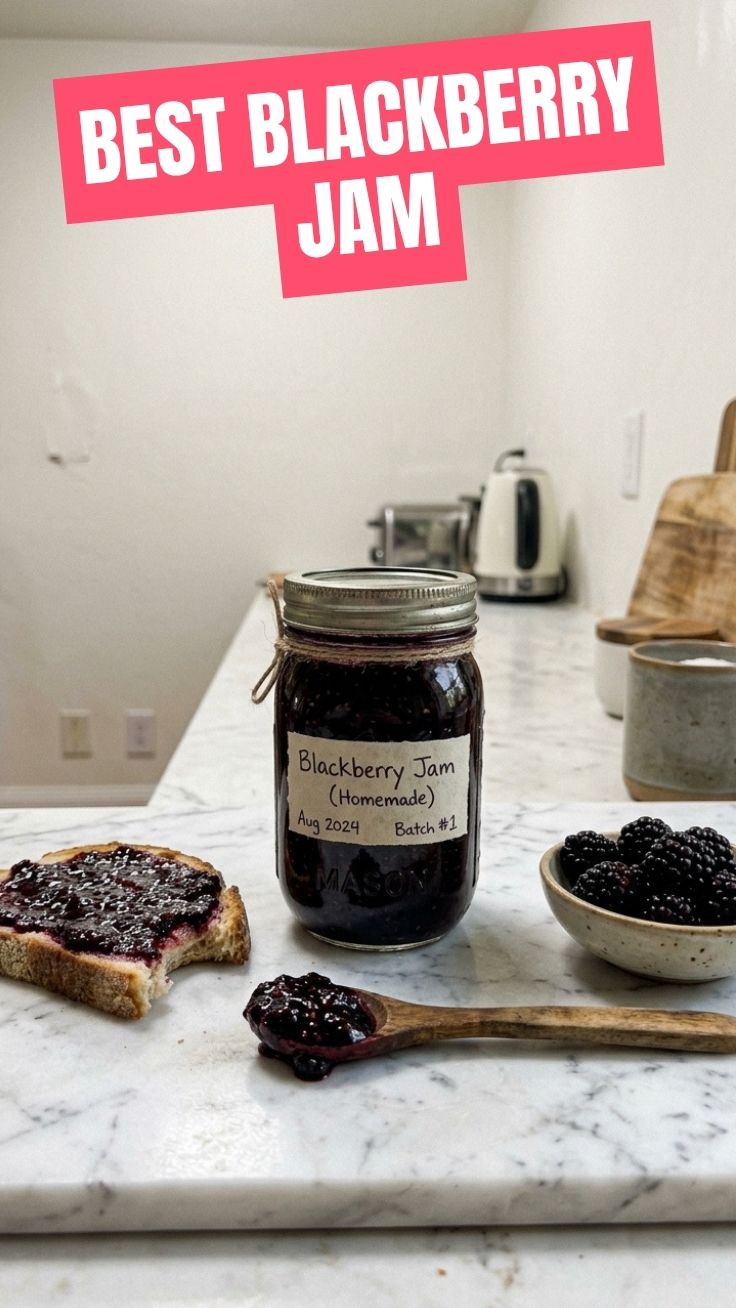
Crafting your jam requires a focused effort, but the schedule is straightforward.
- Prep Time: 20-30 minutes (Washing berries, sterilizing jars, measuring ingredients).
- Cook Time: 30-45 minutes (Active cooking and stirring).
- Water Bath Processing Time (if canning): 10 minutes.
- Resting/Setting Time: 12-24 hours.
Plan your day to allow for uninterrupted cooking time. The delicious aroma will fill your kitchen, making the process a joy!
Step-by-Step Instructions
1. Prepare Jars: Begin by sterilizing your canning jars, lids, and bands. You can do this by washing them in hot, soapy water, rinsing thoroughly, and then either boiling them in a water bath canner for 10 minutes or running them through a dishwasher’s sterilize cycle. Keep them hot until ready to fill.
2. Berry Bliss: Wash the blackberries thoroughly. In your large stainless steel pot, combine the washed blackberries and lemon juice. Over medium heat, bring the mixture to a simmer, stirring occasionally. Once simmering, use a potato masher or fork to gently crush the berries, releasing their juices. Continue to cook for about 5 minutes, allowing the berries to soften. This initial step is vital for a truly authentic Blackberry Jam (Homemade).
3. Sweet Integration: If using pectin, whisk it into the sugar in a separate bowl. This step helps prevent clumping. Gradually add the sugar-pectin mixture (or just sugar if not using pectin) to the simmering berries, stirring constantly until the sugar is completely dissolved.
4. Boil and Set: Increase the heat to high and bring the jam to a rapid, rolling boil that cannot be stirred down. Boil for 1 minute, stirring constantly to prevent scorching. For a Blackberry preserves recipe, achieving this vigorous boil is key for activating the pectin and ensuring a good set. Skim off any foam that rises to the surface with a spoon.
5. Test for Set (Optional but Recommended): Place a small plate in the freezer before you start cooking. After 1 minute of boiling, place a small spoonful of jam onto the chilled plate. Return to the freezer for 1-2 minutes. Gently push the jam with your finger; if it wrinkles, it’s ready. If not, continue boiling for another minute and retest.
6. Jarring the Goodness: Carefully ladle the hot jam into the hot, sterilized jars, leaving 1/4 inch headspace from the rim. Wipe the jar rims clean with a damp cloth to ensure a proper seal.
7. Seal and Store: Center the hot lids on the jars and apply the bands, tightening them to fingertip-tight.
8. Water Bath Processing (Optional for Shelf-Stable): If you desire shelf-stable jam, process the filled jars in a boiling water bath canner for 10 minutes (adjusting for altitude). After processing, turn off the heat, remove the canner lid, and let the jars sit for 5 minutes before carefully removing them to a wire rack to cool completely for 12-24 hours. You’ll hear delightful “pings” as the jars seal!
9. Cool and Enjoy: Let the jam cool completely on the counter. Once cool, check seals. Any unsealed jars should be refrigerated and consumed within 3 weeks.
Nutritional Benefits & Advantages
Beyond its irresistible taste, Blackberry Jam (Homemade) offers several nutritional advantages. Blackberries are an excellent source of vitamin C, essential for immune health, and vitamin K, important for blood clotting and bone health. They are also packed with fiber, aiding digestion and promoting satiety. Furthermore, these berries are rich in antioxidants, particularly anthocyanins, which contribute to their deep purple hue and help combat oxidative stress in the body. Making jam at home allows you to control the quality of ingredients, opting for organic berries and adjusting sugar levels to your preference, making it a healthier alternative to many store-bought options.
Tips, Variations & Cooking Advice
- Seedless Jam: For a smoother jam, press the cooked berries through a fine-mesh sieve or a food mill before adding sugar.
- Flavor Boosts: Add a teaspoon of vanilla extract or a pinch of cinnamon at the end of cooking for an intriguing flavor twist. A splash of balsamic vinegar (just a teaspoon!) can also deepen the berry flavor.
- Less Sugar: If you prefer less sweetness, use specific low-sugar pectin and follow its instructions, as the sugar-to-pectin ratio is crucial for setting.
- Small Batches: If you’re new to jam making, start with a smaller batch to get comfortable with the process.
Common Mistakes to Avoid
- Not Sterilizing Jars Properly: This is a food safety fundamental. Improperly sterilized jars can lead to spoilage.
- Under-Boiling: Not reaching a rapid, rolling boil for the full duration specified can result in runny jam due to pectin not activating fully.
- Over-Boiling: Boiling for too long can lead to overly stiff, almost candy-like jam.
- Not Wiping Jar Rims: Residue on the rim can prevent a proper seal, leading to spoilage.
- Forgetting Headspace: Too much or too little headspace can compromise the seal.
Storage & Meal Prep Tips
Properly processed and sealed jars of Blackberry Jam (Homemade) can be stored in a cool, dark pantry for up to one year. Once opened, refrigerate the jam and consume within 3-4 weeks. Unsealed jars should always be refrigerated. This jam is fantastic with toast, scones, or as a topping for yogurt and ice cream. It also makes a thoughtful homemade gift!
Conclusion
Crafting your own Blackberry Jam (Homemade) is a rewarding experience, transforming simple berries into a shimmering jewel of flavor. This Blackberry preserves recipe isn’t just about preserving fruit; it’s about preserving a moment of summer’s sweetness for months to come. We encourage you to try this recipe and discover the unparalleled taste and satisfaction of homemade. Share your triumphs in the comments below or explore our other delightful canning recipes!
FAQs
1. Can I use frozen blackberries for this recipe?
Yes, you can use frozen blackberries. Thaw them completely before starting, and their juices will contribute to the liquid content, so no other changes are typically needed.
2. My jam didn’t set. What went wrong?
The most common reasons for jam not setting are insufficient boiling time, not enough pectin (if using), or an incorrect sugar-to-fruit ratio. If it’s runny, you can re-boil it with more pectin (following pectin instructions for a “re-set” batch) or enjoy it as a blackberry syrup!
3. How do I know if my jars have sealed?
After cooling for 12-24 hours, the center of the lid should be concave and not flex when pressed. If you hear a “ping” during cooling, that’s usually a good sign of a seal. Any unsealed jars should be refrigerated immediately.
4. Can I reduce the amount of sugar?
Yes, but you must use a low-sugar or no-sugar pectin specifically designed for reduced-sugar recipes. Standard pectin relies on a certain sugar concentration to set properly.
5. What’s the difference between jam and preserves?
Traditionally, jam is made from crushed fruit, while preserves contain whole or large pieces of fruit. Our recipe for Blackberry Jam (Homemade) technically leans towards jam due to the crushing, but the terms are often used interchangeably in home cooking.