Unlocking the Secret to Fluffy Pancakes: Your Guide to a Perfect Weekend Breakfast
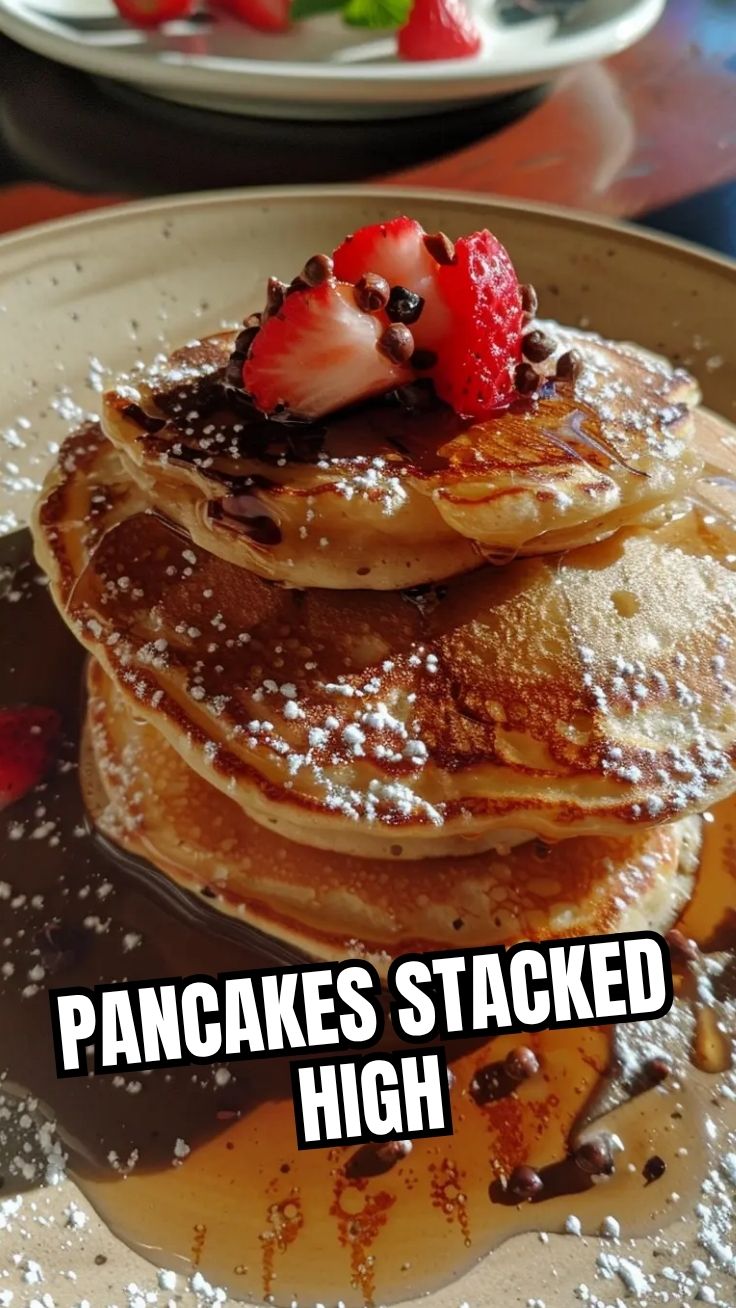
Ever wondered how some people consistently whip up those impossibly light and airy Pancakes that just melt in your mouth? That perfect stack, golden-brown and glistening with syrup, is not just a dream for a leisurely weekend breakfast; it’s an achievable reality in your own kitchen. While store-bought mixes offer convenience, crafting Pancakes from scratch elevates the experience, allowing for unparalleled freshness, customizable flavors, and the satisfaction of creating something truly delicious. Today, we’re diving deep into the art and science of perfecting fluffy Pancakes, transforming your mornings into a culinary delight. Get ready to impress your family and friends with a breakfast that tastes as good as it looks.
Ingredients & Kitchen Tools
- All-Purpose Flour (1 ½ cups): The backbone of our batter, providing structure.
- Granulated Sugar (2 tablespoons): Adds a touch of sweetness and aids in browning.
- Baking Powder (1 ½ teaspoons): The leavening agent responsible for those beautiful, airy bubbles.
- Baking Soda (½ teaspoon): Works with buttermilk for extra lift and tenderness.
- Salt (¼ teaspoon): Enhances all the other flavors.
- Large Egg (1): Binds the ingredients and contributes to richness.
Buttermilk (1 ¼ cups): Its acidity reacts with baking soda, creating a super-fluffy texture. Substitution: If you don’t have buttermilk, combine 1 ¼ cups milk with 1 tablespoon white vinegar or lemon juice and let it sit for 5 minutes.*
- Melted Unsalted Butter (2 tablespoons, plus more for greasing): Adds flavor and moisture.
- Vanilla Extract (1 teaspoon): Aromatic enhancer.
- Whisk: For combining dry ingredients thoroughly.
- Large Mixing Bowl: For preparing the batter.
- Smaller Mixing Bowl: For wet ingredients.
- Measuring Cups & Spoons: For accurate ingredient portions.
- Non-Stick Skillet or Griddle: Essential for even cooking and easy flipping.
- Spatula: For flipping and serving.
- Ladle or ¼ cup measuring cup: For portioning the batter.
Prep Time & Cooking Schedule
- Prep Time: 10 minutes
- Cook Time: 2-3 minutes per pancake (approximately 15-20 minutes total for 8-10 pancakes)
- Resting Time: 5 minutes (for the batter, post-mixing)
This recipe is designed for efficiency, making it perfect for a relaxed weekend morning. The minimal resting time for the batter allows the leavening agents to begin their work, resulting in a more uniform rise and tenderness.
Step-by-Step Instructions
1. Whisk Dry Ingredients: In a large bowl, combine the flour, sugar, baking powder, baking soda, and salt. Whisk vigorously for about 30 seconds to ensure everything is evenly distributed. This step is crucial for achieving light and airy Pancakes that contribute to a delightful breakfast.
2. Combine Wet Ingredients: In a separate, smaller bowl, whisk together the egg, buttermilk, melted butter, and vanilla extract until well combined.
3. Combine Wet and Dry: Pour the wet ingredients into the dry ingredients. Stir gently with a spoon or spatula until just combined. A few lumps are perfectly fine and even desired; overmixing develops gluten, leading to tougher pancakes. The batter should be thick but pourable.
4. Rest the Batter: Let the batter rest for 5 minutes. This allows the baking powder and soda to activate, creating more air bubbles.
5. Heat Skillet: Heat a non-stick skillet or griddle over medium heat. Lightly grease with butter. To test if the skillet is ready, sprinkle a few drops of water; if they sizzle and evaporate, it’s good to go.
6. Cook Pancakes: Pour ¼ cup of batter per pancake onto the hot skillet. Cook for 2-3 minutes per side, or until bubbles appear on the surface and the edges look set. Flip with a spatula and cook for another 1-2 minutes until golden brown.
7. Serve Immediately: Transfer cooked pancakes to a plate. Serve hot with your favorite toppings like maple syrup, fresh berries, or whipped cream.
Nutritional Benefits & Advantages
These homemade Pancakes, while a treat, offer several advantages over their processed counterparts. Using whole ingredients allows for better control over sugar and fat content. They provide a source of carbohydrates for energy, and the addition of an egg contributes protein. For those seeking a more nutrient-dense option, incorporating whole wheat flour can boost fiber content.
Tips, Variations & Cooking Advice
- Flavor Boosts: Add a pinch of cinnamon or nutmeg to the dry ingredients for a warm, spiced flavor. Zest of one lemon or orange can add brightness.
- Fruitful Additions: Fold in fresh blueberries, sliced bananas, or chocolate chips to the batter just before cooking.
- Dietary Adaptations:
* Gluten-Free: Substitute the all-purpose flour with a 1:1 gluten-free flour blend.
* Dairy-Free: Use a non-dairy milk (almond, soy, oat) combined with 1 tablespoon of apple cider vinegar for the buttermilk substitution, and use a dairy-free butter alternative.
- Achieving Perfect Fluff: Do not overmix the batter! This is the most crucial tip for fluffy Pancakes. Under-mixing slightly is better than over-mixing.
- Keep Them Warm: To keep cooked Pancakes warm while you cook the rest, place them on a baking sheet in a single layer in an oven preheated to 200°F (90°C).
Common Mistakes to Avoid
- Overmixing the Batter: As mentioned, this develops gluten, making Pancakestough. Stir until just combined.
- Cooking on Too High Heat: This will burn the outside before the inside cooks through. Medium heat is ideal for even golden-brown results.
- Not Enough Fat on the Skillet: This leads to sticking and uneven browning. A light coating of butter or oil is necessary for each batch.
- Flipping Too Early: Wait for bubbles to form on the surface and the edges to look set before flipping. This indicates the pancake is ready and will not collapse.
Storage & Meal Prep Tips
Leftover Pancakes can be a fantastic make-ahead option for busy mornings.
- Refrigeration: Store cooked and cooled Pancakes in an airtight container or a resealable bag in the refrigerator for up to 3-4 days.
- Freezing: For longer storage, flash-freeze individual Pancakes on a baking sheet until solid (about 30 minutes). Then transfer them to a freezer-safe bag with parchment paper between each Pancakes to prevent sticking. They can be frozen for up to 2 months.
- Reheating: Reheat refrigerated Pancakes in a toaster oven, microwave, or on a lightly greased skillet until warm. Frozen Pancakes can be reheated directly from the freezer; add a minute or two to the reheating time.
Conclusion
Mastering the art of fluffy Pancakes is simpler than you think, and with this guide, you’re well on your way to creating memorable moments around the breakfast table. From selecting the right ingredients to understanding the nuances of temperature, each step contributes to that perfect golden stack. So, gather your ingredients, fire up your griddle, and treat yourself to the best homemade Pancakes you’ve ever had. We encourage you to try this recipe and share your delicious breakfast creations with us!
FAQs
Q1: Can I make the batter ahead of time?
A1: While fresh batter yields the fluffiest results, you can prepare the dry ingredients and wet ingredients separately and combine them just before cooking. If you must mix the whole batter ahead, it can be refrigerated overnight, but the pancakes might be slightly less airy due to the leavening agents losing some potency.
Q2: My Pancakes are dense. What went wrong?
A2: Most likely, you overmixed the batter, developing the gluten. Stir only until the ingredients are just combined, leaving some lumps. Also, ensure your baking powder and soda are fresh.
Q3: How do I get perfectly round Pancakes?
A3: Use a ladle or ¼ cup measuring cup to pour the batter steadily and evenly into the center of your hot skillet. Avoid spreading the batter once it’s on the pan.
Q4: Can I use milk instead of buttermilk?
A4: Yes, but for the best fluffy texture, you’ll need to create a buttermilk substitute. Add one tablespoon of white vinegar or lemon juice to 1 ¼ cups of regular milk and let it sit for 5-10 minutes until it slightly curdles.
Q5: What’s the best way to reheat frozen Pancakes?
A5: For the best results, reheat frozen Pancakes in a toaster or toaster oven until warm and slightly crispy. The microwave can be used, but they might be a bit softer.