Indulge in Bliss: The Ultimate Homemade Strawberry Cheesecake Bars Recipe
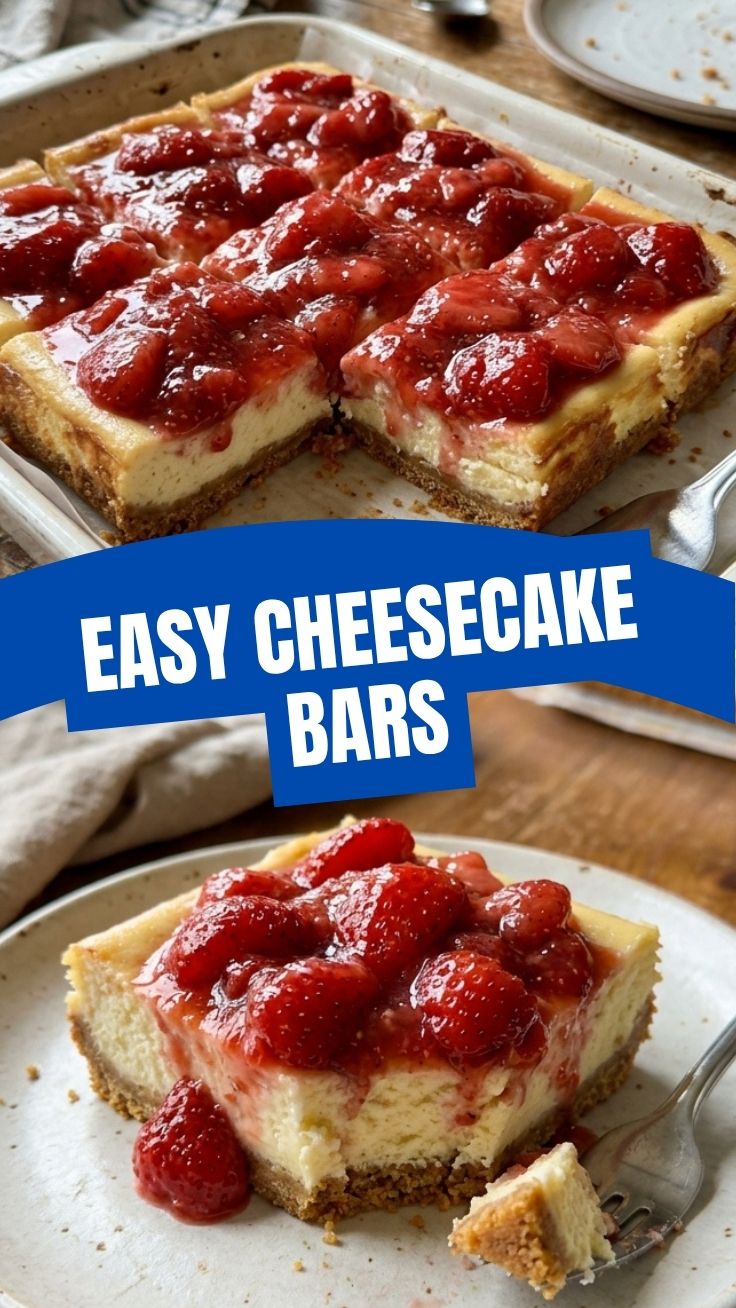
Tired of store-bought desserts that lack that homemade touch? Imagine a dessert that’s creamy, fruity, and utterly irresistible, all crafted in your own kitchen! Today, we’re diving into the delightful world of Strawberry Cheesecake Bars, a treat that perfectly balances the tangy sweetness of fresh strawberries with the rich, smooth texture of cheesecake. Preparing these luscious cheesecake bars at home offers not only a superior taste experience but also the joy of creating something truly special for your loved ones. Get ready to impress with this easy-to-follow recipe. These sensational strawberry cheesecake bars are a guaranteed crowd-pleaser and remarkably simple to make, even for novice bakers.
Ingredients & Kitchen Tools
Gather your culinary arsenal! Here’s what you’ll need to create these heavenly delights:
- For the Crust:
* 1 ½ cups (180g) graham cracker crumbs: Roughly 12 full graham cracker sheets, finely crushed. Adds a classic buttery crunch.
* ¼ cup (50g) granulated sugar: Sweetens the crust lightly.
* 6 tablespoons (85g) unsalted butter, melted: Binds the crumbs together.
- For the Cheesecake Filling:
* 2 (8-ounce) blocks cream cheese, softened: Full-fat for best results, softened to ensure a smooth, lump-free filling.
* ½ cup (100g) granulated sugar: Sweetens the cream cheese base.
* 2 large eggs: Provide structure and richness.
* 1 teaspoon vanilla extract: Enhances the overall flavor profile.
* ¼ cup (60ml) heavy cream: Adds extra creaminess to the filling.
- For the Strawberry Topping:
* 2 cups (300g) fresh strawberries, hulled and diced: Frozen can be substituted; thaw and drain excess liquid.
* ¼ cup (50g) granulated sugar: Sweetens the strawberry layer.
* 1 tablespoon lemon juice: Brightens the strawberry flavor and acts as a natural preservative.
* 1 tablespoon cornstarch (optional): Helps thicken the strawberry topping for a firmer set.
- Kitchen Tools:
* 9×13 inch baking pan: Essential for uniform bars.
* Parchment paper: Lines the pan for easy removal.
* Mixing bowls (various sizes): For combining ingredients.
* Electric mixer (handheld or stand): For whipping cream cheese mixture to perfection.
* Spatula & whisk: For mixing and smoothing.
* Measuring cups and spoons: For precise ingredient quantities.
Prep Time & Cooking Schedule
- Prep Time: 25 minutes
- Cook Time: 35-40 minutes
- Chilling Time: 4 hours (minimum), preferably overnight
Plan ahead! The chilling time is crucial for setting both the cheesecake and the strawberry topping, ensuring perfectly sliceable and delicious Strawberry Cheesecake Bars. Starting them the day before an event is ideal.
Step-by-Step Instructions
1. Prepare the Crust: Preheat your oven to 350°F (175°C). Line a 9×13 inch baking pan with parchment paper, leaving an overhang on the sides for easy lifting. In a medium bowl, combine graham cracker crumbs, sugar, and melted butter. Press the mixture firmly and evenly into the bottom of the prepared pan. Bake for 8-10 minutes until lightly golden. Let cool while you prepare the filling.
2. Make the Cheesecake Filling: In a large bowl, using an electric mixer, beat the softened cream cheese and sugar until smooth and creamy. Beat in the eggs one at a time, mixing well after each addition. Stir in the vanilla extract and heavy cream until just combined. Overmixing will incorporate too much air, leading to cracks.
3. Assemble and Bake: Pour the cheesecake filling over the cooled crust and spread evenly. Bake for 30-35 minutes, or until the edges are set and the center has a slight jiggle. Do not overbake! This prevents a dry texture.
4. Prepare Strawberry Topping: While the cheesecake cools, combine diced strawberries, sugar, and lemon juice in a saucepan. If using, whisk in cornstarch. Cook over medium heat, stirring frequently, until the mixture thickens and the strawberries soften (about 5-7 minutes). Let cool completely.
5. Cool and Chill: Allow the baked cheesecake to cool on a wire rack at room temperature for about an hour. Once completely cooled, spread the cooled strawberry topping evenly over the cheesecake. Refrigerate for at least 4 hours, or preferably overnight, to allow the cheesecake bars to set fully.
Nutritional Benefits & Advantages
These Strawberry Cheesecake Bars offer more than just exquisite taste. Strawberries are packed with Vitamin C and antioxidants, boosting immunity and skin health. While cheesecake is an indulgent treat, homemade versions allow for control over sugar content and ingredient quality. The cream cheese provides calcium and protein, making these bars a nutrient-rich dessert choice in moderation.
Tips, Variations & Cooking Advice
- Fruity Twist: Experiment with other berries like raspberries or blueberries for the topping. A mix of berries can create a vibrant, complex flavor.
- Citrus Zest: Add a teaspoon of lemon or orange zest to the cheesecake filling for an extra bright note.
- Gluten-Free Version: Use gluten-free graham crackers or a nut-based crust (e.g., almond flour and butter) for a gluten-free alternative.
- Dairy-Free Option: Substitute cream cheese with dairy-free cream cheese alternatives and use a plant-based heavy cream.
- Mini Bars: Bake in a muffin tin with paper liners for individual mini cheesecake bites, adjusting baking time as needed.
Common Mistakes to Avoid
- Overmixing the Filling: Overbeating the cream cheese mixture introduces too much air, leading to cracks in your cheesecake as it cools. Mix until just combined and smooth.
- Underbaking: An underbaked cheesecake will have a soupy center and won’t set properly. Look for set edges with a slight jiggle in the middle.
- Not Softening Cream Cheese: Cold cream cheese will result in a lumpy filling. Always ensure it’s at room temperature for a smooth consistency.
- Skipping Chill Time: Impatience is the enemy of perfectly set cheesecake bars. The chilling period is crucial for structure and flavor development.
Storage & Meal Prep Tips
Store leftover cheesecake bars in an airtight container in the refrigerator for up to 3-4 days. For longer storage, freeze individual bars wrapped tightly in plastic wrap and then foil for up to 2 months. Thaw in the refrigerator overnight before serving. These Strawberry Cheesecake Bars are excellent for meal prep as a dessert, allowing you to have a delicious treat ready whenever a craving strikes!
Conclusion
Crafting your own Strawberry Cheesecake Bars at home truly elevates the dessert experience. With our comprehensive guide, you’re now equipped to create a decadent and visually stunning treat that’s sure to delight. The combination of a buttery graham cracker crust, a silky smooth cream cheese filling, and a bright strawberry topping makes these cheesecake bars an irresistible indulgence. Don’t hesitate—give this recipe a try and share your delightful creations with us!
FAQs
Q1: Can I use frozen strawberries for the topping?
A1: Yes, absolutely! Thaw them completely and drain any excess liquid before dicing and using them in the topping.
Q2: What if my cheesecake cracks during baking?
A2: Cracks often result from overbaking or temperature shock. Ensure your cream cheese is at room temperature and avoid overmixing. A water bath can also help prevent cracking by providing an even, moist baking environment.
Q3: How can I cut neat slices of cheesecake bars?
A3: For clean cuts, chill the bars thoroughly. Use a sharp knife, wiping the blade clean with a warm, damp cloth between each slice.
Q4: Can I make the crust ahead of time?
A4: Yes, you can prepare and bake the crust a day in advance. Store it covered at room temperature until ready to assemble the bars.
Q5: Is there a way to make these less sweet?
A5: You can reduce the sugar in both the crust and the cheesecake filling by about ¼ cup each. Taste the strawberry topping mixture before adding cornstarch to adjust its sweetness to your preference.