Unlock Irresistible Flavor: Your Guide to Perfect Lemon Garlic Chicken
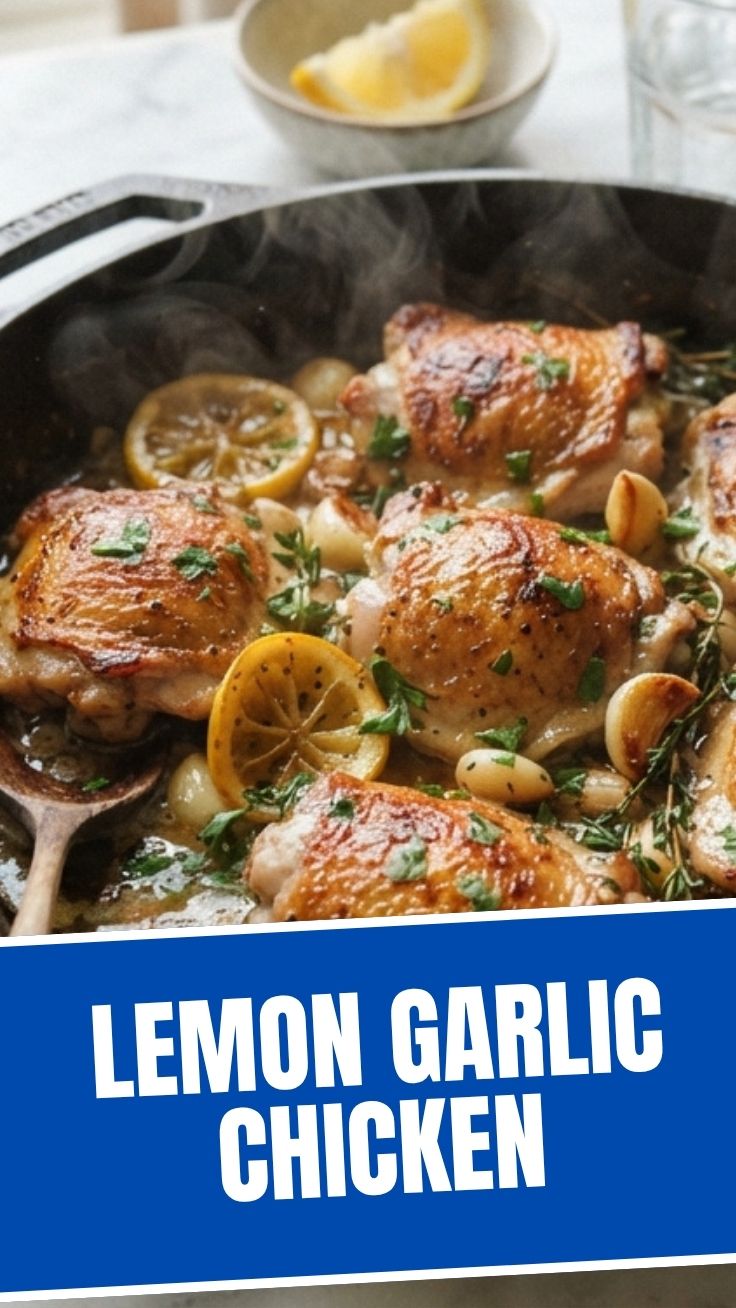
Ever wondered how to transform simple ingredients into a dish that sings with vibrant flavors and comforting warmth? Today, we’re diving deep into creating the ultimate Lemon Garlic Chicken, a culinary staple that’s both impressively delicious and surprisingly easy to master at home. Forget bland, forget complicated – this recipe promises a juicy, aromatic experience that will become a regular in your meal rotation. Preparing homemade dishes like this not only guarantees fresh, wholesome ingredients but also allows you to control every aspect of its flavor profile, making it a truly personalized culinary adventure. And for those eager to explore more vibrant and simple lemon garlic chicken recipes, you’ve come to the right place!
Ingredients & Kitchen Tools
Crafting the perfect Lemon Garlic Chicken requires a handful of fresh ingredients and basic kitchen essentials.
- Chicken Thighs (Bone-in, Skin-on): 2.5-3 lbs. (about 6-8 thighs). Bone-in, skin-on provides maximum flavor and keeps the meat moist. You can substitute with boneless, skinless chicken breasts or thighs, adjusting cooking time.
- Lemons: 2 large, organic. Zest and juice for bright, tangy notes.
- Garlic: 6-8 cloves, fresh. Minced for pungent, aromatic depth. Don’t be shy with garlic!
- Olive Oil: 1/4 cup, extra virgin. For searing and roasting, enhancing richness.
- Fresh Rosemary: 2 sprigs, or 1 tsp dried. Adds a fragrant, earthy undertone. Thyme can be substituted.
- Chicken Broth (Low Sodium): 1/2 cup. To create a flavorful pan sauce and keep chicken moist.
- Salt & Black Pepper: To taste. Essential for seasoning and bringing out flavors.
- Optional: Paprika: 1/2 tsp. For a touch of color and mild warmth.
- Optional: Honey or Maple Syrup: 1 tbsp. To balance the acidity with a hint of sweetness.
Kitchen Tools:
- Large Oven-Safe Skillet or Roasting Pan: Cast iron or stainless steel for even cooking.
- Cutting Board & Sharp Knife: For prepping chicken, lemons, and garlic.
- Grater/Zester: For lemon zest.
- Whisk: For combining marinade ingredients.
- Meat Thermometer: Crucial for ensuring chicken is cooked to a safe internal temperature (165°F / 74°C).
- Tongs: For handling hot chicken.
Prep Time & Cooking Schedule
- Prep Time: 15-20 minutes
- Marinating Time: 30 minutes (minimum) to 4 hours (for best flavor)
- Cook Time: 35-45 minutes
- Resting Time: 5-10 minutes
For optimal flavor, aim to marinate the chicken for at least an hour. This allows the lemon and garlic to truly infuse the meat. Plan to start your prep about 1.5 to 2 hours before you intend to serve dinner.
Step-by-Step Instructions
1. Prepare the Marinade: In a large bowl, whisk together the olive oil, lemon zest, lemon juice, minced garlic, chopped rosemary, salt, pepper, and optional paprika and honey.
2. Marinate the Chicken: Pat the chicken thighs dry with paper towels (this helps with crispy skin!). Add them to the bowl with the marinade, ensuring each piece is thoroughly coated. Cover and refrigerate for at least 30 minutes, or up to 4 hours.
3. Preheat Oven & Sear: Preheat your oven to 400°F (200°C). Heat an oven-safe skillet over medium-high heat. Once hot, remove chicken from the marinade (reserving any excess marinade) and place skin-side down in the hot skillet. Sear for 5-7 minutes until the skin is golden brown and crispy.
4. Flip & Add Liquid: Flip the chicken thighs. Pour the reserved marinade and chicken broth into the skillet around the chicken.
5. Roast: Transfer the skillet to the preheated oven. Roast for 25-35 minutes, or until the internal temperature of the chicken reaches 165°F (74°C) when measured with a meat thermometer at the thickest part. The skin should be deeply golden and the pan sauce slightly reduced. This method ensures tender Lemon Garlic Chicken.
6. Rest & Serve: Remove the skillet from the oven. Tent loosely with foil and let the chicken rest for 5-10 minutes. This allows the juices to redistribute, ensuring moist, flavorful meat. Serve immediately, drizzling with the delicious pan sauce. Enjoy exploring various lemon garlic chicken recipes with this foundational technique!
Nutritional Benefits & Advantages
This Lemon Garlic Chicken dish is a powerhouse of nutrition. Chicken, especially skin-on thighs, provides a good source of lean protein vital for muscle repair and growth. Lemons are rich in Vitamin C, an antioxidant that boosts immunity, while garlic offers compounds like allicin, known for its anti-inflammatory and cardiovascular benefits. Rosemary adds not only flavor but also antioxidants. This meal is naturally gluten-free and can be easily adapted to be dairy-free, making it suitable for various dietary needs.
Tips, Variations & Cooking Advice
- Crispy Skin Secret: Pat chicken very dry before searing. A hot skillet is key!
- Flavor Boost: Add a splash of white wine to the pan sauce along with the chicken broth for extra depth.
- Vegetable Medley: Roast vegetables like asparagus, broccoli, or baby potatoes in the same pan during the last 15-20 minutes of cooking for a complete sheet pan meal.
- Herb Variations: Experiment with other fresh herbs like thyme, oregano, or even a touch of fresh dill.
- Spicier Kick: Add a pinch of red pepper flakes to the marinade for a subtle heat.
- Boneless Chicken: If using boneless, skinless chicken, reduce searing time to 3-4 minutes per side and oven roasting time to 15-20 minutes, or until 165°F.
Common Mistakes to Avoid
- Overcrowding the Pan: This leads to steaming instead of searing, resulting in less crispy skin. Cook in batches if necessary.
- Not Patting Chicken Dry: Excess moisture prevents proper browning.
- Not Resting the Chicken: Skipping this step results in dry chicken as the juices escape when cut.
- Under-Seasoning: Don’t be afraid of salt and pepper! Proper seasoning is crucial for flavor. Taste the sauce and adjust if needed.
- Overcooking: Use a meat thermometer! Overcooked chicken is dry and tough.
Storage & Meal Prep Tips
Storage: Leftover Lemon Garlic Chicken can be stored in an airtight container in the refrigerator for up to 3-4 days.
Freezing: Cooked chicken thighs can be frozen for up to 2-3 months. Allow to cool completely, then wrap individual pieces tightly in plastic wrap and place in a freezer-safe bag or container. Thaw overnight in the refrigerator before reheating.
Reheating: For best results, reheat in the oven at 300°F (150°C) until warmed through, about 15-20 minutes. You can also gently warm on the stovetop with a splash of broth to prevent drying out, or briefly microwave.
Conclusion
Mastering the art of delicious Lemon Garlic Chicken is within your reach. This recipe offers a fantastic balance of zesty, garlicky flavors with tender, juicy chicken, making it a perfect weeknight meal or a star for entertaining. We encourage you to try this simple yet profound dish and discover the joy of creating something truly special in your own kitchen. Whether you’re a seasoned chef or just starting your culinary journey, these lemon garlic chicken recipes are designed to impress. Share your culinary triumphs in the comments below – we can’t wait to hear how it turns out!
FAQs
Q1: Can I use chicken breasts instead of thighs?
A1: Yes, you can! Boneless, skinless chicken breasts will cook faster. Reduce searing time to 3-4 minutes per side and oven roasting time to 15-20 minutes, or until an internal temperature of 165°F (74°C) is reached.
Q2: How do I ensure my chicken skin gets crispy?
A2: The key is to pat the chicken skin very dry before searing and place it skin-side down in a hot skillet for 5-7 minutes. Don’t overcrowd the pan.
Q3: Can I prepare the marinade ahead of time?
A3: Absolutely! You can whisk the marinade ingredients together up to 2-3 days in advance and store it in the refrigerator. Add the chicken to the marinade at least 30 minutes before cooking, or up to 4 hours for optimal flavor.
Q4: My sauce isn’t thickening. What can I do?
A4: If your pan sauce is too thin, remove the chicken from the pan after resting. Place the skillet back on the stovetop over medium heat and let it simmer gently for a few minutes, stirring occasionally, until it reduces to your desired consistency. You can also mix a teaspoon of cornstarch with a tablespoon of cold water, then whisk it into the simmering sauce.