“`html
The Ultimate Guide to Crafting the Perfect Savory Cheese Ball: Your Next Party Essential!
Ever wondered what makes a party appetizer truly unforgettable? It’s that dish that’s devoured in minutes, sparks conversation, and leaves everyone asking for the recipe. Today, we’re diving deep into the world of the Cheese Ball – not just any cheese ball, but a savory masterpiece designed to impress. Beyond its crowd-pleasing appeal, preparing a gourmet Cheese Ball at home allows for unparalleled customization, fresh ingredients, and the sheer satisfaction of creating something delicious from scratch. Forget store-bought, and let’s unlock the secrets to perfect Cheese Ball Recipes that will elevate any gathering, turning you into the ultimate host.
Ingredients & Kitchen Tools
Gathering your mise en place is the first step to culinary success. Here’s what you’ll need for our ultimate savory Cheese Ball:
- Cream Cheese (8 oz, 2 bricks, softened): The creamy base, essential for that signature smooth texture. Opt for full-fat for the best results.
- Cheddar Cheese (1 cup, shredded, sharp): Adds a robust, tangy flavor. Freshly shredded is always better than pre-shredded.
- Goat Cheese (4 oz, crumbled): Introduces a delightful tartness and unique creaminess.
- Green Onions (3, thinly sliced): Provides a mild oniony bite and vibrant color.
- Garlic Powder (1 tsp): Aromatic depth without the harshness of raw garlic.
- Worcestershire Sauce (1 tsp): Adds umami and a complex savory note.
- Smoked Paprika (½ tsp): For a subtle smoky flavor and beautiful color.
- Black Pepper (½ tsp, freshly ground): Enhances all the other flavors.
- Salt (¼ tsp, or to taste): Balances the richness.
- Pecans (1 cup, finely chopped, toasted): Our signature coating, providing crunch and nutty flavor. Walnuts or almonds are good substitutes.
- Fresh Parsley (¼ cup, finely chopped): Adds freshness and color to the coating.
Kitchen Tools:
- Large Mixing Bowl: For combining all the cheese ball ingredients.
- Electric Mixer (handheld or stand): Makes blending softened cream cheese effortless. A sturdy spatula can also work.
- Plastic Wrap: Essential for shaping and chilling the cheese ball.
- Serving Platter: For presentation.
- Spatula or Spoon: For mixing and scraping.
- Measuring Cups and Spoons: For accurate ingredient proportions.
Prep Time & Cooking Schedule
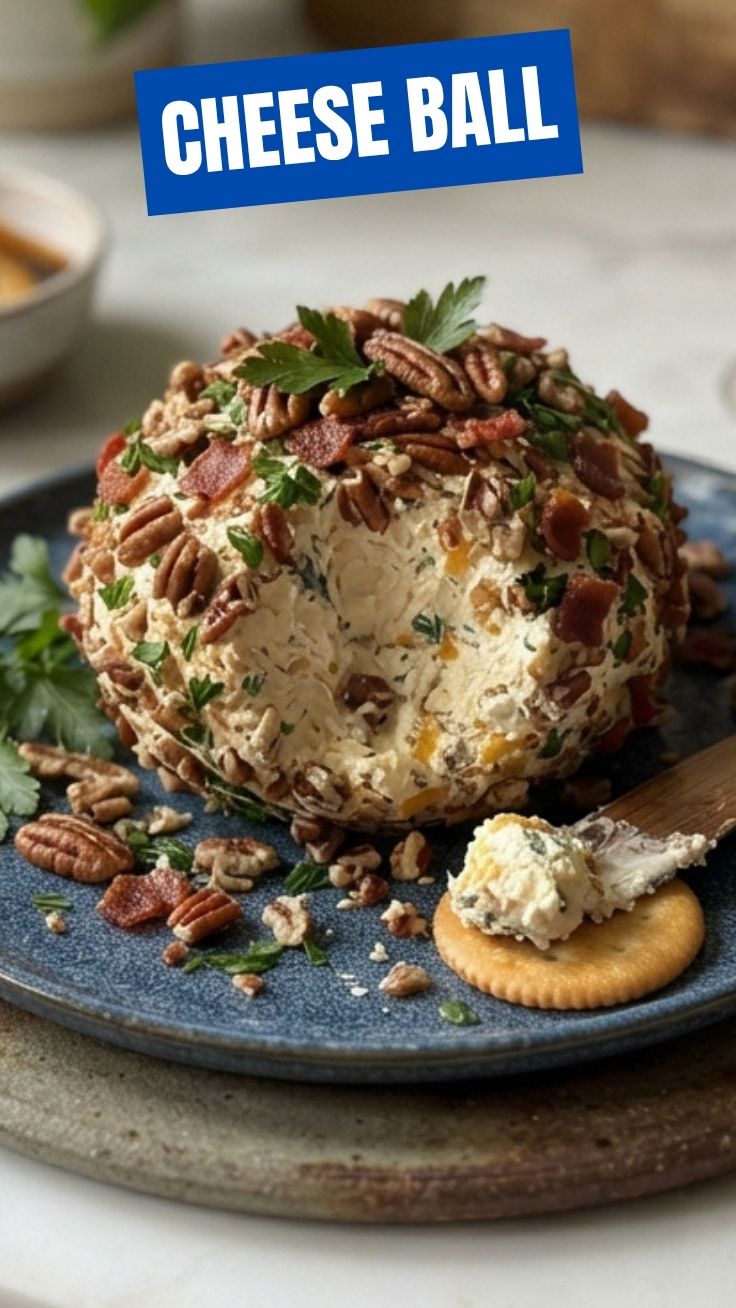
This Cheese Ball recipe is a dream for meal preppers and party planners alike, requiring minimal active cooking time.
- Prep Time: 20 minutes (active mixing and shaping).
- Chilling Time: 2-4 hours (minimum) to allow flavors to meld and the ball to firm up. Overnight is ideal for optimal flavor development.
- Toasting Pecans: 5-7 minutes (if not pre-toasted).
Plan to make this a day ahead to truly maximize its flavor profile. The longer it chills, the better the ingredients meld, creating a more harmonious and delicious appetizer.
Step-by-Step Instructions
- Soften the Cream Cheese: Ensure your cream cheese is at room temperature. This is crucial for a smooth, lump-free mix. You can leave it out for about an hour or gently microwave in short bursts.
- Combine the Cheeses: In a large mixing bowl, combine the softened cream cheese, shredded sharp cheddar, and crumbled goat cheese. Using an electric mixer on medium speed, beat until the mixture is smooth and well combined. Scrape down the sides of the bowl as needed.
- Add Flavorings: Stir in the thinly sliced green onions, garlic powder, Worcestershire sauce, smoked paprika, freshly ground black pepper, and salt. Mix until just combined. Overmixing can lead to a less dense texture.
- Shape the Cheese Ball: Lay out a large piece of plastic wrap on a clean surface. Scrape the cheese mixture onto the center of the plastic wrap. Gather the edges of the plastic wrap and carefully form the mixture into a neat ball shape, about 4-5 inches in diameter. Ensure it’s tightly wrapped to maintain its form.
- Chill Thoroughly: Place the wrapped Cheese Ball in the refrigerator for at least 2-4 hours, or preferably overnight. This firming process is vital for easy coating and robust flavor. This chilling time also allows the different elements of our Cheese Ball Recipes to truly sing.
- Prepare the Coating: While the cheese ball is chilling, finely chop your pecans and toast them lightly in a dry skillet over medium heat for 3-5 minutes, stirring frequently, until fragrant. Let them cool completely. Mix the cooled toasted pecans with the finely chopped fresh parsley on a shallow plate or baking dish.
- Coat the Cheese Ball: Unwrap the chilled cheese ball and carefully roll it in the pecan and parsley mixture, pressing gently to ensure an even coating on all sides.
- Serve: Place the coated cheese ball on a serving platter and surround it with an assortment of crackers, crostini, vegetable sticks, or pretzels. Enjoy!
Nutritional Benefits & Advantages
While often seen as an indulgent appetizer, our savory Cheese Ball offers more than just deliciousness:
- Protein Rich: Cheeses are excellent sources of protein, essential for muscle repair and satiety.
- Calcium Boost: Dairy products are packed with calcium, vital for bone health.
- Healthy Fats: The nuts in the coating, like pecans, provide healthy monounsaturated fats, which are good for heart health.
- Vitamins & Minerals: Green onions and parsley contribute vitamins A and C, along with various minerals and antioxidants.
- Customizable Health: By controlling ingredients, you can choose organic dairy or lower-sodium options, making it a healthier choice than many store-bought alternatives.
Tips, Variations & Cooking Advice
- Flavor Boosters: Add a pinch of red pepper flakes for heat, a dash of onion powder, or a tablespoon of finely chopped sun-dried tomatoes for extra complexity.
- Herb Variations: Experiment with fresh dill, chives, or thyme instead of parsley in the coating for different aromatic profiles.
- Spice It Up: Incorporate finely chopped jalapeños (seeds removed) or a dash of cayenne pepper into the cheese mixture.
- Coating Alternatives: Crushed pretzels, sesame seeds, crispy fried onions, or even crumbled bacon bits make fantastic alternative coatings.
- Dairy-Free Version: Use a blend of vegan cream cheese, nutritional yeast (for cheesy flavor), and plant-based shredded cheddar.
- Portion Control: Instead of one large ball, make several smaller mini cheese balls for individual servings or easier grazing.
Common Mistakes to Avoid
- Not Softening Cream Cheese: This leads to a lumpy, difficult-to-mix cheese ball. Always ensure it’s at room temperature.
- Skipping the Chilling Step: An insufficiently chilled cheese ball will be too soft to handle and coat properly, resulting in a messy presentation.
- Over-Salting: Cheeses are naturally salty. Taste as you go and adjust salt carefully, especially after adding Worcestershire sauce.
- Using Cold Ingredients: Ensure all dairy components are at room temperature for the smoothest blend.
- Uneven Coating: Take your time rolling the cheese ball in the coating mixture, pressing gently to ensure even distribution.
Storage & Meal Prep Tips
- Refrigeration: A prepared Cheese Ball (uncoated or coated) will last for up to 5-7 days in an airtight container in the refrigerator. If storing coated, be aware that the nuts might lose some crispness over time.
- Freezing: You can freeze the uncoated cheese ball for up to 1 month. Wrap it tightly in plastic wrap, then aluminum foil. Thaw in the refrigerator overnight before rolling in the coating and serving.
- Make Ahead: This recipe is perfect for making 1-2 days in advance. Prepare and chill the cheese ball, then coat it just before serving for the freshest texture.
Conclusion
Crafting the perfect savory Cheese Ball is a delightful culinary adventure that promises to be the star of your next gathering. By following these detailed steps and embracing the power of fresh, quality ingredients, you’re not just making an appetizer; you’re creating an experience. We encourage you to try out this recipe and experiment with your own twists, unlocking the full potential of Cheese Ball Recipes. Share your creations, tell us your favorite variations, and get ready to receive rave reviews! Happy cooking!
FAQs
- Can I make this cheese ball ahead of time?
Yes, absolutely! This cheese ball is an excellent make-ahead appetizer. You can prepare the cheese mixture and shape the ball up to 2-3 days in advance, keeping it tightly wrapped in the refrigerator. Coat it with the nuts and herbs just before serving for the best texture. - What kind of crackers pair best with a savory cheese ball?
Crisp, plain crackers or water biscuits are ideal as they don’t compete with the cheese ball’s rich flavors. Crostini, pita chips, and sturdy vegetable sticks like carrots or celery also make great accompaniments. - How do I prevent my cheese ball from being too soft or crumbly?
Ensuring your cream cheese is softened but not melted is key. Overmixing can also incorporate too much air, making it softer. Most importantly, allow adequate chilling time (at least 2-4 hours, or overnight) for the fats to firm up and the flavors to meld, which provides a sturdy, sliceable texture. - Can I use different types of cheese?
Certainly! Feel free to experiment with other semi-hard or soft cheeses. Good options include Monterey Jack, smoked gouda, feta (use less for intensity), or even a touch of blue cheese for a bolder flavor. Maintain the cream cheese as the primary binder. - My nuts aren’t sticking to the cheese ball. What went wrong?
This usually happens if the cheese ball isn’t cold enough or if the nuts are too coarsely chopped. Ensure the cheese ball is thoroughly chilled and the nuts are finely chopped. You can also lightly press the nuts into the surface of the ball.
“`