Unlock the Secret to Irresistible Homemade Garlic Bread: Your Ultimate Guide
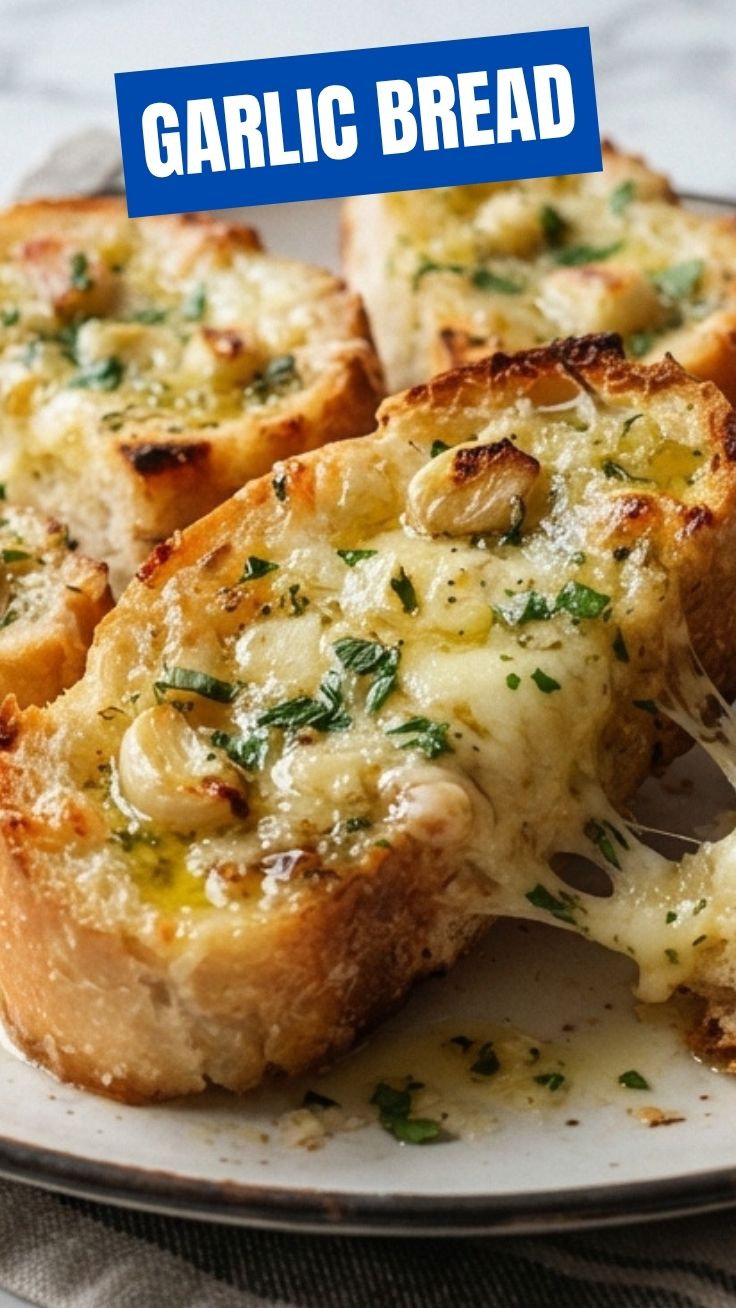
Ever wondered how to achieve that perfect golden crust, aromatic Garlic Butter infusion, and fluffy interior in homemade bread? Look no further! While store-bought options offer convenience, mastering homemade Garlic Bread elevates any meal from ordinary to extraordinary. Not only do you get to control the quality of your ingredients, but the sheer satisfaction of pulling a warm, fragrant loaf from your oven is unparalleled. This comprehensive guide will empower you to create a side dish that’s a star in its own right, effortlessly complementing pastas, soups, or even serving as a delightful appetizer. Get ready to impress your taste buds and those of your loved ones with a culinary creation that’s surprisingly simple yet profoundly delicious.
Ingredients & Kitchen Tools
Crafting the perfect Garlic Bread requires a few essential items. Here’s what you’ll need:
1 Loaf of Crusty Bread: French baguette, Italian bread, or ciabatta work best. The crust provides structural integrity, while the soft interior soaks up all the deliciousness.*
1 Head of Garlic: Fresh garlic is non-negotiable for authentic flavor. Avoid pre-minced jarred garlic; its flavor is often muted.*
1/2 Cup (1 stick) Unsalted Butter, softened: Room temperature butter is crucial for a smooth Garlic Butter spread. Unsalted allows you to control the seasoning precisely.*
2 Tablespoons Fresh Parsley, chopped: Adds a pop of color and fresh, herbaceous notes. Dried parsley can be used in a pinch, but fresh is preferred.*
1/2 Teaspoon Salt: Balances the flavors. Adjust to your preference, especially if using salted butter.*
1/4 Teaspoon Black Pepper: A subtle hint of spice. Freshly ground is always best.*
Optional: 1/4 Cup Grated Parmesan Cheese: For an extra layer of savory depth and a cheesy crust. Consider Pecorino Romano for a sharper flavor.*
Kitchen Tools:
Baking Sheet: To hold the bread while baking. A rimmed baking sheet prevents any butter from dripping.*
Aluminum Foil: For wrapping and crisping. Helps to keep the bread moist initially and then crisps it up.*
- Small Mixing Bowl: For preparing the Garlic Butter.
- Parchment Paper (Optional): For easier cleanup and to prevent sticking.
- Sharp Knife: For slicing the bread and mincing garlic.
- Pastry Brush or Spoon: For spreading the Garlic Butter.
Prep Time & Cooking Schedule
- Prep Time: 15 minutes
- Cook Time: 10-15 minutes
- Resting Time: None required
This recipe is designed for efficiency, making it an ideal last-minute addition to any meal. The short prep time means you can easily whip up a batch while your main course is simmering. The cooking time is also brief, allowing for a fresh, warm loaf just as dinner is served.
Step-by-Step Instructions
1. Preheat Oven & Prepare Bread: Preheat your oven to 375°F (190°C). Slice your loaf of bread lengthwise, almost all the way through, leaving a small hinge on one side. This allows the bread to open up like a book for spreading and then close again to trap the flavors. You can also slice it into individual pieces if preferred.
2. Mince the Garlic: Peel and finely mince all the cloves from your head of garlic. The finer the mince, the more evenly the garlic flavor will distribute throughout the Garlic Butter.
3. Prepare the Garlic Butter: In a small mixing bowl, combine the softened butter, minced garlic, chopped parsley, salt, and black pepper. If using, stir in the grated Parmesan cheese. Mix thoroughly until all ingredients are well combined and the butter is smooth and spreadable. This aromatic blend is the heart of your perfect Garlic Bread.
4. Spread the Butter: Generously spread the garlic butter mixture onto the cut sides of the bread. Ensure an even coating, reaching into all the nooks and crannies. Don’t be shy – the more butter, the more flavorful and moist your bread will be.
5. Wrap & Bake (Initial): Place the buttered bread on a baking sheet. Wrap it loosely but completely in aluminum foil. This step is crucial for trapping moisture and allowing the flavors to meld without the bread drying out. Bake for 10 minutes.
6. Unwrap & Broil (Final Crisp): Carefully remove the foil from the bread. Return the bread to the oven and increase the temperature to broiler setting (or 400°F/200°C if your broiler is too intense). Broil for 2-5 minutes, or until the edges are golden brown and slightly crispy. Keep a close eye on it, as broilers can toast quickly!
7. Serve: Remove from the oven, slice into desired portions (if not already pre-sliced), and serve immediately. Enjoy the tantalizing aroma and incredible taste!
Nutritional Benefits & Advantages
Beyond its undeniable deliciousness, homemade Garlic Bread offers some notable advantages. Garlic itself is a powerhouse, known for its immune-boosting properties and potential cardiovascular benefits, thanks to compounds like allicin. Choosing whole, crusty bread provides complex carbohydrates for sustained energy. While butter does contribute to fat content, making it at home allows you to control the quality of ingredients, opting for grass-fed butter for additional beneficial fatty acids if desired. It’s also a great way to incorporate fresh herbs like parsley, which are rich in vitamins and antioxidants.
Tips, Variations & Cooking Advice
- Cheesy Delight: For an extra decadent treat, sprinkle additional mozzarella or provolone cheese over the buttered bread before the final broiling step.
- Spice It Up: Add a pinch of red pepper flakes to the Garlic Butter for a subtle kick.
- Herbaceous Twist: Experiment with other fresh herbs like chives, oregano, or rosemary in your butter mixture.
- Gluten-Free Option: Use a high-quality gluten-free baguette or loaf for a delicious, diet-friendly alternative.
- Dairy-Free: Substitute regular butter with a good quality vegan butter alternative.
- Grilling Method: For a smoky flavor, grill the buttered bread directly over medium heat for a few minutes per side until golden and charred.
Common Mistakes to Avoid
- Using Cold Butter: Cold butter is difficult to mix evenly, leading to lumpy Garlic Butter and uneven flavor distribution.
- Overcooking the Garlic: Minced garlic can burn quickly, especially under the broiler. Keep a close watch during the final broiling stage.
- Skipping the Foil: Baking without foil initially can lead to dry, tough bread. The foil steams the bread, ensuring a tender interior.
- Not Enough Butter: Be generous! The butter is what makes this bread moist and flavorful.
- Using Stale Bread: While day-old bread can work for some recipes, fresh, crusty bread provides the best texture for Garlic Bread.
Storage & Meal Prep Tips
Leftover Garlic Bread can be stored in an airtight container or zip-top bag at room temperature for up to 2 days, or in the refrigerator for up to 4 days. For longer storage, wrap individual slices tightly in plastic wrap and then foil, and freeze for up to 1 month.
To reheat, simply warm in a preheated oven at 350°F (175°C) for 5-10 minutes until heated through and crisp. You can also toast slices in a toaster oven for a quick re-crisping. Avoid microwaving, as it can make the bread soggy.
Conclusion
Creating your own homemade Garlic Bread is a rewarding experience, transforming simple ingredients into a sensational side dish. With this guide, you’re now equipped to master the art of infusing a humble loaf with rich, aromatic Garlic Butter, delivering a culinary delight that will have everyone asking for more. Don’t hesitate to personalize it with your favorite cheeses or herbs. Give this recipe a try tonight, and prepare to elevate your home cooking to new heights! Share your creations in the comments below – we can’t wait to see your delicious results.
FAQs
Q1: Can I use pre-minced garlic from a jar?
A1: While convenient, fresh garlic offers a significantly superior flavor. Pre-minced garlic often lacks the pungency and freshness needed for truly standout Garlic Bread.
Q2: My bread turned out soggy. What went wrong?
A2: This usually happens if the bread wasn’t baked long enough in the open, or if too much butter was used without proper crisping. Ensure you allow enough time for the final broiling step to achieve a golden, crisp exterior.
Q3: How can I make a larger batch for a party?
A3: Simply scale up the ingredients proportionally. If using multiple loaves, bake them in batches or use multiple baking sheets to ensure even cooking and browning.
Q4: Can I prepare the Garlic Butter ahead of time?
A4: Absolutely! You can prepare the garlic butter mixture up to 3 days in advance and store it in an airtight container in the refrigerator. Let it come to room temperature before spreading for easier application.
Q5: What’s the best type of bread for this recipe?
A5: A crusty, airy bread like a French baguette, Italian loaf, or ciabatta works best. Their texture allows for a crisp exterior and a soft interior that effectively absorbs the flavorful Garlic Butter.