Unlock Golden Perfection: The Ultimate Guide to Homemade Blondies
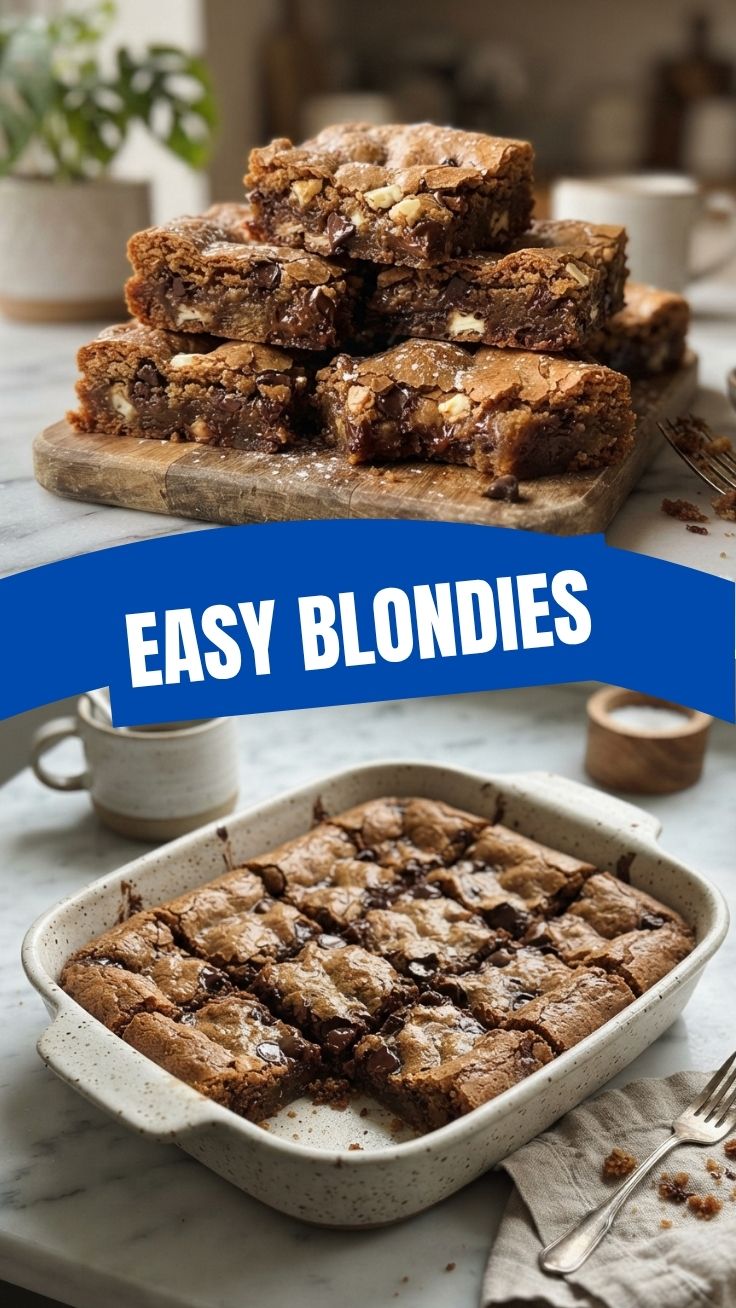
Ever dreamt of biting into a chewy, buttery, melt-in-your-mouth treat that perfectly balances sweetness with rich, caramelized notes? If so, you’re in for a golden revelation! While often overshadowed by their darker cousins, expertly crafted Blondies – essentially rich, vanilla-infused blonde brownies – offer an irresistible allure that’s surprisingly simple to achieve in your own kitchen. This guide will walk you through creating these delightful bars, proving that homemade doesn’t just mean delicious, it means superior. Forget store-bought; let’s bake something truly extraordinary and elevate your dessert game to new heights.
Ingredients & Kitchen Tools
To embark on your blondie baking journey, gather these essentials:
- Unsalted Butter (1 cup / 226g): The foundation of flavor and chewiness. Unsalted allows you to control the salt content precisely.
- Light Brown Sugar (1 ½ cups / 300g): Contributes to the signature chewy texture and rich, caramel-like sweetness.
- Granulated Sugar (½ cup / 100g): Adds sweetness and helps create a crisp crust.
- Large Eggs (2): Act as a binder and add richness.
- Vanilla Extract (2 teaspoons): Essential for that classic blondie flavor. Don’t skimp on quality!
- All-Purpose Flour (1 ½ cups / 180g): Provides structure.
- Baking Powder (1 teaspoon): A leavening agent for a slight lift.
- Salt (½ teaspoon): Balances the sweetness and enhances flavor.
- Chocolate Chips (1 cup / 170g): Choose milk, semi-sweet, or even white chocolate for variation. Optional, but highly recommended!
Kitchen Tools:
- 9×13 inch baking pan: The ideal size for a generous batch.
- Parchment paper: For easy removal and cleanup.
- Large mixing bowls (2): One for wet, one for dry ingredients.
- Whisk: For combining dry ingredients.
- Rubber spatula or wooden spoon: For mixing and folding.
- Electric mixer (handheld or stand): Optional, but makes creaming butter and sugar easier.
- Measuring cups and spoons: Accuracy is key in baking.
- Cooling rack: For even cooling.
Prep Time & Cooking Schedule
- Prep time: 15 minutes
- Cook time: 25-30 minutes
- Resting time: 30 minutes (minimum, for perfect slicing)
Plan to integrate the resting time into your baking schedule. Allowing the blondies to cool completely in the pan prevents them from crumbling when sliced, ensuring those perfect, fudgy squares. This also allows the flavors to meld and the texture to set, enhancing their deliciousness.
Step-by-Step Instructions
1. Preheat & Prep: Preheat your oven to 350°F (175°C). Line a 9×13 inch baking pan with parchment paper, leaving an overhang on the sides for easy lifting.
2. Melt Butter: In a large microwave-safe bowl or saucepan, melt the unsalted butter. Let it cool slightly.
3. Combine Wet Ingredients: In a large bowl, whisk together the melted butter, light brown sugar, and granulated sugar until well combined and smooth. Beat in the eggs one at a time, ensuring each is fully incorporated before adding the next. Stir in the vanilla extract. This creamy mixture is the heart of your perfect Blondies.
4. Combine Dry Ingredients: In a separate medium bowl, whisk together the all-purpose flour, baking powder, and salt.
5. Combine Wet and Dry: Gradually add the dry ingredients to the wet ingredients, mixing until just combined. Be careful not to overmix, as this can lead to tough blondies. Gently fold in the chocolate chips (if using).
6. Bake: Pour the batter into your prepared baking pan and spread evenly. Bake for 25-30 minutes, or until the edges are golden brown and a toothpick inserted into the center comes out with moist crumbs (not wet batter). Remember, these are blonde brownies, so a slightly underbaked center is desired for a fudgier texture.
7. Cool: Remove from the oven and let cool completely in the pan on a wire rack before lifting out and slicing into squares.
Nutritional Benefits & Advantages
While a treat, blondies offer some surprising advantages. Butter provides fat-soluble vitamins, and depending on your additions, you can incorporate fiber from nuts or antioxidants from dark chocolate. Making them at home allows you to control the quality of ingredients, reduce artificial additives, and even opt for alternative flours or sweeteners to suit dietary needs. They also offer a satisfying energy boost, perfect for an afternoon pick-me-up!
Tips, Variations & Cooking Advice
- Brown Butter: For an extra layer of nutty depth, brown your butter before adding it to the sugars. Simply melt the butter in a saucepan over medium heat, stirring occasionally, until it turns amber and smells nutty. Strain out any solids if desired.
- Nutty Additions: Fold in ½-1 cup of chopped pecans, walnuts, or macadamia nuts for added crunch and flavor.
- Spice It Up: A pinch of cinnamon or nutmeg can add a cozy warmth, especially for autumn-inspired blondies.
- Citrus Zest: For a brighter flavor profile, add the zest of one lemon or orange.
- Gluten-Free: Substitute the all-purpose flour with a 1:1 gluten-free baking blend that contains xanthan gum.
- Make Ahead: Blondie batter can be made ahead and refrigerated for up to 24 hours, perfect for busy schedules.
Common Mistakes to Avoid
- Overmixing: Overmixing flour develops gluten, leading to a tough, cake-like texture instead of a chewy one. Mix until just combined.
- Overbaking: This is the quickest way to dry out your blondies. Look for golden edges and a slightly moist center for that perfect fudgy consistency.
- Not Cooling Properly: Slicing warm blondies will result in crumbly, messy squares. Patience is key for neat, firm slices.
- Using Cold Ingredients: Ensure eggs are at room temperature for better emulsification and a smoother batter.
Storage & Meal Prep Tips
Store leftover blondies in an airtight container at room temperature for up to 3-4 days. For extended freshness, they can be refrigerated for up to a week. To freeze, wrap individual blondie squares tightly in plastic wrap, then place them in a freezer-safe bag or container for up to 3 months. Thaw at room temperature or gently warm in the microwave for a few seconds. These make excellent additions to lunchboxes or grab-and-go snacks.
Conclusion
There you have it – the definitive guide to baking the most exquisite homemade Blondies. From their rich, buttery foundation to that perfectly chewy texture, these golden squares are more than just a dessert; they’re a testament to the joy of baking. Mastering this recipe means you’ll consistently churn out treats that are superior to any store-bought equivalent. So, don’t hesitate to dive in and discover the simple magic of creating your own delicious blonde brownies. Share your creations, experiment with variations, and most importantly, savor every golden bite!
FAQs
Q1: Can I use salted butter instead of unsalted?
A1: Yes, but reduce the added salt in the recipe by ¼ teaspoon to avoid overly salty blondies.
Q2: How do I know when the blondies are perfectly baked?
A2: The edges should be golden brown, and a toothpick inserted into the center should come out with moist crumbs, not wet batter. The center might still look a little soft; this is normal for fudgy blondies.
Q3: What if my blondies are too cakey?
A3: This often happens from overmixing the batter or overbaking. Ensure you mix only until the flour is just incorporated and keep an eye on the baking time.
Q4: Can I add frosting to blondies?
A4: Absolutely! A simple vanilla glaze, cream cheese frosting, or even a chocolate ganache can elevate your blondies, though they are delicious on their own.
Q5: What’s the best way to get clean slices?
A5: Ensure the blondies are completely cooled. For extra clean cuts, place them in the refrigerator for 20-30 minutes before slicing, and use a sharp knife wiped clean between each cut.