Craving that Irresistible Crunch? Why Homemade Chex Mix is Always the Best Bet
Ever found yourself reaching for a pre-made bag of Chex Mix, only to be slightly underwhelmed by its lack of punch or that slightly stale taste? You’re not alone! Many commercially produced snack options, while convenient, often fall short of the vibrant flavors and satisfying textures we truly crave. But what if I told you that creating your own batch of this classic snack mix at home is not only incredibly easy, but also guarantees an unparalleled burst of flavor and freshness that store-bought simply can’t compare to? Get ready to unlock the secrets to the ultimate homemade Chex Mix, a versatile and crowd-pleasing treat that will have everyone reaching for more.
Ingredients & Kitchen Tools
Here’s what you’ll need to create your own perfectly seasoned batch:
- 12 cups assorted Chex cereals (Rice, Corn, Wheat): Provides the foundational crispness and variety for a satisfying crunch.
- 2 cups pretzel sticks or mini pretzels: Adds a salty, crunchy counterpoint to the cereal.
- 2 cups bite-sized cheese crackers (e.g., Goldfish, Cheez-Its): Contributes a savory, cheesy flavor and additional texture.
- 1 cup mixed nuts (pecans, walnuts, cashews, almonds): Offers rich flavor, healthy fats, and a satisfying chew.
- 1/2 cup unsalted butter, melted: The crucial binder for the seasoning and helps achieve a golden crisp.
- 3 tablespoons Worcestershire sauce: Provides an umami depth and savory complexity.
- 1 tablespoon garlic powder: Aromatic and essential for that classic savory profile.
- 1 tablespoon onion powder: Enhances the savory notes with a hint of sweetness.
- 1 teaspoon smoked paprika: Adds a subtle smoky flavor and a touch of color.
- 1/2 teaspoon cayenne pepper (optional): For those who like a little kick.
- 1/2 teaspoon salt: Balances and enhances all the flavors.
Kitchen Tools:
- Large roasting pan or two baking sheets: For even distribution and baking.
- Large mixing bowl: To toss all the ingredients together.
- Whisk: To combine the seasoning mixture.
- Spatula or large spoon: For stirring during baking.
Prep Time & Cooking Schedule
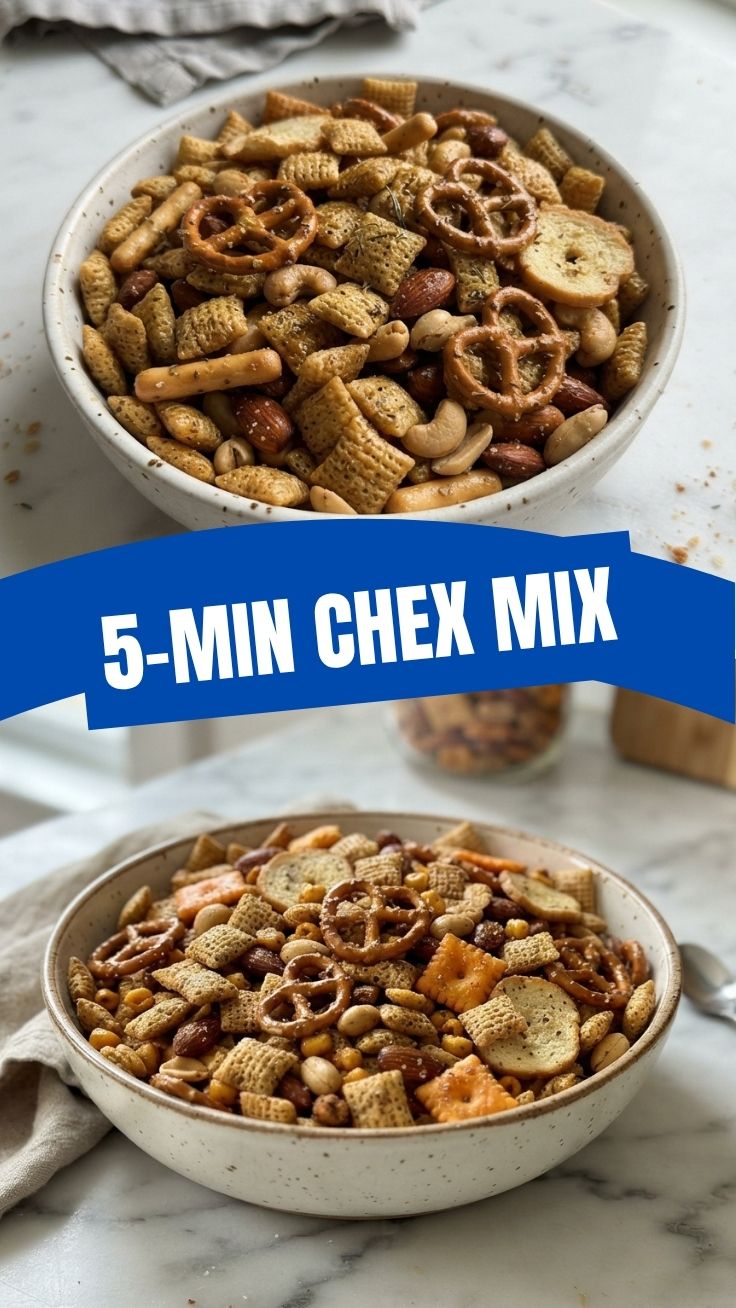
- Prep Time: 15 minutes
- Cook Time: 1 hour
- Cooling Time: 30 minutes (essential for optimal crispness)
This recipe is perfect for a weekend afternoon, allowing ample time for baking and cooling to achieve that signature crunch. You can even prepare the dry ingredients and seasoning mixture ahead of time to streamline the process.
Step-by-Step Instructions
1. Preheat Oven & Prepare Dry Ingredients: Preheat your oven to 250°F (120°C). In a very large mixing bowl, gently combine the assorted Chex cereals, pretzel sticks, cheese crackers, and mixed nuts. Ensure they are evenly distributed.
2. Whisk the Seasoning: In a separate small bowl, whisk together the melted butter, Worcestershire sauce, garlic powder, onion powder, smoked paprika, cayenne pepper (if using), and salt until well combined. This is where the magic happens for your homemade Chex Mix.
3. Combine & Coat: Pour the seasoning mixture evenly over the dry ingredients in the large bowl. Using a large spatula or spoon, gently toss until all the ingredients are thoroughly coated. This comprehensive coating ensures every bite of your delicious snack mix is bursting with flavor.
4. Bake to Perfection: Divide the mixture evenly between your large roasting pan or two baking sheets. Spread it out in a single layer for even baking.
5. Stir Frequently: Bake for 1 hour, stirring every 15 minutes. This crucial step prevents burning and ensures uniform toasting, giving your Chex Mix that perfect golden hue and crispy texture.
6. Cool Completely: Once baked, remove from the oven and spread the hot mixture onto sheets of parchment paper or waxed paper to cool completely. This cooling process is vital for achieving maximum crispness.
Nutritional Benefits & Advantages
Homemade Chex Mix offers more than just deliciousness. By making it yourself, you control the ingredients, allowing you to choose lower-sodium pretzels, whole-grain cereals, and a variety of nutrient-rich nuts. Nuts provide healthy fats, protein, and fiber, while whole-grain cereals offer dietary fiber for digestive health. This allows for a more mindful approach to snacking compared to many processed alternatives.
Tips Variations & Cooking Advice
- Sweet & Salty: For a delightful twist, add 1/2 cup of brown sugar to the butter mixture.
- Spice It Up: Elevate the heat with a pinch of red pepper flakes or a dash of hot sauce.
- Herbaceous Notes: Incorporate dried herbs like rosemary or thyme for an earthy aroma.
- Gluten-Free: Ensure all your Chex cereals are certified gluten-free, and use gluten-free pretzels and crackers.
- Dairy-Free: Substitute unsalted butter with a plant-based butter alternative.
- Microwave Method: For a quicker approach, microwave in a large bowl on high for 5-6 minutes, stirring every 2 minutes, until crisp. Be cautious, as it can burn easily.
Common Mistakes to Avoid
- Overcrowding the Pan: This leads to steaming instead of toasting, resulting in a less crispy Chex Mix. Use multiple pans if necessary.
- Skipping the Stirring: Failure to stir regularly will cause uneven baking and potentially burnt spots.
- Not Cooling Completely: Removing the mix from the oven and eating it warm before it fully cools will result in a chewier, less satisfying texture. Patience is key!
- Using Rancid Nuts: Old nuts can impart an off-flavor. Always use fresh ingredients for the best results.
Storage & Meal Prep Tips
Once completely cooled, store your homemade Chex Mix in an airtight container at room temperature for up to 2-3 weeks. This makes it an ideal make-ahead snack mix for parties, road trips, or simply daily enjoyment. Avoid refrigerating, as this can cause it to lose its crispness. Freezing is not recommended.
Conclusion
Crafting your own batch of snack mix is a rewarding experience that yields a superior product to anything you can buy in a store. From customizing the seasonings to ensuring the perfect crunch, homemade Chex Mix is a true testament to the joy of cooking. We hope you’ve been inspired to try this recipe and discover the irresistible appeal of this classic treat. Share your creations in the comments below, or explore our other delightful recipes for more culinary adventures!
FAQs
Q1: Can I use different types of cereal?
A1: Absolutely! Feel free to experiment with other sturdy cereals like Cheerios or Crispix for variations in flavor and texture.
Q2: How do I prevent the mix from burning?
A2: The key is to stir the mixture every 15 minutes during baking and keep your oven temperature consistent at 250°F (120°C).
Q3: Can I make this ahead for a party?
A3: Yes! It stores beautifully in an airtight container for up to 2-3 weeks, making it an excellent make-ahead party snack.
Q4: What if my Chex Mix isn’t crispy enough?
A4: Ensure you spread it in a single layer on your baking sheets and allow it to cool completely before storing or serving. Cooling is crucial for crispness.
Q5: Can I reduce the amount of butter?
A5: While you can slightly reduce the butter, it’s essential for binding the seasoning and achieving that desirable golden, crispy finish. A small reduction shouldn’t impact it too much, but too little may lead to a drier mix.