Unleash Your Inner Barista: Crafting the Perfect Homemade Milkshake Bliss
Ever wondered how those thick, creamy, and utterly delightful Milkshake creations from your favorite diner are made? What if I told you that achieving that same level of decadent deliciousness is simpler than you think, right in your own kitchen? Preparing a homemade Milkshake isn’t just about saving money; it’s about customizing flavors, controlling ingredients, and experiencing the pure joy of a personalized treat. Forget those overly sweet, factory-produced concoctions. We’re about to dive into the art of making a gourmet Milkshake that will tantalize your taste buds and impress everyone you serve. This comprehensive guide, complete with tantalizing milkshake recipes, will transform your dessert game, ensuring you can whip up restaurant-quality goodness anytime the craving strikes.
Ingredients & Kitchen Tools
Crafting the perfect Milkshake requires a few essential ingredients and kitchen tools, each playing a crucial role in achieving that sought-after creamy texture and rich flavor.
- Premium Vanilla Bean Ice Cream (1 pint): The foundation of any great milkshake. Opt for a high-quality, full-fat vanilla ice cream for the richest flavor and creamiest consistency. French vanilla works wonderfully.
- Whole Milk (1/2 cup, chilled): Provides the liquid base and helps achieve the desired consistency. Chilled milk is essential to prevent the ice cream from melting too quickly.
- Vanilla Extract (1 teaspoon): Enhances the vanilla notes, adding depth and warmth to the overall flavor profile.
- Sugar (1-2 tablespoons, optional): Adjust to your sweetness preference. If your ice cream is already very sweet, you might omit this. Granulated sugar or a touch of maple syrup works well.
- Whipped Cream (for garnish, optional): A classic topping that adds an extra layer of indulgence.
- Chocolate Syrup (for garnish, optional): Drizzled inside the glass or on top for a visually appealing and delicious touch.
- Blender: A powerful blender is key to creating a smooth, lump-free milkshake.
- Measuring Cups and Spoons: For accurate ingredient proportions.
- Tall Glasses: For serving your delicious creation.
- Straws (reusable, if possible): The ideal way to enjoy a thick milkshake.
Prep Time & Cooking Schedule
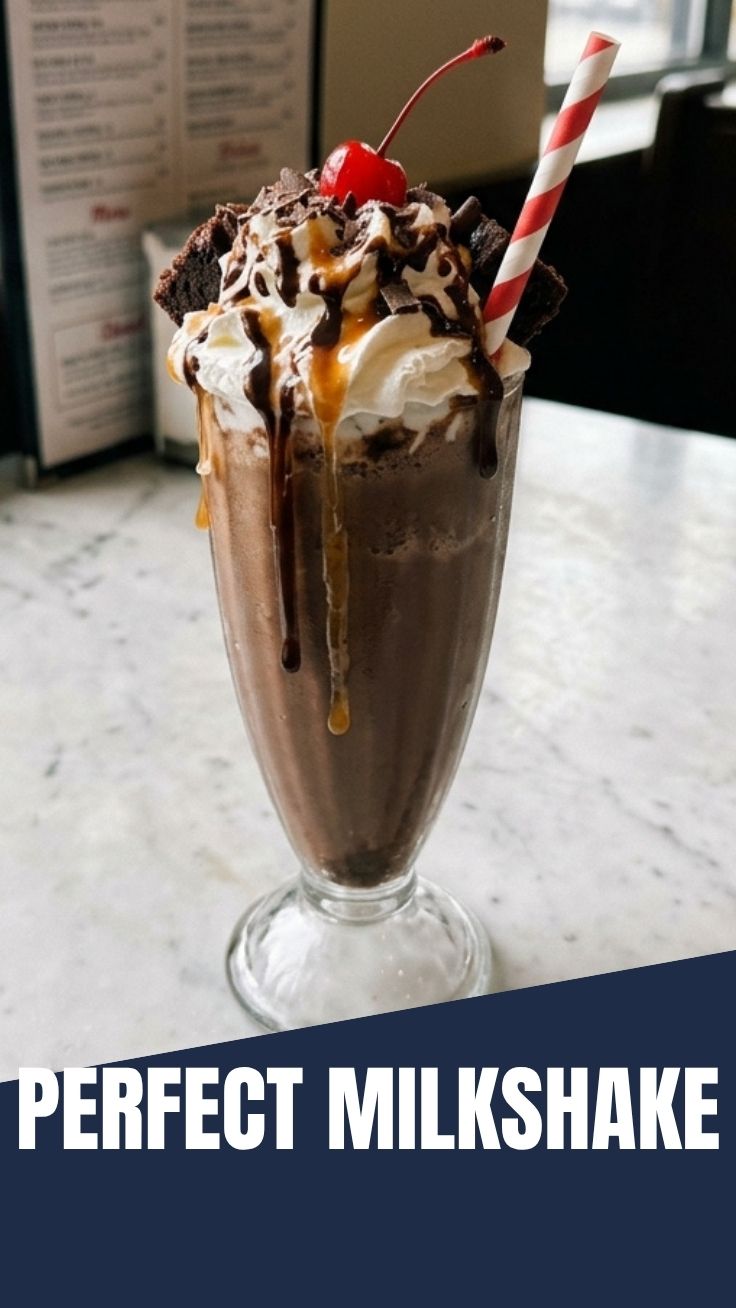
The beauty of a homemade Milkshake lies in its immediate gratification!
- Prep Time: 5 minutes
- Blender Time: 1-2 minutes
- Total Time: 6-7 minutes
There is no cooking, resting, or marinating time involved. This is a wonderfully quick dessert or treat, perfect for an impromptu indulgence or a fast cool-down on a warm day. Simply gather your ingredients, blend, and enjoy!
Step-by-Step Instructions
Follow these clear steps to create a heavenly Milkshake that’s superior to any store-bought version. These milkshake recipes are designed for success.
1. Chill Your Glassware (Optional but Recommended): Place your serving glasses in the freezer for at least 10-15 minutes before starting. This helps keep your milkshake colder for longer.
2. Scoop the Ice Cream: Add a full pint of premium vanilla bean ice cream to your blender. Ensure the ice cream is still firm, not melted, for the best consistency.
3. Add Liquid and Flavoring: Pour in the 1/2 cup of chilled whole milk, 1 teaspoon of vanilla extract, and your optional sugar (1-2 tablespoons).
4. Blend to Perfection: Secure the blender lid and start blending on a low setting, gradually increasing to medium-high. Blend until the mixture is completely smooth and creamy, with no ice cream lumps remaining. This usually takes about 1 to 2 minutes. Practical Tip: If the mixture is too thick to blend, add milk 1 tablespoon at a time until it moves freely. Avoid adding too much milk, as it will make your Milkshake too thin.
5. Taste and Adjust: Briefly taste the mixture. If you desire more sweetness, add a touch more sugar and blend for a few more seconds.
6. Pour and Garnish: Pour the freshly blended Milkshake into your chilled tall glasses.
7. Serve Immediately: Top with whipped cream and a drizzle of chocolate syrup if desired, and serve with a wide straw. Enjoy your homemade Milkshake right away!
Nutritional Benefits & Advantages
While a classic Milkshake is certainly an indulgence, it does offer some nutritional advantages when made with quality ingredients. Dairy, like the milk and ice cream used, is an excellent source of calcium for bone health and provides protein for muscle repair and satiety. Choosing full-fat dairy also ensures better absorption of fat-soluble vitamins. Furthermore, making your own allows you to control the sugar content, avoiding the excessive amounts often found in commercial versions. Whole milk also contributes important vitamins like Vitamin D.
Tips, Variations & Cooking Advice
The beauty of Milkshake mastery lies in its adaptability. Here are some ideas to spark your creativity:
- Flavor Variations:
* Chocolate: Add 2 tablespoons of unsweetened cocoa powder or 1/4 cup chocolate syrup to the blender.
* Strawberry: Blend in 1 cup of fresh or frozen strawberries.
* Oreo: Crumble 4-5 Oreo cookies into the blender for a cookies and cream delight.
* Coffee: Add 1 shot of espresso or 1-2 tablespoons of instant coffee powder.
* Peanut Butter: Incorporate 2-3 tablespoons of creamy peanut butter for a nutty twist.
- Ingredient Swaps:
* Dairy-Free: Use a good quality non-dairy ice cream (almond, soy, or coconut-based) and non-dairy milk (almond, oat, or soy milk) for a vegan option.
* Lactose-Free: Use lactose-free ice cream and milk.
- Texture Adjustments: For an extra thick milkshake, reduce the milk to 1/4 cup and add a few more scoops of ice cream. For a thinner consistency, add milk 1 tablespoon at a time until desired texture is reached.
- Adult Version: Add a shot of your favorite liqueur, such as Kahlúa, Bailey’s, or a spiced rum, for a grown-up treat.
Common Mistakes to Avoid
1. Using Melted or Soft Ice Cream: This will result in a watery, thin milkshake that lacks the desired richness. Always start with firm, hard ice cream.
2. Adding Too Much Milk (or Other Liquid): Over-diluting is the most common mistake. Start with the recommended amount and add more only if the blender struggles. You can always add more, but you can’t take it out.
3. Under-Blended Ingredients: Ensure all ingredients are fully incorporated and smooth. Lumps of ice cream or unmixed flavorings are not pleasant.
4. Not Chilling Your Glassware: While optional, this simple step significantly enhances the enjoyment by keeping your milkshake colder for longer, especially when making milkshake recipes on a warm day.
Storage & Meal Prep Tips
A freshly made Milkshake is always best enjoyed immediately due to its tendency to melt and separate. However, if you have leftovers:
- Refrigeration: You can store a milkshake in an airtight container in the refrigerator for up to 1 hour. It will likely separate, so a quick whisk or re-blend will be needed before serving. The texture will not be as thick as fresh.
- Freezing: For longer storage, pour the leftover milkshake into an freezer-safe container or ice cube tray. It can be frozen for up to 1-2 weeks. When ready to enjoy, let it thaw slightly at room temperature for 10-15 minutes, then re-blend with a splash of fresh milk until smooth. This method works surprisingly well for preserving flavor.
Conclusion
Mastering the art of making a homemade Milkshake is a truly rewarding endeavor. With just a few simple ingredients and a blender, you can craft a delightful, customizable treat that rivals any diner version. This guide has equipped you with the knowledge and confidence to experiment with various milkshake recipes, turning your kitchen into a personal dessert haven. So, go ahead, gather your ingredients, and blend up some creamy bliss. Don’t forget to share your amazing creations and personal twists in the comments below! We love hearing about your culinary adventures.
FAQs
Q1: Can I use frozen fruit instead of ice cream for a healthier version?
A1: Yes, you can. While it won’t be a traditional creamy milkshake, blending frozen fruit (like bananas or berries) with milk or yogurt creates a delicious and often healthier smoothie. For a thicker consistency, add a scoop of protein powder or a tablespoon of nut butter.
Q2: My milkshake is too thin. How can I fix it?
A2: If your milkshake is too thin, add a few more scoops of ice cream and re-blend until the desired thickness is achieved. Ensure your ice cream is very firm when you start.
Q3: How can I make my milkshake extra thick without adding more ice cream?
A3: To achieve an extra-thick milkshake, reduce the amount of milk you add initially. You can also add a tablespoon of Xanthan gum (a common thickener) or a spoonful of malted milk powder, which also adds a distinct flavor. Freezing your glasses beforehand also helps maintain thickness longer.
Q4: Can I prepare the ingredients ahead of time?
A4: You can measure out your milk and other liquid ingredients and keep them chilled, but a milkshake is truly best made fresh. The ice cream should only be added to the blender right before blending to maintain its frozen state.
Q5: What’s the best way to clean my blender after making a milkshake?
A5: For easy cleanup, immediately after pouring your milkshake, rinse the blender carafe with warm water. Then, add a few drops of dish soap and about 1 cup of warm water, secure the lid, and blend on high for 30 seconds. Rinse thoroughly, and it should be sparkling clean!