Unlock the Ultimate Comfort Food: Your Guide to Savory Homemade Garlic Bread
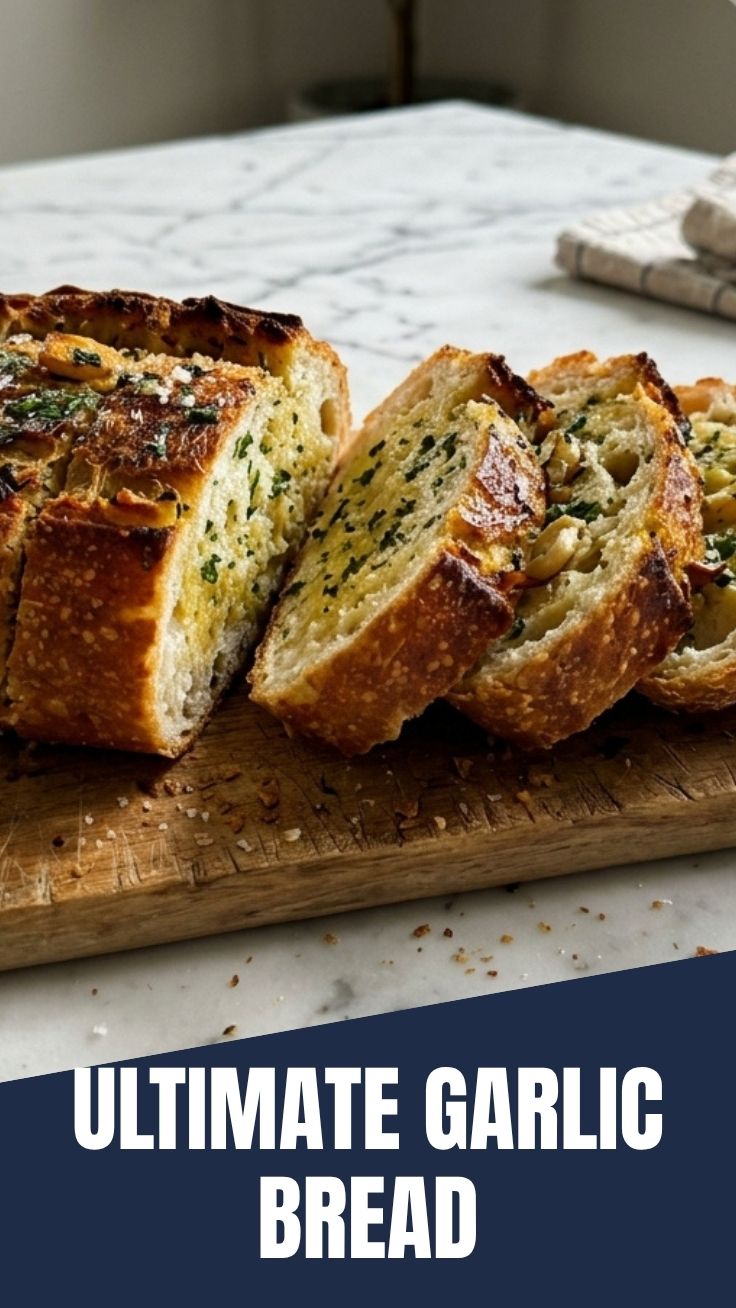
Tired of flimsy, flavorless store-bought bread? Are you ready to elevate your meal experience with an irresistible side dish that’s deceptively easy to make at home? Imagine a crusty exterior yielding to a soft, aromatic interior, infused with rich, savory Garlic Butter. This is more than just a side; it’s a culinary statement. Preparing your own Garlic Bread from scratch offers unparalleled flavor, freshness, and the satisfaction of knowing exactly what goes into your food. Skip the artificial additives and embrace the simple joy of creating something truly delicious.
Ingredients & Kitchen Tools
- 1 Loaf of Crusty French or Italian Bread: (About 16-18 inches long) A sturdy loaf is essential for that perfect crispy-on-the-outside, soft-on-the-inside texture.
- 1/2 Cup (1 stick) Unsalted Butter, softened: Allows for easy mixing and spreading. Unsalted gives you control over the overall sodium content.
- 4-6 Cloves Garlic, minced: Fresh garlic is non-negotiable for authentic flavor. Adjust to your desired intensity.
- 2 Tablespoons Fresh Parsley, finely chopped: Adds a vibrant color and herby freshness that complements the garlic.
- 1/2 Teaspoon Salt: Enhances the overall flavor profile.
- 1/4 Teaspoon Black Pepper (freshly ground): For a subtle aromatic kick.
- Optional: 1/4 Cup Grated Parmesan Cheese: Adds a delightful savory, umami note and helps form a golden crust.
- Baking Sheet: To hold the bread while it bakes.
- Aluminum Foil (optional): For covering during initial baking if you prefer softer crust.
- Small Mixing Bowl: For combining the butter mixture.
- Spatula or Spoon: For mixing.
- Sharp Serrated Knife: Crucial for slicing the bread without tearing.
- Pastry Brush or Butter Knife: For evenly spreading the garlic butter.
Prep Time & Cooking Schedule
- Prep Time: 10 minutes (This includes mincing garlic and chopping herbs).
- Cook Time: 10-15 minutes (Varies depending on your desired level of crispiness).
- Total Time: 20-25 minutes.
This recipe is perfect for last-minute additions to dinner, requiring minimal fuss but delivering maximum impact. You can prepare the garlic butter mixture ahead of time and store it in the fridge for up to a week, making assembly a breeze.
Step-by-Step Instructions
1. Preheat Oven & Butter Prep: Preheat your oven to 375°F (190°C). In a small mixing bowl, combine the softened butter, minced garlic, chopped parsley, salt, pepper, and optional grated Parmesan cheese. Mix thoroughly until smooth and well combined. This aromatic mixture forms the perfect Garlic Butter that will infuse our bread with incredible flavor.
2. Slice the Bread: Using a serrated knife, slice the loaf horizontally through the middle, almost to the end, creating a hinge. Alternatively, slice it into individual pieces about 1-inch thick, again, almost cutting all the way through if you prefer pull-apart style. Make sure this delicious Garlic Bread is ready to absorb all that goodness.
3. Spread the Garlic Butter: Generously spread the garlic butter mixture evenly over both cut surfaces of the bread. Ensure you get into all the nooks and crannies.
4. Bake to Perfection: Place the bread directly on a baking sheet. Bake in the preheated oven for 10-15 minutes, or until the edges are golden brown and crispy, and the butter is bubbling. For a softer interior, you can loosely tent the bread with aluminum foil for the first 7-8 minutes of baking, then remove for the remaining time to crisp up.
5. Serve & Enjoy: Once golden and fragrant, remove from the oven. If you sliced it as a hinge, cut it all the way through into individual pieces. Serve immediately and watch it disappear!
Nutritional Benefits & Advantages
Homemade garlic bread, while indulgent, offers some advantages. Fresh garlic is a known superfood, packed with powerful antioxidants and immune-boosting properties. Butter provides healthy fats and fat-soluble vitamins. Using quality whole-grain bread as a base (if desired) can add fiber and complex carbohydrates. You also control the sodium, fat, and artificial additives often found in commercially prepared versions.
Tips, Variations & Cooking Advice
- Cheesy Delight: For an extra gooey interior, sprinkle mozzarella or a blend of Italian cheeses over the garlic butter before baking.
- Spicy Kick: Add a pinch of red pepper flakes to the garlic butter mixture for a subtle heat.
- Herbal Infusion: Experiment with other herbs like fresh oregano, thyme, or chives for different flavor profiles.
- Grill It! For a smoky flavor, wrap the buttered bread in foil and grill over medium heat for 5-7 minutes, turning once, or until heated through and lightly charred.
- Dairy-Free Option: Use a high-quality vegan butter substitute to make this recipe completely dairy-free.
- Gluten-Free: Opt for a good quality gluten-free baguette or loaf; ensure it can withstand the baking process without becoming too crumbly.
Common Mistakes to Avoid
- Cold Butter: Using cold butter makes it difficult to incorporate the garlic and herbs evenly. Always soften your butter to room temperature.
- Overcooking: While a crispy crust is desired, overcooking can lead to dry, hard bread. Keep an eye on it, especially during the last few minutes.
- Too Little Garlic: Don’t be shy with the garlic! It’s the star of the show. Adjust to your taste, of course, but a meager amount will result in bland bread.
- Not Using Fresh Ingredients: Dried herbs or pre-minced garlic will never yield the same vibrant flavor as fresh ingredients.
Storage & Meal Prep Tips
Leftover garlic bread can be stored in an airtight container or wrapped tightly in aluminum foil at room temperature for up to 2 days, or in the refrigerator for up to 4 days. To reheat, wrap loosely in foil and warm in a 350°F (175°C) oven for 5-10 minutes, or until heated through and crisp. You can also re-toast it in a toaster oven for extra crispiness. The prepared garlic butter mixture can be stored in an airtight container in the refrigerator for up to a week, or frozen for several months, making future garlic bread endeavors a breeze.
Conclusion
There’s nothing quite like the aroma and taste of freshly baked homemade Garlic Bread. With just a few simple ingredients and a little love, you can transform an ordinary meal into an extraordinary culinary experience. The rich, savory notes of our expertly crafted Garlic Butter permeate every bite, promising a delightful crunch and a soft, flavorful interior. We encourage you to try this recipe, experiment with your own twists, and share your delicious results. Prepare to amaze your taste buds and impress your dinner guests with this ultimate comfort food!
FAQs
1. Can I use pre-minced garlic?
While fresh garlic is highly recommended for superior flavor, pre-minced garlic can be used in a pinch. Adjust the quantity to taste, as its potency can vary.
2. What’s the best type of bread to use?
A crusty French baguette or Italian loaf works best, as their texture can withstand the butter and heat, resulting in a perfect balance of crispy and soft.
3. How do I prevent my garlic bread from becoming soggy?
Ensure your butter is softened, not melted, to prevent oversaturation. Also, avoid covering tightly with foil for the entire baking duration, as this traps steam and can lead to sogginess.
4. Can I freeze garlic bread?
Yes! You can butter and assemble the bread, then wrap it tightly in foil and plastic wrap before freezing for up to 1-2 months. Bake directly from frozen, adding an extra 5-10 minutes to the cook time.