Unlock Flavor and Health: Your Ultimate Guide to Perfect Stuffed Bell Peppers
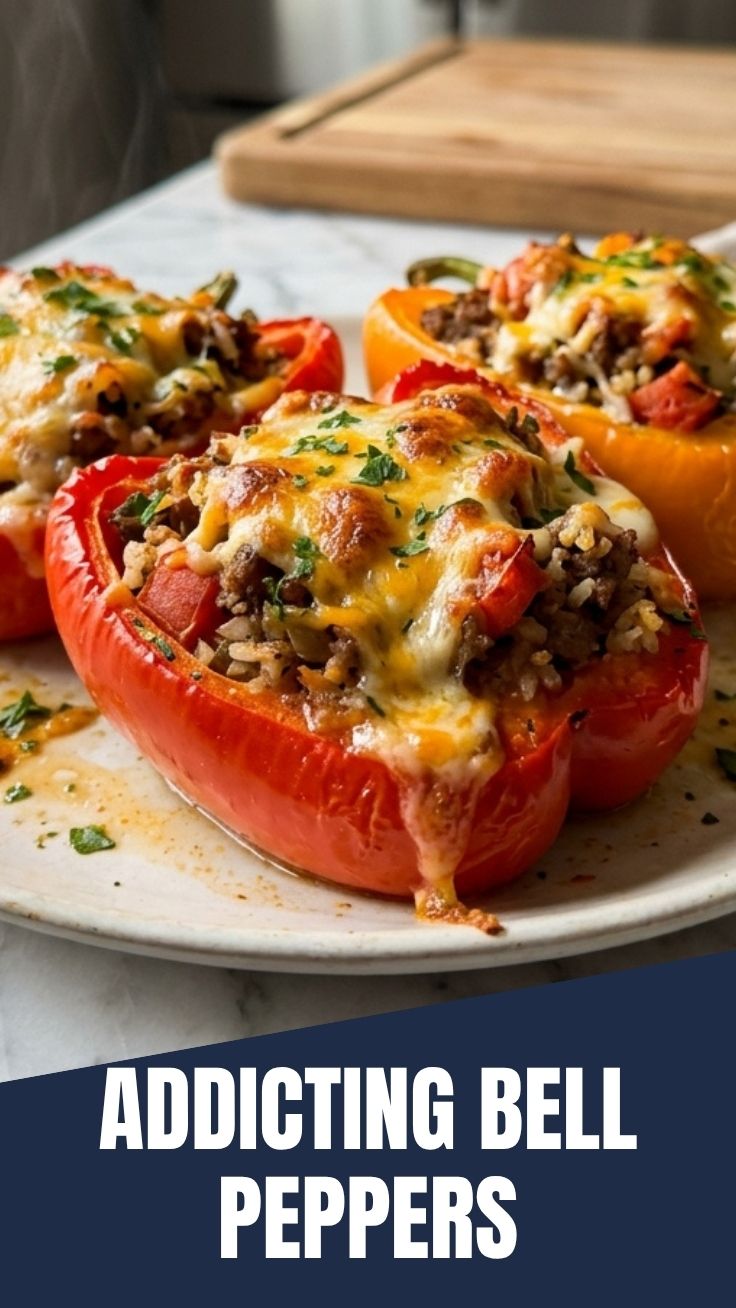
Tired of dinner dilemmas? Imagine a vibrant, satisfying meal that’s as wholesome as it is delicious. That’s the magic of Stuffed Bell Peppers! Crafting these culinary masterpieces at home allows for endless customization, ensuring fresh, high-quality ingredients and flavors tailored precisely to your palate. Forget bland takeout and embrace the joy of creating a truly nourishing and flavorful dish from scratch, demonstrating why this classic comfort food remains a perennial favorite among home cooks seeking delightful and nutritious bell pepper recipes.
Ingredients & Kitchen Tools
For a truly exceptional Stuffed Bell Peppers experience, gather these essentials:
- Bell Peppers (4-6 large): Opt for a variety of colors (red, yellow, orange) for a visually appealing dish and diverse nutrient profiles. Choose firm, unblemished peppers.
- Ground Meat (1 lb): Lean ground beef, turkey, or even a plant-based crumble works wonderfully. This is the heart of your savory filling.
- Cooked Rice (1 cup): Brown rice or white rice, pre-cooked, adds substance and helps bind the filling.
- Canned Diced Tomatoes (14.5 oz can, undrained): Provides moisture and a tangy base for the sauce.
- Onion (1 medium): Finely diced for aromatic depth.
- Garlic (2-3 cloves): Minced for a pungent, savory kick.
- Tomato Sauce (15 oz can): For the rich, saucy topping.
- Worcestershire Sauce (1 tbsp): Adds umami and complexity.
- Italian Seasoning (1 tsp): A fragrant blend of herbs.
- Salt & Black Pepper (to taste): Essential for seasoning.
- Cheese (1 cup shredded): Mozzarella, cheddar, or a blend for topping. Optional but highly recommended for gooey deliciousness.
- Olive Oil (1 tbsp): For sautéing.
Kitchen Tools:
- Large Skillet: For browning the meat and sautéing aromatics.
- Large Baking Dish: To hold the stuffed peppers during baking.
- Measuring Cups & Spoons: For accurate ingredient portions.
- Cutting Board & Knife: For prepping vegetables.
- Mixing Bowl: To combine the filling ingredients.
Prep Time & Cooking Schedule
Planning is key for a stress-free cooking experience!
- Prep Time: 25 minutes (This includes chopping vegetables, cooking rice if not already prepared, and browning the meat).
- Cook Time: 40-50 minutes (Baking time for the peppers until tender and heated through).
- Resting Time: 5-10 minutes (Allowing the peppers to cool slightly before serving helps the filling set and prevents burns).
You can easily pre-chop your vegetables or even prepare the filling a day ahead to significantly cut down on active prep time closer to dinner.
Step-by-Step Instructions
1. Preheat & Prep Peppers: Preheat your oven to 375°F (190°C). Wash and dry your bell peppers. Carefully slice off the tops (caps) of the peppers, then remove the seeds and membranes. If the peppers are wobbly, you can trim a very thin slice from the bottom to create a flat base, being careful not to cut through.
2. Sauté Aromatics & Meat: In a large skillet, heat olive oil over medium heat. Add the diced onion and cook until softened, about 5-7 minutes. Stir in the minced garlic and cook for another minute until fragrant. Add the ground meat to the skillet, breaking it up with a spoon. Cook until browned, then drain any excess grease.
3. Assemble the Filling: Return the browned meat to the skillet (or a large mixing bowl). Stir in the cooked rice, diced tomatoes (undrained), 1/2 cup of the tomato sauce, Worcestershire sauce, Italian seasoning, salt, and pepper. Mix well to combine all ingredients. This savory mixture forms the core of your perfect Stuffed Bell Peppers.
4. Stuff & Bake: Spoon the prepared filling generously into each hollowed-out bell pepper. Arrange the stuffed peppers in your baking dish. Pour the remaining tomato sauce over the tops of the stuffed peppers.
5. Bake to Perfection: Cover the baking dish tightly with aluminum foil and bake for 30 minutes. This steaming helps the peppers soften.
6. Add Cheese (Optional) & Finish Baking: Remove the foil. If using cheese, sprinkle it over the tops of the peppers. Return to the oven, uncovered, and bake for another 10-20 minutes, or until the peppers are tender, the filling is heated through, and the cheese is melted and bubbly. Enjoy these delightful bell pepper recipes!
Nutritional Benefits & Advantages
Bell peppers are nutritional powerhouses, packed with Vitamin C, antioxidants, and fiber. Choosing lean meat or a plant-based alternative further enhances the health profile of these Stuffed Bell Peppers, making them a balanced meal offering protein, complex carbohydrates from the rice, and a wealth of vitamins and minerals. They are naturally gluten-free (check rice packaging) and can be easily adapted to be dairy-free.
Tips, Variations & Cooking Advice
- Spice It Up: Add a pinch of red pepper flakes to the filling for a subtle heat.
- Cheese Please: Experiment with different cheeses like feta, provolone, or even a smoked gouda for unique flavor notes.
- Vegetarian Twist: Replace ground meat with quinoa, lentils, or a mixture of finely chopped mushrooms and spinach.
- Herb Power: Fresh herbs like parsley or basil stirred into the filling at the end add brightness.
- Cooking Method: While baking is traditional, you can also cook stuffed peppers in an Instant Pot or slow cooker for different textures.
- Air Fryer Finish: For crispy bell pepper edges, finish the last 10 minutes in an air fryer after baking.
Common Mistakes to Avoid
- Under-seasoning: Don’t be shy with salt and pepper! Taste your filling before stuffing.
- Overcooking Peppers: While you want them tender, avoid mushy peppers. Monitor the baking time.
- Not Draining Fat: If using higher-fat ground meat, draining the grease prevents a greasy final dish.
- Ignoring the Caps: While not used for stuffing, the pepper caps can be finely diced and added to the filling for extra nutrients and flavor.
Storage & Meal Prep Tips
Leftover Stuffed Bell Peppers are fantastic! Store them in an airtight container in the refrigerator for up to 3-4 days. For longer storage, freeze individual peppers in freezer-safe containers for up to 3 months. To reheat, thaw overnight in the fridge and then warm in the oven (covered) at 350°F (175°C) until heated through, or microwave in short bursts.
Conclusion
Crafting your own Stuffed Bell Peppers is a rewarding culinary journey, yielding a dish that’s both comforting and impressively versatile. By following these steps and tips, you’ll master this classic, delivering a delicious, nutritious, and totally customizable meal. So, gather your ingredients, unleash your creativity, and let these vibrant bell pepper recipes become a staple in your home cooking repertoire. Share your creations in the comments below – we’d love to hear your favorite variations!
FAQs
Q1: Can I make Stuffed Bell Peppers ahead of time?
A1: Absolutely! You can prepare the filling a day in advance and store it in the refrigerator. Stuff the peppers just before baking.
Q2: What if I don’t have fresh bell peppers?
A2: While fresh is best for texture, you can use frozen bell pepper halves. They might be softer, so adjust cooking time accordingly.
Q3: How do I prevent the peppers from becoming watery?
A3: Ensure your filling isn’t overly wet. Draining excess grease from the meat and not adding too much liquid beyond the canned tomatoes and sauce helps.
Q4: Can I use different grains instead of rice?
A4: Yes! Quinoa, bulgur, farro, or even couscous can be excellent substitutes for rice, offering different textures and nutritional profiles.
Q5: My peppers are still firm after baking. What should I do?
A5: Cover them again with foil and continue baking for another 10-15 minutes, or until desired tenderness is reached. Oven temperatures can vary.