Unlock Juicy Flavor: Your Guide to Perfect Baked Chicken Breast Every Time!
Tired of dry, uninspired chicken for dinner? What if we told you that achieving a perfectly moist and flavorful Baked Chicken Breast at home is not just possible, but incredibly simple? In a world of complicated culinary trends, mastering the basics is an art, and baking chicken breast is a fundamental skill that unlocks a world of delicious, healthy meals. Forget bland, forget boring – this comprehensive guide will transform your chicken game, proving that exceptional flavor doesn’t require hours in the kitchen. We’ll delve into the science of juicy protein, making your weeknight dinners and meal prep endeavors effortlessly delicious. Get ready to elevate your cooking with these incredibly Easy Chicken Recipes.
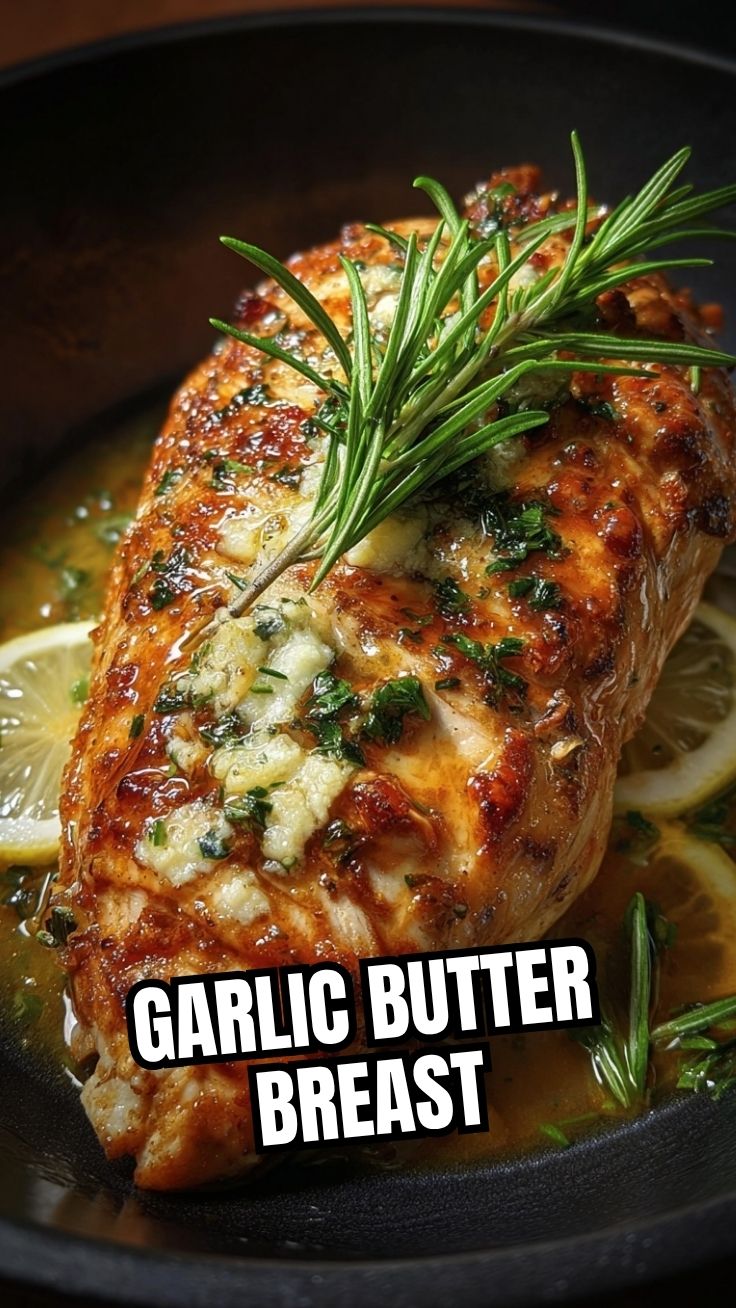
Ingredients & Kitchen Tools
Crafting the perfect baked chicken breast requires a few simple, high-quality ingredients and basic kitchen essentials.
- Boneless, Skinless Chicken Breasts (4 pieces, ~6-8 oz each): Opt for organic or free-range for best flavor. Their lean nature makes them a healthy protein source.
- Olive Oil (2 tbsp): Extra virgin is preferred for its rich flavor and heart-healthy monounsaturated fats. Helps bind seasonings and prevent sticking.
- Salt (1 tsp): Essential for seasoning; sea salt or kosher salt works well. Enhances the natural flavors of the chicken.
- Black Pepper (½ tsp): Freshly ground is always best for a more pungent aroma and flavor.
- Garlic Powder (1 tsp): A milder, more consistent flavor than fresh garlic, evenly distributing savory notes.
- Paprika (1 tsp): Adds a mild, sweet pepper flavor and a beautiful golden-brown color.
- Optional – Onion Powder (½ tsp): For an extra layer of savory depth.
- Optional – Dried Herbs (½ tsp, e.g., thyme, oregano, rosemary): To introduce aromatic complexity.
- Baking Dish or Sheet Pan: Essential for even cooking. A rimmed baking sheet lined with foil or parchment paper makes cleanup a breeze.
- Meat Thermometer: Crucial for ensuring the chicken is cooked through to a safe internal temperature (165°F / 74°C) without overcooking.
- Tongs: For handling hot chicken safely.
- Cutting Board & Knife: For prepping and slicing.
Prep Time & Cooking Schedule
This recipe is designed for maximum efficiency without compromising flavor. Understanding the timeline will help you seamlessly integrate it into your meal plan.
- Prep Time: 10 minutes (This includes seasoning the chicken and preheating your oven. Minimal effort for maximum impact!)
- Cook Time: 20-30 minutes (Depending on the thickness of your chicken breasts and oven calibration. Thicker breasts will take longer.)
- Resting Time: 5-10 minutes (Absolutely crucial! This allows the juices to redistribute throughout the meat, preventing dry chicken.)
Allow approximately 35-50 minutes from start to finish. This makes it a perfect candidate for busy weeknights or as a cornerstone for healthy meal prep.
Step-by-Step Instructions
Follow these steps precisely for a consistently juicy and flavorful Baked Chicken Breast. These Easy Chicken Recipes are all about technique.
1. Preheat & Prepare: Preheat your oven to 400°F (200°C). Line a baking dish or sheet pan with parchment paper or foil for easy cleanup.
2. Pat Dry: Using paper towels, thoroughly pat the chicken breasts dry. This is a critical step, as excess moisture can lead to steaming instead of browning, preventing that desirable golden crust.
3. Season Generously: In a small bowl, combine salt, black pepper, garlic powder, paprika, and any optional herbs or onion powder. Drizzle olive oil over the chicken breasts and rub to coat evenly. Then, sprinkle the seasoning mixture generously over both sides of the chicken, ensuring full coverage.
4. Arrange for Success: Place the seasoned chicken breasts in a single layer on your prepared baking dish, ensuring there’s a little space between each piece for even cooking. Avoid overcrowding the pan.
5. Bake to Perfection: Transfer the baking dish to the preheated oven. Bake for 20-30 minutes. The exact time will depend on the thickness of your chicken breasts.
6. Check for Doneness: This is where your meat thermometer becomes invaluable. Insert the thermometer into the thickest part of the largest chicken breast. It should read 165°F (74°C). If it’s not quite there, return it to the oven for a few more minutes and recheck.
7. Rest, Then Slice: Once cooked, remove the chicken from the oven and tent it loosely with foil. Let it rest for 5-10 minutes. Do not skip this step! Resting allows the muscle fibers to relax and reabsorb the flavorful juices, resulting in incredibly moist chicken. After resting, slice against the grain for maximum tenderness.
Nutritional Benefits & Advantages
Chicken breast is a powerhouse of lean protein, making it an excellent choice for a healthy diet. It’s low in fat and rich in essential nutrients like Niacin (Vitamin B3), Vitamin B6, Phosphorus, and Selenium. These contribute to energy production, brain function, bone health, and antioxidant defense. Furthermore, chicken breast is highly versatile, fitting seamlessly into various dietary plans, from low-carb to high-protein. Baking, rather than frying, keeps unwanted fats to a minimum, preserving its inherent health benefits.
Tips, Variations & Cooking Advice
- Flavor Boosts: Try adding a squeeze of fresh lemon juice before baking for brightness, or a sprinkle of cayenne pepper for a subtle kick.
- Marinades: Marinating the chicken for at least 30 minutes (or overnight) in a yogurt-based marinade, Italian dressing, or a citrus-herb blend can significantly tenderize and flavor the meat.
- Pounding Thin: For faster and even cooking, place chicken breasts between two sheets of parchment paper and gently pound them to an even thickness (about ¾ inch).
- Sauces: Serve with a simple pan sauce made from chicken broth, white wine, and a pat of butter, or a fresh salsa for added zest.
- Dietary Adaptations: Naturally gluten-free and dairy-free, this recipe is adaptable to most diets. For a lower sodium option, reduce the salt and rely more on herbs and spices.
Common Mistakes to Avoid
- Overcrowding the Pan: This leads to steaming, not browning. Give your chicken space!
- Not Patting Dry: A damp surface prevents a beautiful sear and crisp texture.
- Skipping the Meat Thermometer: This is the #1 culprit for dry, overcooked chicken. Trust the thermometer, not just the clock.
- Not Resting the Chicken: Resting is non-negotiable for juicy results. Impatience here will lead to dry meat.
- Cutting with the Grain: Always slice against the grain to shorten muscle fibers, making each bite more tender.
Storage & Meal Prep Tips
Cooked baked chicken breast is a meal prep superstar!
- Refrigeration: Store leftover cooked chicken breast in an airtight container in the refrigerator for up to 3-4 days.
- Freezing: For longer storage, slice or dice the cooked chicken and freeze in an airtight, freezer-safe bag or container for up to 2-3 months. Thaw overnight in the refrigerator before reheating.
- Reheating: To maintain moisture, reheat gently. A microwave on medium power for short bursts, or in a covered dish in a 300°F (150°C) oven with a splash of broth, works best. Avoid high heat, which can dry it out.
- Versatility: Use pre-cooked chicken in salads, sandwiches, wraps, tacos, pasta dishes, or quick stir-fries.
Conclusion
Mastering the perfect Baked Chicken Breast is a culinary game-changer. With just a few simple steps and the right techniques, you can transform a humble ingredient into a consistently delicious, healthy, and versatile meal. We hope this guide empowers you to ditch dry chicken forever and embrace the joy of perfectly cooked protein. These Easy Chicken Recipes are designed to fit seamlessly into any lifestyle. Now go forth and create! We’d love to hear about your juicy triumphs in the comments below.
FAQs
Q: How do I ensure my chicken breast stays moist?
A: The most critical steps are not overcooking (use a meat thermometer!) and allowing the chicken to rest for 5-10 minutes after baking. Patting dry and proper seasoning also help create a crust that locks in moisture.
Q: Can I use frozen chicken breasts?
A: Yes, but ensure they are fully thawed in the refrigerator before seasoning and baking. Baking from frozen will result in uneven cooking and a longer cook time.
Q: What if my chicken breasts are different thicknesses?
A: For even cooking, try to select breasts of similar thickness or, if necessary, pound the thicker parts slightly to equalize them. This prevents smaller pieces from drying out while larger ones cook through.
Q: Can I add vegetables to the baking dish?
A: Absolutely! This is a fantastic one-pan meal idea. Cut denser vegetables like potatoes or carrots into smaller pieces and add them to the pan about 10-15 minutes before the chicken, or softer vegetables like bell peppers and zucchini at the same time as the chicken.