Mastering Mouthwatering Ribs: Your Ultimate Guide for Flavorful Feasts
Ever wondered how to achieve that fall-off-the-bone tenderness and smoky flavor in ribs right in your own kitchen? Preparing exquisite ribs at home isn’t just about saving money; it’s about crafting an unforgettable culinary experience tailored to your taste. This comprehensive guide will walk you through everything you need to know, whether you’re planning a festive spread or a cozy family dinner. Get ready to elevate your cooking game with our detailed breakdown of how to make perfect Labor Day BBQ Ribs that will have everyone asking for your secret.
Ingredients & Kitchen Tools
To craft the perfect rack of ribs, you’ll need the right ingredients and equipment.
Ingredients:
- 2 racks (about 4-5 lbs) pork spare ribs or baby back ribs: The foundation of your delicious meal. Spare ribs offer more meat, while baby backs are leaner.
- ½ cup brown sugar: Adds a touch of sweetness and helps create a beautiful crust.
- ¼ cup paprika: Provides color and a smoky, earthy flavor.
- 2 tablespoons garlic powder: An aromatic staple for depth of flavor.
- 2 tablespoons onion powder: Complements the garlic and enhances savory notes.
- 1 tablespoon black pepper: Essential for a balanced spice profile.
- 1 tablespoon salt (kosher or sea salt recommended): Balances flavors and brings out the best in the meat.
- 1 teaspoon cayenne pepper (optional): For a subtle kick of heat.
- ½ cup apple cider vinegar: Tenderizes the meat and adds a tangy brightness.
- 1 cup chicken or beef broth: Keeps the ribs moist during cooking.
- Your favorite BBQ sauce (about 1-2 cups): For basting and serving; choose a smoky, sweet, or spicy variety.
Kitchen Tools:
- Large baking sheet with a wire rack: Elevates ribs for even cooking and airflow.
- Aluminum foil: For tenderizing and wrapping.
- Basting brush: To apply BBQ sauce evenly.
- Meat thermometer: Ensures ribs reach a safe internal temperature.
- Sharp knife: For trimming and portioning.
- Cutting board: A stable surface for preparation.
- Large pot or slow cooker (if making Slow Cooker Ribs): For alternative cooking methods.
Prep Time & Cooking Schedule
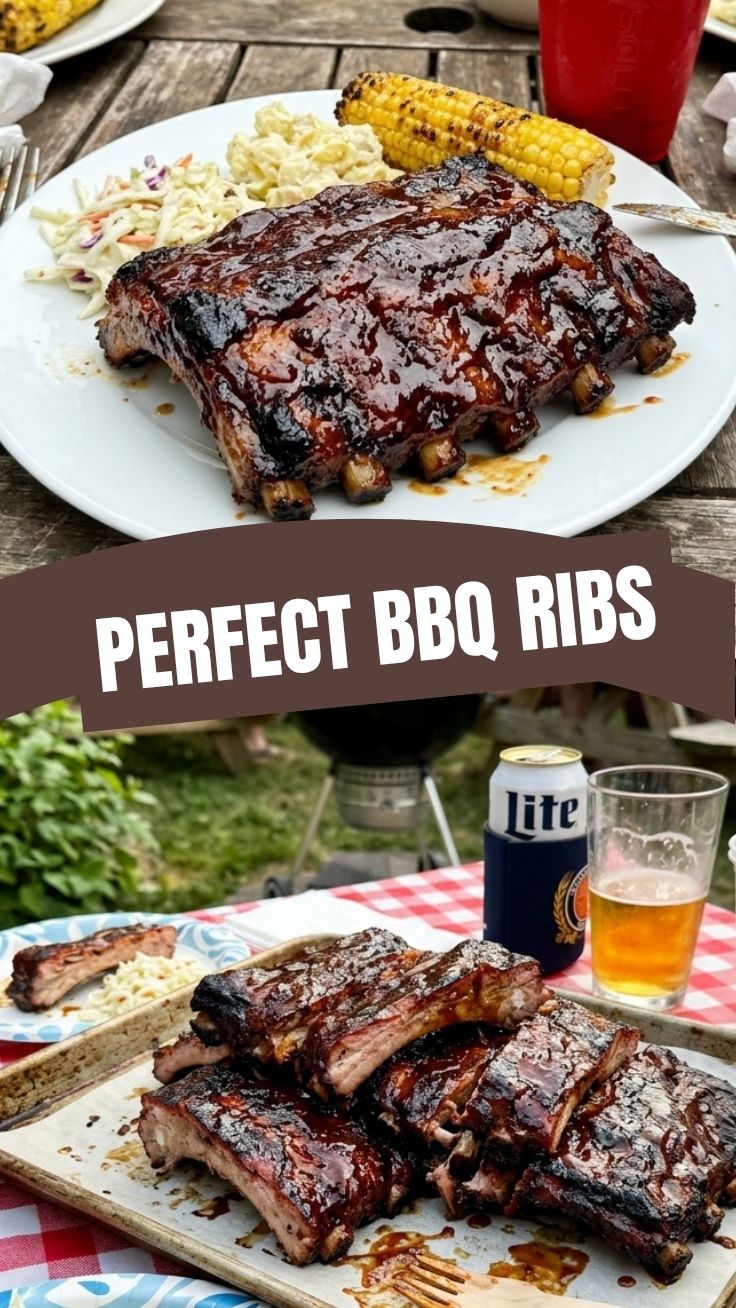
Planning is crucial for perfectly tender ribs.
- Prep Time: 20-30 minutes (includes membrane removal and dry rub application).
- Marinating Time (Optional but Recommended): 4-24 hours. A longer marination allows the flavors to penetrate deeper.
- Cook Time (Oven Baked): 2.5-3 hours at 275°F (135°C), plus 15-20 minutes for basting at 375°F (190°C).
- Cook Time (Slow Cooker Ribs): 6-8 hours on low or 3-4 hours on high.
- Resting Time: 10-15 minutes after cooking. This helps redistribute juices for maximum tenderness.
Step-by-Step Instructions
Follow these steps for ribs that are tender, juicy, and packed with flavor.
1. Prepare the Ribs: Remove the membrane from the back of each rack of ribs. Use a paper towel to grasp a corner of the membrane and pull it off. This step is crucial for tender ribs. Trim any excess fat.
2. Make the Dry Rub: In a small bowl, combine brown sugar, paprika, garlic powder, onion powder, black pepper, salt, and cayenne pepper (if using).
3. Apply the Rub: Generously rub the spice mixture all over both sides of the ribs. For best results, cover and refrigerate for at least 4 hours, or preferably overnight, to let the flavors meld.
4. Preheat Oven & Prepare for Baking: Preheat your oven to 275°F (135°C). Place the ribs on a wire rack set on a baking sheet. Pour the apple cider vinegar and chicken/beef broth into the bottom of the baking sheet (under the rack), being careful not to get the ribs wet. This creates a moist environment.
5. First Bake: Cover the baking sheet tightly with aluminum foil. Bake for 2.5-3 hours, or until the ribs are very tender but not falling apart.
6. Sauce & Finish: Remove the foil, drain off any accumulated liquid (or save it for a sauce base), and increase oven temperature to 375°F (190°C). Baste the ribs generously with your favorite BBQ sauce.
7. Final Bake: Return the ribs to the oven and bake for another 15-20 minutes, or until the sauce is caramelized and slightly tacky. For an irresistible finish, you can briefly broil them for 2-3 minutes, watching carefully to prevent burning.
8. Rest & Serve: Let the ribs rest for 10-15 minutes before slicing between the bones and serving. This ensures maximum juiciness. Enjoy your perfectly cooked Labor Day BBQ Ribs! If you’re opting for a hands-off approach, remember that Slow Cooker Ribs provide unparalleled tenderness with minimal supervision.
Nutritional Benefits & Advantages
Pork ribs, in moderation, offer a good source of protein, essential for muscle repair and growth. They also provide valuable vitamins and minerals like zinc, selenium, and B vitamins. Home-cooked ribs allow you to control the sugar and sodium content of your BBQ sauce, making it a healthier option than many store-bought alternatives. Preparing them from scratch ensures you know exactly what goes into your meal.
Tips, Variations & Cooking Advice
- Smoky Flavor: Add a teaspoon of liquid smoke to your dry rub or broth for an extra smoky dimension without a smoker.
- Spicy Kick: Increase cayenne pepper or add a pinch of smoked chipotle powder to the rub.
- Gluten-Free: Ensure your BBQ sauce is certified gluten-free. Most dry rub ingredients are naturally gluten-free.
- Alternative Cooking Method (Slow Cooker): To make Slow Cooker Ribs, sear the seasoned ribs in a hot pan before placing them in the slow cooker with ½ cup of broth or apple cider vinegar. Cook on low for 6-8 hours. Finish under the broiler with BBQ sauce.
- Grilling Finish: After the initial oven bake, you can finish your ribs on a preheated grill over medium heat, basting with sauce for 10-15 minutes to develop char and smoky flavor.
Common Mistakes to Avoid
- Not removing the membrane: This tough membrane makes ribs chewy and prevents flavor penetration. Always remove it!
- Overcooking: While “fall-off-the-bone” is desired, ribs that are mushy and entirely fall apart are overcooked. They should still have a slight chew. Use a meat thermometer (195-205°F / 90-95°C for optimal tenderness).
- Undercooking: Tough ribs are a sign of insufficient cooking time. Give them the time they need!
- Skipping the rest: Resting allows juices to redistribute, resulting in juicier ribs.
Storage & Meal Prep Tips
Leftover ribs can be a delicious meal prep option. Store cooked ribs tightly wrapped in aluminum foil or in an airtight container in the refrigerator for up to 3-4 days. For longer storage, freeze them for up to 3 months. To reheat, wrap in foil and warm in a 300°F (150°C) oven until heated through, or microwave in short bursts, taking care not to dry them out. Adding a tablespoon of water or broth to the foil can help maintain moisture.
Conclusion
Crafting perfect ribs at home is a rewarding experience that combines simple techniques with incredible results. Whether you’re aiming for show-stopping Labor Day BBQ Ribs or the effortless tenderness of Slow Cooker Ribs, these instructions will guide you to culinary success. Don’t be shy – dive in, experiment with flavors, and enjoy the satisfaction of serving truly delicious, homemade ribs. Your taste buds (and your guests) will thank you!
FAQs
Q1: Can I use chicken broth instead of apple cider vinegar?
A1: Yes, you can. While apple cider vinegar adds a tangy flavor and helps tenderize, chicken broth will also keep the ribs moist. You can even use a combination of both.
Q2: How do I know when the ribs are done?
A2: The best test is tenderness. When gently nudged, the meat should pull away from the bone easily. An internal temperature between 195-205°F (90-95°C) also indicates optimal doneness for tender ribs.
Q3: Can I prepare the dry rub ahead of time?
A3: Absolutely! You can mix the dry rub ingredients and store them in an airtight container for several weeks, making prep even faster.
Q4: What if I don’t have a wire rack for baking?
A4: While a wire rack is ideal for air circulation, you can place the ribs directly on a foil-lined baking sheet. Just be aware that the bottom might be slightly less crispy.
Q5: My ribs turned out tough. What went wrong?
A5: Tough ribs usually mean they haven’t been cooked long enough. Ensure you’ve removed the membrane, applied enough liquid to the baking sheet (if oven baking), and extended the cooking time until they reach the desired tenderness.