Unlock the Ultimate Summer Flavor: Your Guide to Perfect Grilled Corn on the Cob
Ever wondered how to achieve that perfectly charred, smoky, and sensationally sweet Grilled Corn on the Cob that tastes like sunshine on a plate? Forget bland, boiled corn – embracing the grill transforms this humble vegetable into a culinary star. Mastering this simple yet rewarding technique at home not only elevates your summer meals but also opens a world of delicious possibilities. This guide will walk you through every step to ensure your grilled corn recipes become legendary, making you the undisputed grill master among your friends and family.
Ingredients & Kitchen Tools
Gathering your artillery before you start is key to a smooth cooking experience. Here’s what you’ll need:
- Fresh Corn on the Cob (4-6 ears): Look for firm, bright green husks and plump kernels. Organic is always a great choice for optimal flavor.
- Unsalted Butter (¼ cup, melted): For flavor and to help achieve that perfect golden-brown char. Clarified butter can also be used.
- Olive Oil (2 tablespoons): A light coating helps prevent sticking and promotes even cooking. Avocado oil is a good alternative for its high smoke point.
- Salt (½ teaspoon, or to taste): Kosher or sea salt works best to enhance the corn’s natural sweetness.
- Black Pepper (¼ teaspoon, freshly ground): Adds a subtle kick. Smoked paprika can add extra depth.
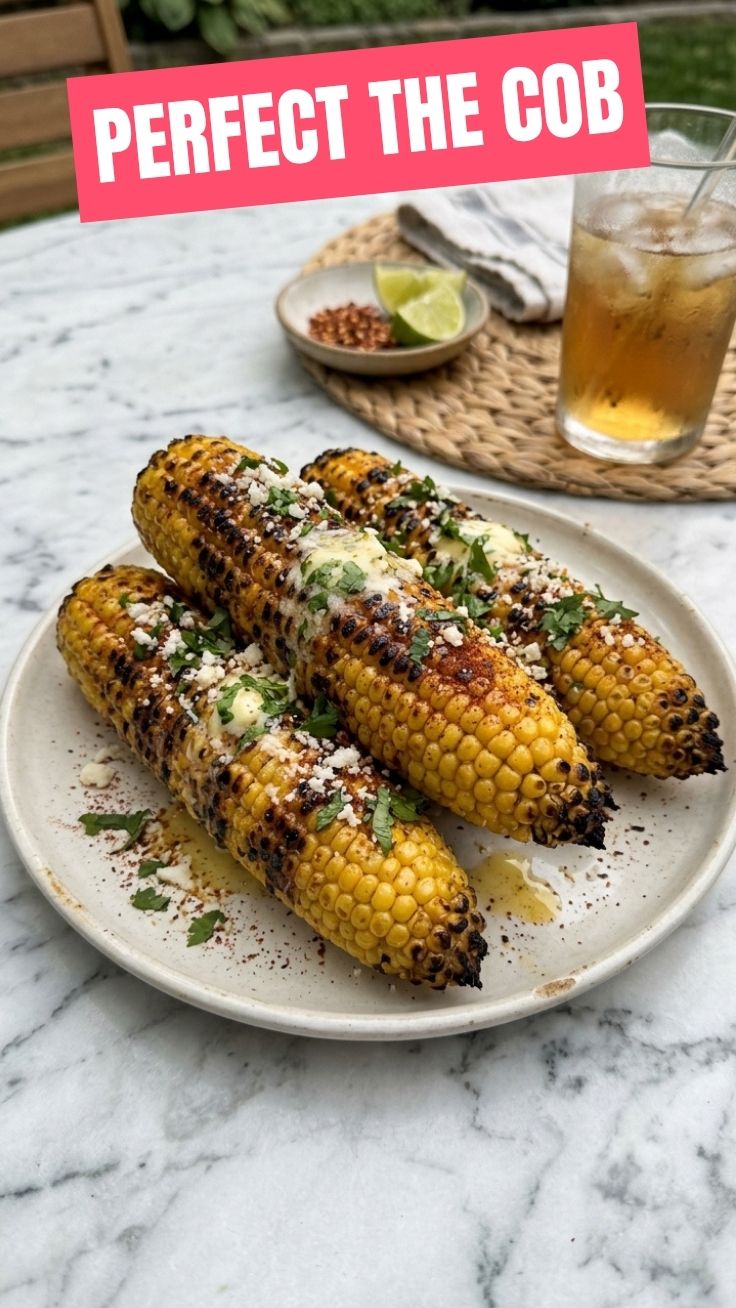
Optional Toppings: Cojita cheese, fresh cilantro, lime wedges, chili powder, Tajín seasoning – for elote*-style corn.
- Grill (Charcoal or Gas): The star of the show. Ensure it’s clean and preheated.
- Tongs (long-handled): Essential for safely turning the corn on the hot grill.
- Basting Brush: For applying butter or oil.
- Small Bowl: For mixing melted butter and seasonings.
- Cutting Board & Knife: For shucking and preparing the corn (if applicable).
Prep Time & Cooking Schedule
Getting the timing right ensures a stress-free grilling experience.
- Prep Time: 10 minutes (This includes shucking, cleaning, and seasoning the corn).
- Cooking Time: 10-15 minutes (Actual time will depend on grill temperature and desired char level).
- Resting Time: 2-3 minutes (Allowing it to rest briefly helps the flavors meld and prevents scalding hot kernels).
Plan to start prepping your corn shortly before you’re ready to light the grill. The beauty of Grilled Corn on the Cob is its quick cooking time, making it an ideal last-minute addition to any BBQ.
Step-by-Step Instructions
Follow these simple steps for perfectly grilled corn every time:
1. Preheat Your Grill: Set your grill to medium-high heat (375-400°F or 190-200°C). If using a charcoal grill, wait until the coals are ash-gray. This ensures even cooking and a beautiful sear.
2. Prepare the Corn: If not using the husks, carefully shuck the corn, removing all silks. You can also pull back the husks to use as a handle and remove silks, then soak the husked corn in water for 15-20 minutes to prevent scorching. Pat dry if soaking.
3. Season the Corn: In a small bowl, combine melted butter, olive oil, salt, and pepper. Brush each ear of corn generously with this mixture. This is where the magic happens, setting the stage for amazing flavor.
4. Grill ‘Em Up: Place the seasoned corn directly on the preheated grill grates. Use tongs to turn the corn every 2-3 minutes, ensuring all sides get evenly charred and cooked. Look for tender kernels and distinct grill marks.
5. Achieve Perfection: Continue grilling for 10-15 minutes, or until the kernels are tender and slightly caramelized, with a nice smoky char in spots. The internal temperature should be around 160°F (71°C) if you want to be precise, but tenderness is the best indicator.
6. Serve Hot: Remove the corn from the grill and serve immediately. This is the perfect time to add any desired toppings from your favorite grilled corn recipes.
Nutritional Benefits & Advantages
Corn is more than just a tasty side dish; it offers several health perks! It’s a good source of dietary fiber, which aids digestion and can help lower cholesterol. Yellow corn is rich in carotenoids like lutein and zeaxanthin, beneficial for eye health. Grilling, as opposed to boiling, can help retain more of these heat-sensitive nutrients and, when prepared with minimal added fats, keeps the dish relatively light. It’s also naturally gluten-free, making it a versatile option for various dietary needs.
Tips, Variations & Cooking Advice
- Flavor Boosts: Rub the corn with a cut lime or lemon wedge after grilling for a bright, zesty finish.
- Herbaceous Delight: Mix finely chopped fresh herbs like chives, parsley, or dill into your butter mixture before basting.
- Spicy Kick: Add a pinch of cayenne pepper or chipotle powder to your seasoning mix for a fiery twist.
- Sweet & Smoky: A drizzle of honey or maple syrup after grilling provides a delightful sweet counterpoint to the smoky char.
- Husks On/Off: Grilling with husks on creates a steamed effect, resulting in softer kernels, though with less direct smoky flavor. Shucked corn gets that superior char.
- Dietary Adaptations: For dairy-free, use a plant-based butter alternative or simply olive oil. For lower sodium, reduce the salt and rely on herbs and spices for flavor.
Common Mistakes to Avoid
- Overcrowding the Grill: This lowers the grill temperature and prevents proper charring. Cook in batches if necessary.
- Under-Seasoning: Don’t be shy with the butter, salt, and pepper! They are essential for flavor.
- Not Rotating Enough: Uneven cooking will result in some perfectly charred spots and some raw spots. Turn often.
- Grilling on a Cold Grill: Always preheat your grill to the specified temperature to get those beautiful grill marks and ensure quick, even cooking.
- Letting it Dry Out: If grilling shucked, a light brush of oil or butter helps keep the kernels moist.
Storage & Meal Prep Tips
Leftover grilled corn can be stored in an airtight container in the refrigerator for up to 3-4 days. To maintain texture and flavor when reheating, cut the kernels off the cob and gently sauté them in a pan with a touch of butter or olive oil, or reheat briefly in the microwave. Freezing is also an option; cut kernels off the cob, spread them on a baking sheet to freeze individually, then transfer to a freezer-safe bag for up to 3 months. Thaw and use in soups, salads, or stir-fries.
Conclusion
Creating perfectly Grilled Corn on the Cob is an art form that’s surprisingly easy to master. With its smoky sweetness and tender bite, it’s a quintessential summer side dish that never fails to impress. We encourage you to fire up your grill, experiment with exciting toppings, and discover your own favorite grilled corn recipes. Share your culinary creations and let us know your go-to grilling tips in the comments below!
FAQs
Q1: Do I need to soak corn before grilling?
A1: Soaking husked corn for 15-20 minutes can prevent scorching and result in slightly more tender kernels. If grilling unshucked corn, soaking the corn with the husks on keeps the husks from burning. It’s optional for shucked corn, but helpful if you want a softer kernel.
Q2: What’s the best way to get good char marks?
A2: Ensure your grill is preheated to medium-high (375-400°F) and the grates are clean. Don’t move the corn too quickly – allow it to sit for 2-3 minutes per side before turning to develop those beautiful grill marks.
Q3: Can I grill corn without husks?
A3: Absolutely! Grilling corn without husks (shucked) allows for direct contact with the heat, resulting in a more pronounced char and smoky flavor. Just make sure to brush it with oil or butter to keep it from drying out.
Q4: How do I know when the corn is done?
A4: The corn is done when the kernels are tender and slightly plump, with some golden-brown or charred spots. You can easily test a kernel with your fingernail or by carefully tasting it.
Q5: What are some popular grilled corn toppings?
A5: Beyond butter, salt, and pepper, popular toppings include: Cojita cheese, lime juice, chili powder (like Tajín), fresh cilantro, mayonnaise or crema for a Mexican street corn (elote) style, and even hot sauce or a sprinkle of smoked paprika.