Rise and Shine: Fluffy Dutch Baby Pancake Perfection at Home
Ever wondered about that magical, puffy pancake that looks like it belongs on a gourmet breakfast table but is surprisingly simple to make? We’re talking about the incredible versatility of the Dutch Baby Pancake, a dish that transforms everyday ingredients into a spectacular morning (or evening!) treat. Preparing this at home not only saves you a trip to a fancy brunch spot but also fills your kitchen with an irresistible aroma that’s sure to wake up your senses. It’s a culinary experience that’s both impressive and comforting, much like its close cousin, the German Pancake. Dive in to discover how easy it is to achieve that coveted golden perfection right in your own kitchen!
Ingredients & Kitchen Tools
To embark on your Dutch Baby Pancake adventure, gather these essentials:
- Large Cast-Iron Skillet (10-12 inches): Essential for that signature crisp edge and even heat distribution. A heavy-bottomed oven-safe skillet works too.
- Whisk: For combining ingredients smoothly.
- Blender (Optional but Recommended): Creates the smoothest batter, minimizing lumps effortlessly.
- Measuring Cups & Spoons: Accuracy is key in baking!
- Heat-Resistant Spatula: For serving.
Ingredients:
- 3 Large Eggs: At room temperature for better incorporation and lift.
- ½ Cup All-Purpose Flour: Standard flour creates the classic structure.
- ½ Cup Milk: Whole milk is preferred for richness, but any milk works.
- 2 Tablespoons Granulated Sugar: Just enough for a hint of sweetness.
- ¼ Teaspoon Salt: Balances flavors and enhances sweetness.
- 4 Tablespoons Unsalted Butter: For melting in the skillet, contributing to the crispy, buttery crust.
- Optional Toppings: Powdered sugar, fresh berries, lemon wedges, maple syrup, fruit compote, whipped cream.
Prep Time & Cooking Schedule
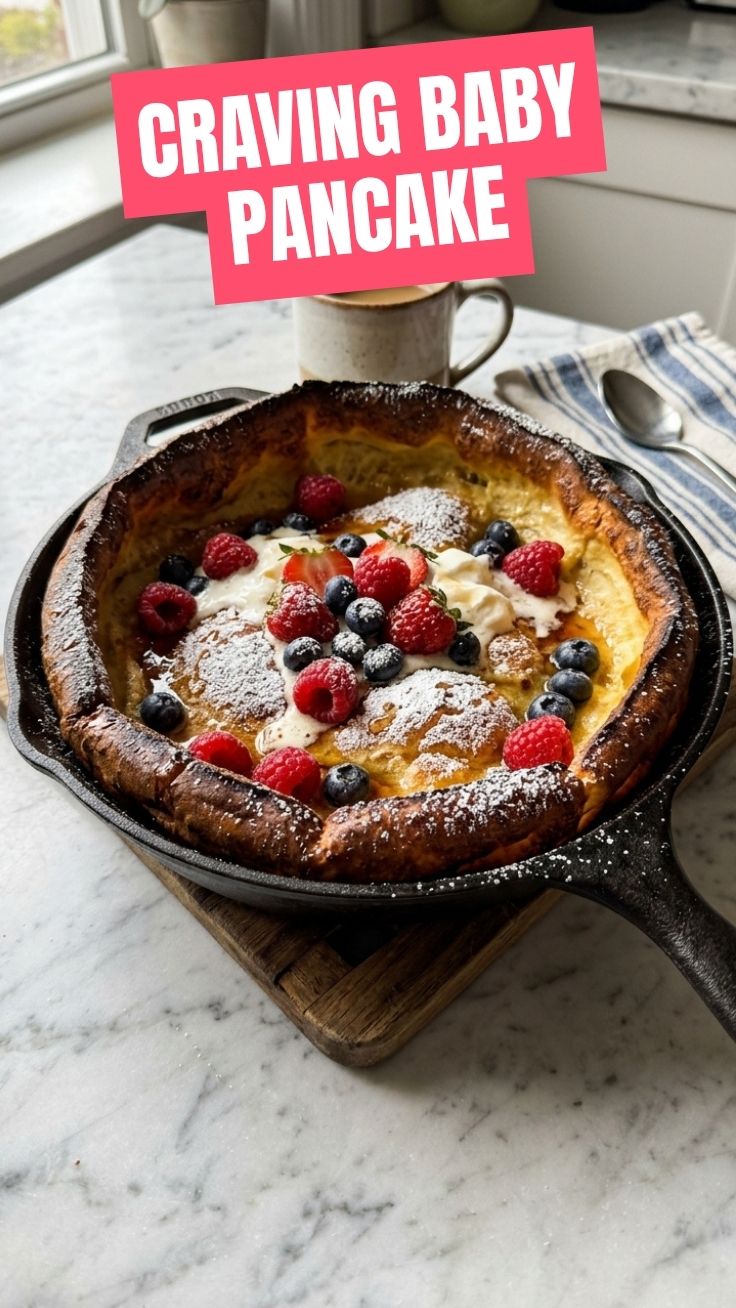
This recipe is surprisingly quick, making it perfect for a spontaneous brunch!
- Prep Time: 5 minutes
- Resting Time (Optional but Recommended): 10-15 minutes (allows gluten to relax for a tender texture)
- Cook Time: 15-20 minutes
- Total Time: Approximately 20-40 minutes
For best results, aim to preheat your oven and skillet while you prepare the batter. The resting time for the batter isn’t strictly necessary, but it does lead to a slightly more tender and airy pancake.
Step-by-Step Instructions
Achieving that towering, golden Dutch Baby Pancake is easier than you think. Follow these steps for success:
1. Preheat Oven & Skillet: Place your cast-iron skillet in the oven and preheat to 425°F (220°C). This ensures the skillet gets scorching hot, which is crucial for the pancake’s dramatic rise.
2. Prepare the Batter: In a blender or mixing bowl, combine the eggs, milk, flour, sugar, and salt. If using a blender, blend until smooth, about 30 seconds, scraping down the sides as needed. If whisking, ensure there are no lumps.
3. Rest the Batter (Optional): Let the batter rest at room temperature for 10-15 minutes. This allows the flour to fully hydrate, resulting in a more tender crumb.
4. Melt the Butter: Carefully remove the hot skillet from the oven. Add the 4 tablespoons of butter to the skillet and swirl it around until it’s completely melted and coats the bottom and sides. The butter should sizzle.
5. Pour & Bake: Pour the prepared batter directly into the hot, buttered skillet. Immediately return the skillet to the oven.
6. Watch it Rise: Bake for 15-20 minutes, or until the edges are dramatically puffed and deeply golden brown, and the center is set. Resist the urge to open the oven door during the first 10-12 minutes, as this can cause the pancake to deflate.
7. Serve Immediately: Carefully remove the skillet from the oven. The pancake will begin to deflate almost immediately, which is completely normal. Dust generously with powdered sugar, add fresh fruit, a squeeze of lemon, or maple syrup. Enjoy your perfect German Pancake!
Nutritional Benefits & Advantages
A Dutch Baby Pancake, while a treat, offers some notable advantages. Eggs are a fantastic source of protein, essential for muscle repair and sustained energy. Milk contributes calcium for bone health. Compared to traditional pancakes that often involve multiple flips and significant oil, this oven-baked variant uses minimal oil absorbed into its crisp crust. It’s a substantial, satisfying meal that can be customized with nutritious toppings like fresh berries, which are rich in antioxidants and fiber.
Tips, Variations & Cooking Advice
- Sweet vs. Savory: While typically sweet, a Dutch Baby Pancake can go savory! Omit the sugar and serve with cheese, herbs, smoked salmon, or sautéed vegetables.
- Gluten-Free: Substitute the all-purpose flour with a 1:1 gluten-free baking mix for an equally delicious result.
- Dairy-Free: Use your preferred plant-based milk (almond, soy, oat) and dairy-free butter.
- Flavor Boosts: Add a teaspoon of vanilla extract or a pinch of nutmeg to the batter for extra aroma.
- Fruit Infusion: Arrange thinly sliced apples, pears, or berries in the hot buttered skillet before pouring the batter over them for a baked-in fruit experience.
Common Mistakes to Avoid
- Not Preheating the Skillet: This is the most crucial step for a high rise. A cold skillet leads to a flat pancake.
- Opening the Oven Door Too Soon: The sudden temperature drop can cause the pancake to collapse. Patience is key!
- Overmixing the Batter: While a smooth batter is good, overmixing can develop too much gluten, leading to a tough pancake. Blend just until combined.
- Cool Skillet: Make sure the skillet is piping hot when the butter is added and the batter is poured.
Storage & Meal Prep Tips
A freshly baked Dutch Baby Pancake is best served immediately. However, if you have leftovers:
- Refrigeration: Wrap cooled portions tightly in plastic wrap or an airtight container. It will keep for 1-2 days.
- Reheating: Reheat in a preheated oven at 350°F (175°C) for 5-10 minutes until warmed through, or briefly in a toaster oven for crispness. Microwaving is not recommended as it will make it soggy.
- Meal Prep (Batter): You can prepare the batter up to 24 hours in advance and store it in the refrigerator. Just give it a good whisk before pouring into the hot skillet.
Conclusion
There you have it – the secrets to crafting a perfectly puffed, golden, and utterly delicious Dutch Baby Pancake right in your own kitchen! This impressive yet simple dish, much like its cousin the German Pancake, is a testament to how humble ingredients can create something truly spectacular. Its versatility, ease of preparation, and dazzling presentation make it a go-to for any breakfast, brunch, or even a delightful dessert. Don’t hesitate to give this recipe a try; you’ll be amazed at the results! Share your creations with us in the comments below!
FAQs
Q1: Why did my Dutch Baby Pancake not puff up?
A1: The most common reasons are not preheating the skillet enough, opening the oven door too early, or a cold oven. Ensure your skillet is scorching hot when the batter goes in, and resist peeking during baking.
Q2: Can I make this in a regular baking dish instead of a cast-iron skillet?
A2: While a cast-iron skillet provides the best heat retention and crispiness, you can use any 10-12 inch oven-safe baking dish. Just ensure it’s well-greased and preheated in the oven.
Q3: What’s the difference between a Dutch Baby and a regular pancake?
A3: A Dutch Baby Pancake is a large, oven-baked pancake with a custard-like center and dramatically puffed, crispy edges, often cooked in a cast iron skillet. Regular pancakes are smaller, cooked on a griddle, and have a softer, flatter consistency.
Q4: Can I add fruit to the batter?
A4: You can arrange thinly sliced fruit (like apples or pears) in the hot, buttered skillet before pouring the batter over them. Adding fruit directly into the batter might weigh it down and inhibit its rise.
Q5: What are some fun toppings for a Dutch Baby?
A5: Beyond the classic powdered sugar and lemon, try fresh berries, sliced bananas, whipped cream, maple syrup, chocolate sauce, toasted nuts, or a dollop of fruit compote. For a savory twist, consider cheese, herbs, or a fried egg.