Revolutionize Your Burger Night: The Ultimate Homemade Cheeseburger Experience
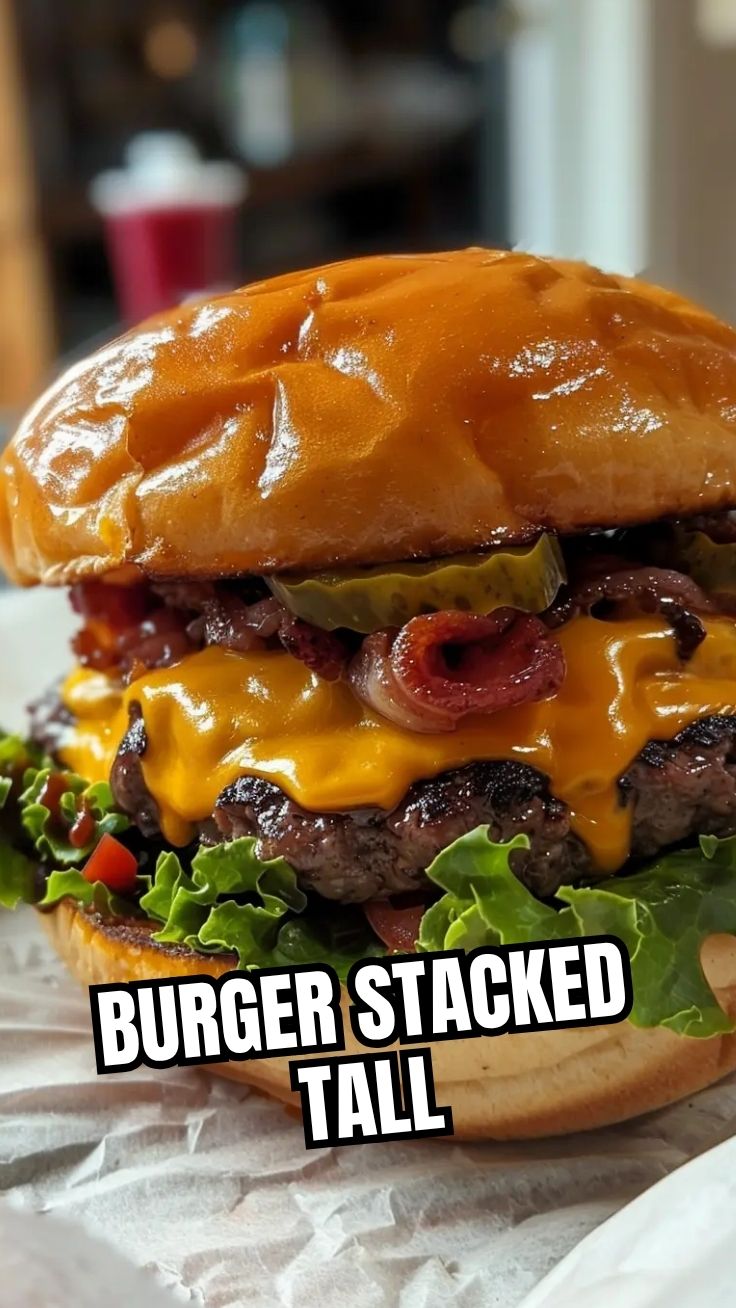
Are you truly tired of bland, uninspired burgers that leave you feeling… well, just BLAH? Imagine biting into a juicy, flavorful homemade Cheeseburger, perfectly seared with a melty cheese crown, all crafted in your own kitchen. This isn’t just about making a meal; it’s about elevating your culinary game and experiencing the pure joy of a perfectly executed classic. Learning how to master the art of the perfect burger at home offers unparalleled satisfaction, allowing you to control every ingredient and tailor it to your exact preferences. Forget those generic fast-food patties; today, we’re diving deep into creating a truly exceptional burger that will make you question why you ever settled for less. We’ll explore everything from choosing the best beef for your patty to achieving that ideal sear, ensuring your homemade creation rivals any gourmet establishment. Even a classic Hamburger can be transformed into culinary gold with the right approach and a little homemade love.
Ingredients & Kitchen Tools
Here’s what you’ll need to craft your masterpiece. Remember, quality ingredients make all the difference!
Ingredients:
- 1.5 lbs Ground Beef (80/20 Chuck): This ratio provides the ideal balance of fat for juiciness and flavor. Opt for freshly ground if possible.
- 1 tsp Salt: Enhances the beef’s natural flavors. Kosher or sea salt preferred.
- 0.5 tsp Black Pepper: Adds a touch of spice and aromatic depth. Freshly ground is best.
- 1/2 tsp Garlic Powder: Contributes a subtle, savory aroma without overpowering.
- 1/4 tsp Onion Powder: Rounds out the savory profile, adding a hint of sweetness.
- 4 slices American Cheese (or Cheddar, Provolone): Melts beautifully and provides that classic burger creaminess. Use your favorite!
- 4 Burger Buns (Brioche, Potato, or Sesame Seed): Choose a sturdy bun that can hold up to the juicy patty. Brioche adds richness.
- Optional Toppings: Lettuce, tomato, onion, pickles, ketchup, mustard, mayonnaise, bacon, sautéed mushrooms. Customize to your heart’s content!
- 1 tbsp Olive Oil (or high smoke point oil like Grapeseed): For searing the patties without sticking.
Kitchen Tools:
- Large Mixing Bowl: For gently combining burger ingredients.
- Cast Iron Skillet or Heavy-Bottomed Pan: Essential for achieving a perfect sear and crust.
- Spatula: A sturdy, wide spatula is crucial for flipping and pressing patties.
- Instant-Read Thermometer: To ensure perfect doneness without overcooking.
- Baking Sheet with Wire Rack: For resting cooked patties.
- Optional: Burger Press: For uniform patty thickness.
Prep Time & Cooking Schedule
Planning is key to a stress-free cooking experience. This recipe allows for a quick turnaround but benefits from a short resting period.
- Prep Time: 15 minutes (Includes seasoning meat, forming patties, and chopping toppings).
- Cook Time: 10-15 minutes (Per batch of burgers, depending on desired doneness).
- Resting Time: 5 minutes (Crucial for juicy patties, preventing dryness).
- Total Time: Approximately 30-35 minutes.
Plan to have all your ingredients prepped and ready before you start cooking. This “mise en place” approach ensures a smooth and enjoyable burger-making process.
Step-by-Step Instructions
Follow these steps closely for an incredibly satisfying burger experience.
1. Prepare the Patties: In a large mixing bowl, gently combine the ground beef with salt, black pepper, garlic powder, and onion powder. Avoid overmixing, as this can lead to tough burgers. Divide the mixture into four equal portions (approximately 6 oz each). Form each portion into a loose ball, then gently flatten into a patty about 3/4 to 1 inch thick. Make a small indentation in the center of each patty with your thumb – this prevents the burger from puffing up into a dome while cooking, ensuring an even cook.
2. Preheat Your Pan: Place your cast iron skillet or heavy-bottomed pan over medium-high heat. Add the olive oil and allow it to preheat until shimmering, just before it begins to smoke. A hot pan is crucial for a great sear.
3. Sear the Burgers: Carefully place the patties in the hot skillet. Do not overcrowd the pan; cook in batches if necessary. Sear undisturbed for 3-4 minutes to develop a beautiful crust. Many believe a well-seared Cheeseburger is the hallmark of burger mastery.
4. Flip and Cook: Flip the patties. For a medium-rare burger, continue to cook for another 3-4 minutes. For medium, cook 4-5 minutes, and for well-done, 6-7 minutes. Use an instant-read thermometer to check internal temperature: 130-135°F for medium-rare, 135-140°F for medium, and 150-155°F for medium-well. For a classic Hamburger, this cooking process is identical.
5. Add Cheese and Toast Buns: During the last minute of cooking, place a slice of cheese on top of each patty. You can cover the pan for 30 seconds to help the cheese melt perfectly. While the cheese is melting, lightly butter or oil your burger buns and toast them face down in a separate dry pan or directly on the hot skillet for 1-2 minutes until golden brown.
6. Rest and Assemble: Transfer the cooked patties to a baking sheet with a wire rack and let them rest for 5 minutes. This allows the juices to redistribute, ensuring a tender and moist burger. Assemble your burgers on the toasted buns with your favorite toppings. Serve immediately!
Nutritional Benefits & Advantages
Homemade burgers, especially when made with quality ground beef, offer several nutritional upsides. Beef is an excellent source of protein, essential for muscle repair and growth. It also provides vital nutrients like iron, zinc, and B vitamins, which are crucial for energy production and immune function. By making your own, you control the amount of fat, sodium, and ingredients, avoiding excessive additives often found in processed versions. Choosing lean beef and piling on fresh veggies as toppings significantly boosts the nutritional profile compared to fast-food counterparts.
Tips, Variations & Cooking Advice
- Flavor Boosts: Mix in a dash of Worcestershire sauce, a spoonful of Dijon mustard, or some finely minced jalapeño into the ground beef mixture for extra flavor.
- Dietary Adaptations:
* Gluten-Free: Serve on gluten-free buns or as a lettuce wrap.
* Dairy-Free: Omit the cheese or use a dairy-free cheese alternative.
* Lower Fat: Opt for leaner ground beef (90/10) but be mindful it may be less juicy. Mix in some finely grated zucchini to add moisture.
- Alternative Cooking Methods: Grill your burgers over medium-high heat for a smoky flavor. For a quick option, pan-fry as described.
- Patty Size: Aim for patties slightly wider than your bun, as they shrink when cooked.
- Don’t Press: Resist the urge to press down on the patties with your spatula while cooking, as this squeezes out all the delicious juices, leading to dry burgers.
Common Mistakes to Avoid
- Overmixing the Meat: This develops the protein strands too much, resulting in a tough, chewy burger. Keep handling to a minimum.
- Cooking on a Cold Pan: Leads to sticking and a lack of a good sear. Always preheat your pan until hot.
- Overcrowding the Pan: Lowers the pan’s temperature, steaming the burgers instead of searing them, and preventing a crust from forming. Cook in batches if needed.
- Not Resting the Patties: Resting allows the meat’s juices to redistribute, ensuring a tender and moist burger. Skipping this step can lead to dry results.
- Ignoring Temperature: Guessing doneness often leads to overcooked or undercooked burgers. An instant-read thermometer is your best friend.
Storage & Meal Prep Tips
Cooked burger patties can be stored in an airtight container in the refrigerator for 3-4 days. For longer storage, cooked patties freeze well for up to 2-3 months. Wrap individual patties tightly in plastic wrap, then place them in a freezer-safe bag.
To reheat, thaw frozen patties in the refrigerator overnight. Reheat gently in a skillet over medium-low heat with a splash of water, covered, to maintain moisture. You can also warm them carefully in a microwave. Avoid high heat, which can dry out the meat. Prepare toppings fresh for the best experience.
Conclusion
Mastering the art of the homemade Cheeseburger is a truly rewarding endeavor, transforming a simple meal into an extraordinary culinary experience. By following these detailed steps and paying attention to key techniques, you can consistently achieve a juicy, flavorful patty with that irresistible melty cheese. This guide empowers you to craft a burger that not only satisfies your cravings but also showcases your growing cooking prowess. Don’t be afraid to experiment with toppings and flavor variations to make it uniquely yours. Whether you’re aiming for a classic Hamburger or an elevated gourmet delight, the principles remain the same: quality ingredients, proper technique, and a lot of love. Give this recipe a try and share your delicious results in the comments below – we can’t wait to hear about your perfect burger!
FAQs
Q1: Can I use leaner ground beef?
A1: Yes, you can use leaner ground beef (90/10 or even 93/7), but be aware that it will result in a less juicy burger. To compensate, you might consider adding a tablespoon of softened butter or finely grated zucchini to the mixture to enhance moisture.
Q2: What’s the best way to prevent my burgers from falling apart?
A2: The key is to handle the meat as little as possible to avoid overmixing. Ensure your patties are firmly but gently formed, and that the pan is adequately hot before placing them in. Avoid flipping them too often until a crust has formed.
Q3: How do I store leftover burger patties?
A3: Store leftover plain burger patties in an airtight container in the refrigerator for up to 3-4 days. They also freeze very well; wrap each patty individually in plastic wrap and then place them in a freezer-safe bag for up to 2-3 months.
Q4: Can I cook these burgers on a grill instead of a pan?
A4: Absolutely! Grilling adds a wonderful smoky flavor. Preheat your grill to medium-high heat. Follow the same cooking times, flipping once. Keep an eye on flare-ups from the fat.
Q5: What are some uncommon but delicious topping ideas?
A5: Try caramelized onions, a fried egg, avocado slices, a dollop of pesto, Sriracha mayo, blue cheese crumbles, or even a generous smear of peanut butter for a surprisingly good combo!