Elevate Your Morning: The Ultimate Guide to Perfect French Toast
Ever wondered how to transform your breakfast routine into an extraordinary culinary experience? Imagine waking up to the aroma of golden, fluffy slices, perfectly caramelized and bursting with flavor. Preparing French Toast at home isn’t just about cooking; it’s about crafting moments, infusing warmth into your day, and indulging in a truly satisfying Healthy Breakfast. This comprehensive guide will walk you through every step, ensuring your homemade version rivals any gourmet brunch. Forget expensive restaurant bills; with a few simple ingredients and our expert tips, you’re on your way to mastering this timeless classic, making every bite a testament to delicious, home-cooked goodness.
Ingredients & Kitchen Tools
To embark on your French Toast adventure, gather these essentials:
Bread: 1 loaf of Challan, Brioche, or even day-old Hawaiian rolls. These breads provide the best texture and absorb the custardy batter beautifully.*
Eggs: 4 large eggs. The foundation of our rich custard.*
Milk: 1 cup whole milk or half-and-half. For a creamier, more indulgent batter. Dairy-free alternatives like almond or oat milk work too.*
Granulated Sugar: 2 tablespoons. Adds a touch of sweetness to the batter itself.*
Vanilla Extract: 1 teaspoon pure vanilla extract. Enhances the overall flavor profile.*
Ground Cinnamon: ½ teaspoon. A classic spice pairing with French Toast.*
Pinch of Salt: ¼ teaspoon. Balances the sweetness and highlights other flavors.*
Butter: 2 tablespoons unsalted butter (for cooking). Provides a golden-brown crust and prevents sticking.*
Optional Toppings: Fresh berries, maple syrup, powdered sugar, whipped cream, sliced bananas, chocolate chips. Customize to your heart’s content!*
Kitchen Tools:
- Large Shallow Dish or Pie Plate: For soaking the bread slices.
- Whisk: To combine the batter ingredients.
Non-Stick Skillet or Griddle: For cooking the French Toast. Ensures even cooking and easy flipping.*
- Spatula: For flipping.
- Tongs (Optional): For handling slices.
- Measuring Cups and Spoons: For accurate ingredient portions.
Prep Time & Cooking Schedule
- Prep Time: 10 minutes
- Soaking Time: 5-10 minutes (per batch)
- Cook Time: 3-5 minutes per side, per batch
- Total Time: Approximately 30-40 minutes (depending on batch size)
This recipe is perfect for a leisurely weekend morning. The preparation is straightforward, and the active cooking time is minimal, allowing you to enjoy the process without feeling rushed. You can prepare the batter an hour in advance and keep it refrigerated, making your morning even smoother.
Step-by-Step Instructions
1. Prepare the Batter: In your large shallow dish, whisk together the eggs, milk, granulated sugar, vanilla extract, ground cinnamon, and salt until well combined and slightly foamy.
2. Slice the Bread: If not pre-sliced, cut your chosen bread into ½ to ¾-inch thick slices. Thicker slices hold up better to soaking and give a more substantial final product.
3. Soak the Bread: Dip each slice of bread into the egg mixture, ensuring both sides are fully coated. Don’t let it soak for too long (20-30 seconds per side is usually enough), especially with softer bread like brioche, to prevent it from becoming soggy. For a truly French Toast experience, you’re aiming for a custardy interior with a crisp exterior—a hallmark of a delightful Healthy Breakfast.
4. Heat the Skillet: Place your non-stick skillet or griddle over medium heat. Add ½ tablespoon of butter and let it melt, swirling to coat the pan.
5. Cook the French Toast: Carefully place 2-3 soaked bread slices in the hot skillet, ensuring not to overcrowd it. Cook for 3-5 minutes per side, or until golden brown and cooked through. Adjust heat as necessary to prevent burning.
6. Repeat: Add more butter to the pan as needed for subsequent batches.
7. Serve Immediately: Transfer cooked slices to plates. Serve hot with your favorite toppings.
Nutritional Benefits & Advantages
Beyond its undeniable deliciousness, homemade French Toast offers several advantages. The eggs provide a good source of protein, essential for starting your day with sustained energy. Milk contributes calcium for bone health. Opting for whole-grain bread boosts fiber intake, aiding digestion. When paired with fresh berries, you get a powerful dose of antioxidants and vitamins, transforming this indulgent treat into a surprisingly well-rounded and delightful breakfast option.
Tips, Variations & Cooking Advice
- Spice it Up: Experiment with nutmeg, cardamom, or even a touch of orange zest in your batter.
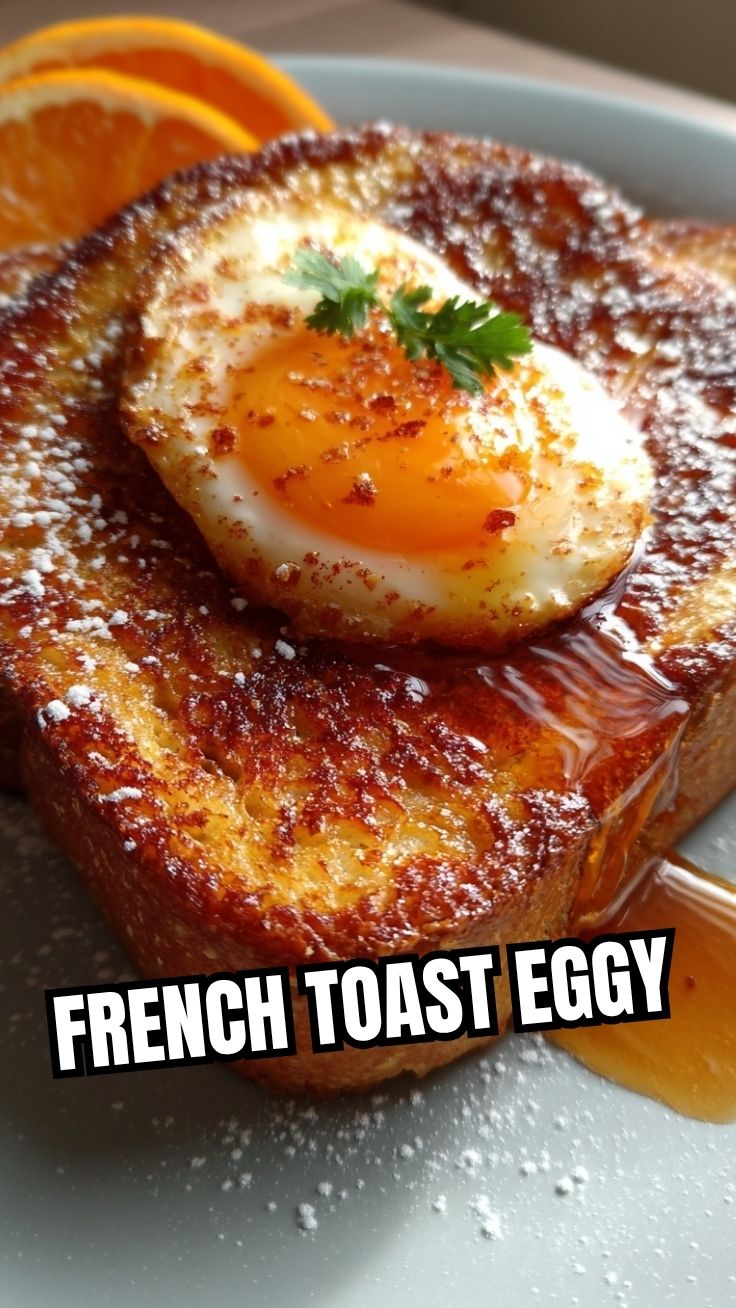
- Savory Twist: Omit the sugar and cinnamon, and instead add a pinch of black pepper, garlic powder, and onion powder to the batter. Serve with avocado and a fried egg.
- Stuffed French Toast: Spread cream cheese or a fruit jam between two slices of bread before soaking and cooking.
- Gluten-Free/Dairy-Free: Use gluten-free bread and a dairy-free milk alternative (almond, oat, or soy milk) to cater to dietary needs.
- Don’t Rush: Patience is key for perfectly browned slices. If the heat is too high, the outside will burn before the inside cooks through.
Common Mistakes to Avoid
- Over-Soaking: This leads to soggy French Toast that falls apart. Aim for a quick dip.
- Under-Soaking: Results in dry, bland bread. Ensure both sides are adequately coated.
- Overcrowding the Pan: This lowers the pan temperature and steams the bread instead of browning it, leading to a less crispy result. Cook in batches.
- Too High Heat: The outside will burn while the interior remains uncooked. Medium heat is ideal.
- Not Enough Butter: Lack of fat causes sticking and uneven browning. Don’t be shy with a little butter between batches.
Storage & Meal Prep Tips
Leftover French Toast can be stored in an airtight container in the refrigerator for up to 3 days. To reheat, you can use a toaster, oven (at 350°F or 175°C for 5-10 minutes), or a microwave for a quicker (though less crispy) option. For longer storage, freeze individual slices arranged on a baking sheet, then transfer to a freezer-safe bag. They’ll keep for up to 1 month. Reheat from frozen in a toaster or oven until warmed through.
Conclusion
Mastering homemade French Toast is a truly rewarding culinary endeavor. With this step-by-step guide, you’re not just making a meal; you’re creating a memorable experience, a delicious and often Healthy Breakfast that brings joy to any morning. We encourage you to try this recipe, experiment with toppings, and share your golden-brown creations with us! What are your favorite French Toast memories or topping combinations? Let us know in the comments below!
FAQs
Q1: Can I use regular sandwich bread for French Toast?
A1: While regular sandwich bread can be used, softer, richer breads like brioche, challah, or Hawaiian rolls yield a much more luxurious and satisfying texture. If using sandwich bread, ensure it’s slightly stale to prevent it from becoming too soggy.
Q2: How do I prevent my French Toast from being soggy?
A2: The key is not to over-soak the bread. A quick dip (20-30 seconds per side) is usually sufficient. Also, ensure your skillet is hot enough and don’t overcrowd the pan.
Q3: Can I make the batter ahead of time?
A3: Yes, you can prepare the egg batter up to 24 hours in advance and store it in an airtight container in the refrigerator. Just give it a good whisk before using.
Q4: What’s the secret to perfectly golden-brown French Toast?
A4: Medium heat is crucial. Too high, and it burns; too low, and it becomes dry. Also, ensure you have enough butter or oil in the pan to promote even browning and a delicious crispy crust.
Q5: What are some kid-friendly topping ideas?
A5: Kids often love sprinkles, mini chocolate chips, sliced bananas, whipped cream, or a drizzle of chocolate sauce. Fresh berries remain a popular and, of course, delicious Healthy Breakfast choice!