Unlock Culinary Magic: Your Guide to Crafting the Perfect Korean-Inspired Beef Bowl at Home
Ever wonder how to bring the vibrant, umami-rich flavors of your favorite Korean restaurant right into your own kitchen? Preparing dishes like the Korean Beef Bowl at home isn’t just about saving money; it’s about control over ingredients, customization, and the sheer satisfaction of creating something truly delicious from scratch. This comprehensive guide will empower you to master this incredibly flavorful and surprisingly simple dish, blending the savory depth of traditional bulgogi with the convenience of a quick-cook bowl.
Ingredients & Kitchen Tools
To embark on your Korean culinary journey, gather these essential items:
- 1 lb Lean Ground Beef: (85/15 or 90/10) Provides a rich base while keeping it relatively lean.
- 1/2 cup Soy Sauce: (low-sodium recommended) The backbone of our savory sauce. Use tamari for a gluten-free option.
- 1/4 cup Brown Sugar: (packed) Adds a touch of sweetness to balance the umami. Maple syrup can be a natural alternative.
- 2 tbsp Sesame Oil: (toasted) Delivers that signature nutty, aromatic Korean flavor. Don’t substitute with untoasted.
- 1 tbsp Fresh Ginger: (grated) Pungent and warming, crucial for authentic taste.
- 2 cloves Garlic: (minced) Aromatic foundation.
- 1/2 tsp Black Pepper: Freshly ground for best flavor.
- 1/4 cup Water: Thins the sauce slightly.
- 1 tbsp Cornstarch: (optional, for thickening) Helps achieve a glossy, coating sauce.
- 1 tbsp Vegetable Oil: (or other neutral oil) For browning the beef.
- 4 cups Cooked Rice: (short-grain white or brown) The essential canvas for your bowl.
- Garnish Options: Toasted sesame seeds, sliced green onions, kimchi, red pepper flakes (gochugaru), a fried egg.
Kitchen Tools:
- Large Skillet or Wok: For browning the beef and simmering the sauce.
- Mixing Bowl: For preparing the sauce.
- Whisk: To combine sauce ingredients.
- Grater/Garlic Press: For ginger and garlic.
- Measuring Cups & Spoons: For accurate ingredient portions.
- Rice Cooker or Saucepan: For cooking rice.
Prep Time & Cooking Schedule
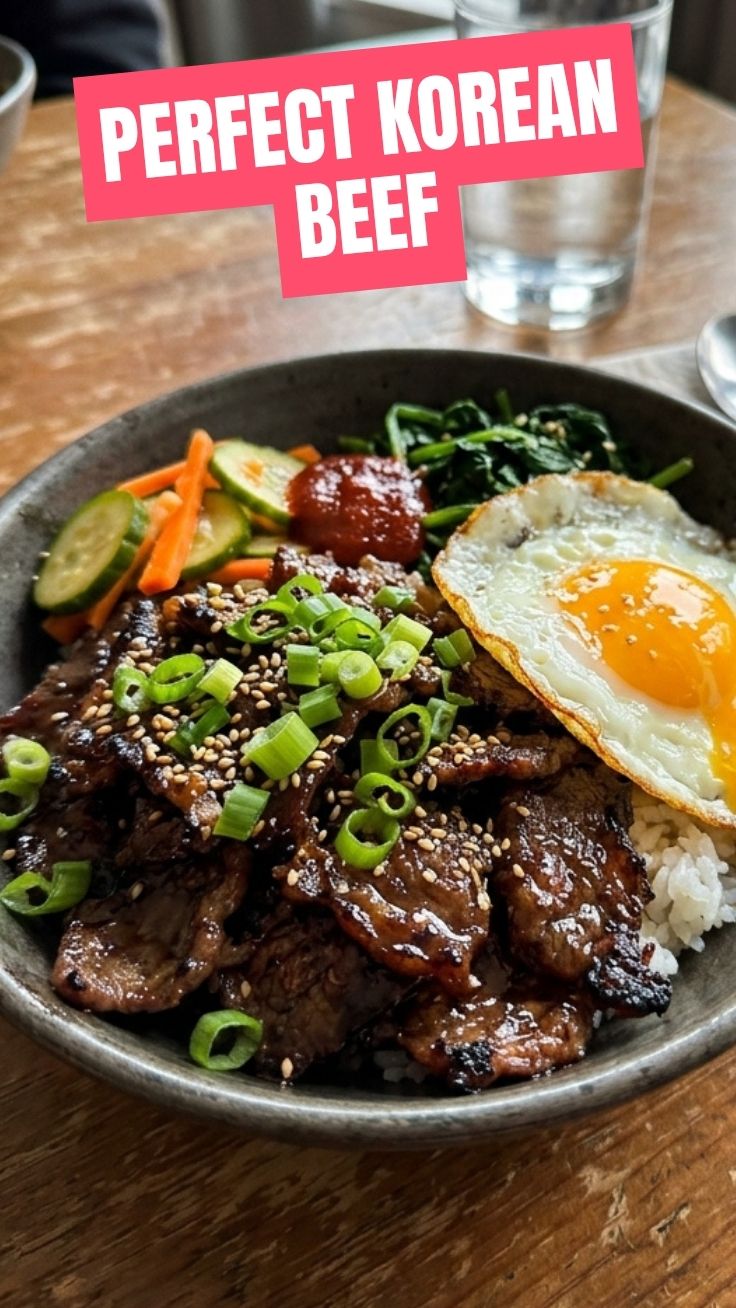
This recipe is designed for efficiency without compromising flavor.
- Prep Time: 15 minutes (Includes mincing, grating, and sauce preparation.)
- Cook Time: 15-20 minutes (Browning beef, simmering sauce, and combining.)
- Total Time: Approximately 30-35 minutes.
To plan your meal perfectly, consider cooking your rice first as it takes the longest. While the rice cooks, you can prepare the sauce and chop your garnishes. This synchronicity ensures everything is ready to serve hot and fresh.
Step-by-Step Instructions
1. Prepare the Sauce: In a medium bowl, whisk together the soy sauce, brown sugar, sesame oil, grated ginger, minced garlic, black pepper, and water. If using, whisk in the cornstarch until fully dissolved.
2. Brown the Beef: Heat the vegetable oil in a large skillet or wok over medium-high heat. Add the ground beef, breaking it up with a spoon. Cook until thoroughly browned and no pink remains, about 5-7 minutes. Drain any excess grease.
3. Simmer the Sauce: Pour the prepared sauce over the browned ground beef. Bring the mixture to a gentle simmer, stirring occasionally. Reduce the heat to medium-low and continue to simmer for 5-8 minutes, or until the sauce has thickened slightly and coats the beef beautifully. This creates the incredible saucy foundation for our Korean Beef Bowl, reminiscent of a quick bulgogi preparation.
4. Assemble the Bowls: Divide the cooked rice among four bowls. Spoon a generous portion of the saucy ground beef over the rice.
5. Garnish and Serve: Garnish with toasted sesame seeds, sliced green onions, and any other desired toppings like kimchi or a fried egg. Serve immediately and enjoy!
Nutritional Benefits & Advantages
This dish offers a balanced nutritional profile. Lean ground beef provides essential protein and iron, crucial for energy and muscle maintenance. Ginger and garlic contribute potent antioxidants and anti-inflammatory properties, while the sesame oil adds healthy monounsaturated fats. By controlling the amount of sugar and sodium in your homemade sauce, you can create a healthier version than many takeout options. Including plenty of rice provides complex carbohydrates for sustained energy, and adding kimchi not only boosts flavor but also introduces beneficial probiotics for gut health.
Tips, Variations & Cooking Advice
- Spice It Up: Add 1-2 teaspoons of gochujang (Korean chili paste) to the sauce for a delightful kick.
- Vegetable Boost: Sauté some chopped carrots, bell peppers, or spinach with the beef for added nutrients and color.
- Protein Alternatives: This recipe works wonderfully with ground turkey, ground chicken, or even crumbled firm tofu for a vegetarian option. Adjust cooking times accordingly.
- Low-Carb Option: Serve over cauliflower rice, zoodles, or a bed of mixed greens instead of white rice.
- Sweetness Control: Adjust the amount of brown sugar to your preference. Start with less and add more if needed.
Common Mistakes to Avoid
- Overcooking the Beef: Ground beef can become tough if cooked too long. Brown thoroughly, then simmer just until the sauce thickens.
- Not Draining Fat: Excess fat can make the dish greasy and dilute the sauce’s flavor. Always drain after browning.
- Skipping Fresh Aromatics: Using powdered ginger and garlic won’t yield the same vibrant flavor as fresh. Don’t skimp on these!
- Too Much Sesame Oil: Toasted sesame oil is potent. A little goes a long way; too much can overpower the dish.
- Not Tasting and Adjusting: Always taste the sauce before adding it to the beef and adjust seasonings (soy sauce for salt, sugar for sweetness) to your liking.
Storage & Meal Prep Tips
This Korean Beef Bowl is fantastic for meal prep!
- Refrigeration: Store leftover beef and rice separately in airtight containers in the refrigerator for up to 3-4 days. Store garnishes separately.
- Freezing: The cooked ground beef mixture freezes well for up to 2-3 months. Thaw overnight in the refrigerator before reheating. Cook fresh rice when ready to serve.
- Reheating: Reheat the beef mixture gently on the stovetop or in the microwave until heated through. For rice, sprinkle a tablespoon of water over it before microwaving to help it steam and soften.
Conclusion
Mastering the art of the homemade Korean Beef Bowl is a truly rewarding culinary experience. With its perfect blend of savory, sweet, and umami flavors, it offers a quick and satisfying meal that rivals any restaurant. Whether you’re craving the depth of slow-cooked bulgogi in a flash or simply a healthy weeknight dinner, this recipe is designed to impress. Give it a try this week, and don’t forget to share your delicious creations in the comments below! What are your favorite toppings?
FAQs
Q1: Can I make this gluten-free?
A1: Absolutely! Simply substitute regular soy sauce with tamari and ensure all other ingredients are certified gluten-free.
Q2: How can I make the sauce thicker?
A2: If you want an even thicker sauce, you can add 1 tablespoon of cornstarch mixed with 2 tablespoons of cold water to the simmering sauce. Stir constantly until it reaches your desired consistency.
Q3: What kind of rice is best for this dish?
A3: Short-grain white rice is traditionally used in Korean cuisine for its slightly sticky texture, but jasmine rice or even brown rice also work beautifully as a base.
Q4: Can I use different ground meats?
A4: Yes, ground turkey, chicken, or pork are great alternatives. Adjust cooking times slightly as lean ground meats cook faster.
Q5: What are some good vegetable additions?
A5: Sliced carrots, bell peppers, spinach (sautéed until wilted), or even steamed broccoli florets are excellent choices to add color, texture, and nutrients to your bowl.