Unlock the Secrets to Restaurant-Quality Smoked Brisket at Home
Have you ever dreamt of savoring a slice of melt-in-your-mouth Smoked Brisket without leaving your kitchen? Today, we’re peeling back the layers on how to master this culinary art, bringing the authentic taste of Texas BBQ right to your backyard. Preparing this legendary dish at home isn’t just about the incredible flavor; it’s an experience, a journey of patience and precision that culminates in an unbelievably tender, smoky masterpiece. Imagine the aroma filling your home, the anticipation building, and that first perfect bite – pure bliss! This guide will empower you to confidently tackle beef brisket, transforming it from a formidable cut to a family-favorite centerpiece.
Ingredients & Kitchen Tools
To embark on your Smoked Brisket adventure, you’ll need a carefully curated selection of ingredients and tools. Precision and quality make all the difference in achieving that signature Texas BBQ flavor.
Ingredients:
- 12-15 lb USDA Prime or Choice Packer Brisket: The star of the show. Look for a full brisket with both the flat and point, and good marbling for optimal tenderness and flavor.
- 1/2 cup Coarse Black Pepper: Essential for creating the “bark”—the flavorful, peppery crust.
- 1/2 cup Coarse Kosher Salt: Balances the pepper and helps draw out moisture for better bark formation.
- 1/4 cup Granulated Garlic: Adds a pungent, savory depth.
- 1/4 cup Granulated Onion: Complements the garlic with another layer of savory aroma.
- 1/4 cup Paprika (optional): For a touch of color and mild sweetness.
- 1/2 cup Apple Cider Vinegar (for spritzing): Keeps the brisket moist during the long cook and adds a hint of tang.
- Wood Chunks or Pellets (Oak, Hickory, Pecan): For that quintessential smoky flavor. Oak is a classic for brisket.
Kitchen Tools:
- Smoker (Pellet, Offset, or Electric): Your primary cooking vessel.
- Meat Thermometer (Digital, Instant-Read, and Leave-in Probe): Crucial for monitoring internal temperature accurately.
- Large Roasting Pan or Foil Pan: For the “Texas Crutch” (wrapping the brisket) and resting.
- Aluminum Foil (Heavy-Duty): For wrapping. Peach butcher paper is an excellent alternative for a crispier bark.
- Sharp Brisket Knife: For precise trimming and slicing.
- Cutting Board (Large): To accommodate the entire brisket.
- Spray Bottle: For spritzing.
- Heat-Resistant Gloves: For handling the hot brisket.
Prep Time & Cooking Schedule
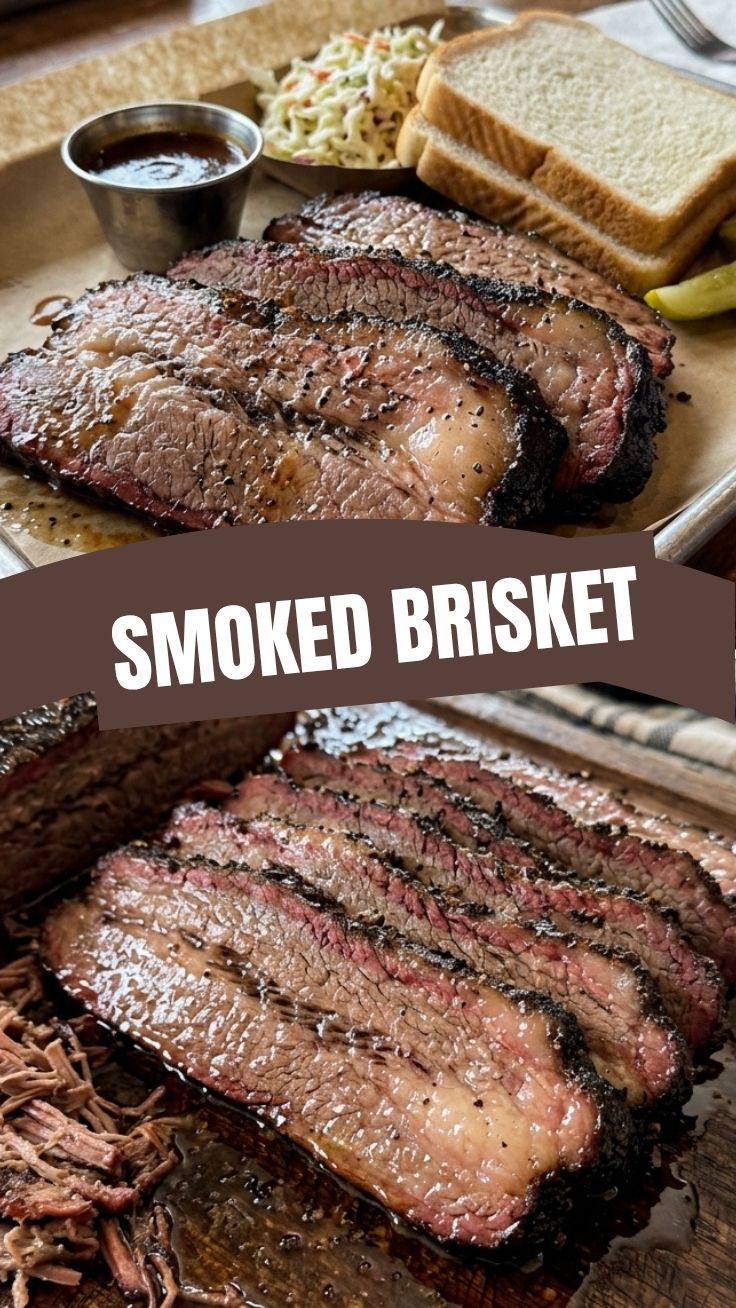
Mastering smoked brisket requires patience and a good understanding of the timeline. This is not a quick meal, but the reward is immense.
- Prep Time: 30-45 minutes (trimming and seasoning)
- Smoking Time: 10-16 hours (depending on brisket size and smoker temperature)
- Resting Time: 2-4 hours
Planning Ahead: Start your brisket early in the morning, or even the night before, if you want it ready for a late lunch or dinner. A 12-15 lb brisket can easily take 12-14 hours to smoke, plus the crucial resting period. Factor in resting time; it’s non-negotiable for tender, juicy results. Don’t rush this step!
Step-by-Step Instructions
Achieving the perfect Smoked Brisket is a methodical process. Follow these steps for a truly authentic Texas BBQ experience.
1. Trim the Brisket: Remove most of the hard, thick fat from the fat cap, leaving about 1/4 to 1/2 inch evenly across the surface. Trim any silver skin or small, loose pieces of meat. This ensures even cooking and promotes bark formation.
2. Season Generously: Combine coarse salt, black pepper, granulated garlic, granulated onion, and paprika (if using) to create your rub. Apply the rub liberally and evenly to all surfaces of the brisket. Pat it down firmly to ensure it adheres. Let it sit at room temperature for an hour, or refrigerate overnight for deeper flavor penetration.
3. Preheat Your Smoker: Set your smoker to a consistent temperature of 225-250°F (107-121°C). Once stable, add your wood chunks or pellets. Oak, hickory, or pecan are excellent choices.
4. Smoke the Brisket: Place the brisket fat-side up (or towards the heat source, if applicable) directly on the smoker grates. Insert a leave-in probe thermometer into the thickest part of the flat, avoiding large pockets of fat.
5. Maintain & Spritz: Maintain your smoker temperature. After 3-4 hours, begin spritzing the brisket every 45-60 minutes with apple cider vinegar to keep it moist and promote a good bark.
6. The Stall & The Wrap: The brisket will typically hit a “stall” between 150-170°F (65-77°C) where its temperature plateaus. This is normal. Once the bark is set (around 6-8 hours, or when the color is a deep mahogany and the rub is firm), wrap the brisket tightly in heavy-duty aluminum foil or butcher paper. This technique, known as the “Texas Crutch,” helps push through the stall and retains moisture.
7. Continue Cooking to Tenderness: Return the wrapped brisket to the smoker. Continue cooking at 275°F (135°C) until the internal temperature reaches 200-205°F (93-96°C) and the brisket is probe-tender. A probe should slide in and out with very little resistance, “like butter.”
8. The Critical Rest: Once tender, carefully remove the wrapped brisket from the smoker. Place it in a cooler (without ice) or an oven set to its lowest “warm” setting (around 150°F / 65°C) for a minimum of 2 hours, and preferably 3-4 hours. This resting period allows the juices to redistribute, resulting in an incredibly tender and moist final product.
9. Slice and Serve: After resting, unwrap the brisket. Slice against the grain, separating the flat and the point if desired. The flat is best sliced 1/4 inch thick, while the fattier point can be chopped for burnt ends.
Nutritional Benefits & Advantages
Beyond its incredible flavor, Smoked Brisket offers several nutritional upsides. Beef brisket provides a significant source of high-quality protein, essential for muscle repair and growth. It’s also rich in iron, zinc, and B vitamins (B12, niacin, riboflavin), which are vital for energy production and overall well-being. While it’s known for its fat content, much of the unhealthy saturated fat can be trimmed away before cooking, and the long, slow smoking process renders some of the remaining fat, leaving behind succulent, nutrient-dense meat.
Tips, Variations & Cooking Advice
- Wood Selection: Experiment with different woods. While oak is classic, pecan or hickory add a different nuanced smokiness. Apple wood can add a subtle sweetness.
- Injecting: For ultra-moist brisket, consider injecting a beef broth mixture into the flat before seasoning.
- Burnt Ends: The fatty point of the brisket is excellent for making burnt ends. After separating the point during slicing, cube it, toss with BBQ sauce, and return to the smoker for another 1-2 hours until caramelized.
- Dry Brining: For even juicier meat and crispier bark, apply only salt (a “dry brine”) to the brisket 12-24 hours before cooking, then add the other rub ingredients just before smoking.
- Temperature Control: Consistency is key. Invest in a good air probe for your smoker to accurately monitor ambient temperature.
Common Mistakes to Avoid
- Rushing the Cook: Impatience leads to tough, dry brisket. Always allow ample cook and rest time.
- Over-Trimming: Removing too much fat can result in dry meat. That 1/4 to 1/2 inch fat cap is important for moisture.
- Under-Trimming: Leaving too much hard fat prevents rub penetration and can lead to a greasy, unpleasant texture.
- Not Resting: Skipping the rest is the biggest mistake. The meat needs time to reabsorb its juices after the high heat.
- Cutting with the Grain: Always slice against the muscle fibers to ensure maximum tenderness. Cutting with the grain will make even perfectly cooked brisket tough.
- Ignoring Probe Tenderness: While temperature targets are guides, “probe tenderness” is the true indicator of doneness.
Storage & Meal Prep Tips
Leftover Smoked Brisket is a treasure! To store safely, allow the meat to cool completely, then slice or shred it and place it in airtight containers.
- Refrigeration: Stored properly, brisket will last 3-4 days in the refrigerator.
- Freezing: For longer storage, freeze sliced or shredded brisket in freezer-safe bags or containers for up to 3 months. For best results, freeze with a small amount of au jus or broth to maintain moisture.
- Reheating: To reheat, gently warm in an oven at 250-300°F (120-150°C) with a splash of beef broth or water, covered with foil, until just warm through. Microwaving can dry it out.
Conclusion
Mastering the art of Smoked Brisket is a journey of skill, patience, and passion, but the reward of a perfectly tender, smoky slice that captures the essence of true Texas BBQ is unparalleled. By following these detailed steps, you’re not just cooking a meal; you’re creating an experience and a memory. Don’t be intimidated by the long cook time – embrace the process, the aromas, and the incredible flavors you’ll achieve. We encourage you to try this recipe, share your magnificent results with us, and explore the endless possibilities of homemade BBQ!
FAQs
Q1: My brisket is tough. What went wrong?
A1: Tough brisket is usually due to insufficient cooking time (not reaching probe tenderness) or not allowing it to rest long enough. Ensure it cooks until it feels like soft butter when probed, and always rest for at least 2 hours.
Q2: Can I make this without a dedicated smoker?
A2: While a dedicated smoker is ideal, you can achieve good results using a charcoal grill with indirect heat and wood chunks, or even an electric oven with a smoke box (though this produces less authentic smoke flavor).
Q3: What’s the difference between peach butcher paper and foil for wrapping?
A3: Peach butcher paper breathes better than foil, allowing some moisture and smoke to escape, which results in a slightly crispier bark. Foil creates a tighter seal, steaming the brisket and often leading to a softer bark. Both are effective for getting through the stall.
Q4: How important is trimming the fat cap?
A4: Extremely important. Too much fat prevents bark formation and can make the brisket greasy. Too little makes the brisket dry. Aim for a consistent 1/4 to 1/2 inch thickness.
Q5: My bark isn’t forming. Why?
A5: Bark formation can be affected by too much moisture in the smoker, wrapping too early (before the bark sets), or using a rub with too much sugar (which can burn). Ensure proper airflow, don’t wrap until the bark is firm, and use a coarse pepper-heavy rub.