Unlock the Secret to Irresistible Weeknight Dinners: Your Guide to Perfect Honey Garlic Shrimp
Ever wondered how some dishes effortlessly bridge the gap between gourmet flavor and weeknight convenience? Today, we’re diving deep into a culinary creation that does just that: the sensational Honey Garlic Shrimp. This dish isn’t just about satisfying hunger; it’s about transforming a simple ingredient into a symphony of sweet and savory notes, all within the comfort of your own kitchen. Learning this honey garlic shrimp recipe at home empowers you to control ingredients, adjust flavors to your preference, and impress your family and friends with minimal effort. Forget takeout – your next favorite meal is just a few steps away, promising both incredible taste and a truly gratifying cooking experience.
Ingredients & Kitchen Tools
Crafting the perfect Honey Garlic Shrimp requires a handful of fresh ingredients and basic kitchen essentials. Here’s what you’ll need:
- Shrimp (1 lb): Large or jumbo shrimp, peeled and deveined, tails on or off (your preference). Fresh or frozen (thawed) work equally well.
- Honey (¼ cup): Pure, unsweetened honey. Adds that essential sweetness and glossy finish.
- Soy Sauce (¼ cup): Low-sodium is recommended to control saltiness. Provides the savory umami depth.
- Garlic (4-6 cloves): Freshly minced. The star of the savory component, don’t skimp on flavor!
- Rice Vinegar (1 tbsp): Adds a slight tang to balance the sweetness. Apple cider vinegar can be a substitute.
- Sesame Oil (1 tsp): Toasted or regular. Offers a distinctive nutty aroma.
- Cornstarch (1 tsp): Mixed with 1 tablespoon of water (slurry). Used to thicken the sauce to a perfect glaze.
- Olive Oil or Vegetable Oil (1 tbsp): For sautéing the shrimp.
- Red Pepper Flakes (½ tsp, optional): For a touch of heat.
- Green Onions (2 tbsp, chopped, for garnish): Adds freshness and a pop of color.
- Sesame Seeds (1 tsp, for garnish): For added texture and a classic Asian-inspired finish.
Kitchen Tools & Utensils:
- Large Skillet or Wok: Preferably non-stick, for even cooking of the shrimp.
- Whisk: To combine sauce ingredients smoothly.
- Small Bowl: For mixing the sauce.
- Measuring Cups & Spoons: For accurate ingredient proportions.
- Tongs or Spatula: For turning the shrimp.
Prep Time & Cooking Schedule
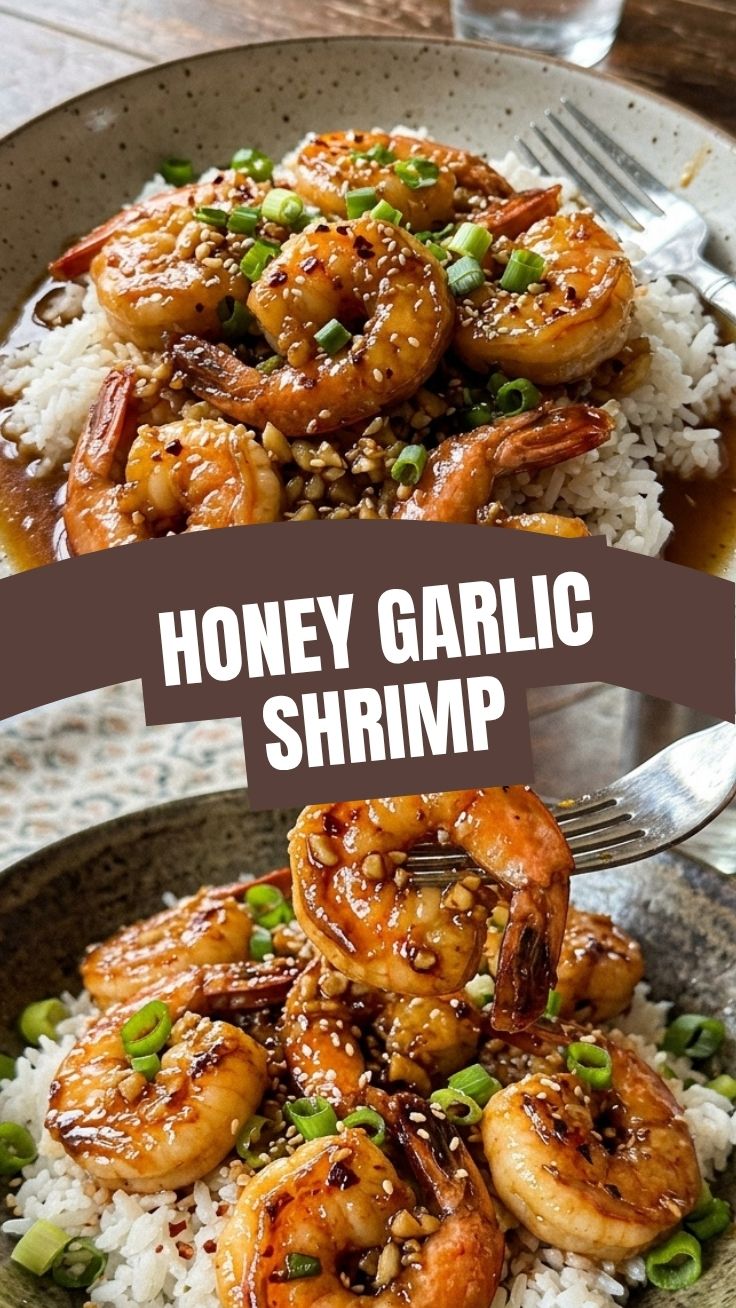
This recipe is designed for efficiency, making it perfect for busy weeknights.
- Prep Time: 10 minutes
* This includes peeling and deveining shrimp (if not pre-prepped), mincing garlic, and gathering all your sauce ingredients.
- Cook Time: 8-10 minutes
* Shrimp cooks very quickly, so precise timing is key to tenderness.
- Resting Time: None required! Serve immediately for best results.
You can easily fit this into a dinner schedule, as the entire process from start to finish is under 20 minutes. Consider preparing your rice or noodles in advance to have a complete meal ready as soon as the shrimp is done.
Step-by-Step Instructions
1. Prepare the Shrimp: If using frozen shrimp, ensure they are fully thawed and pat them dry thoroughly with paper towels. This helps them sear properly and prevents a watery sauce.
2. Whisk the Sauce: In a small bowl, combine honey, soy sauce, minced garlic, rice vinegar, sesame oil, and red pepper flakes (if using). Whisk until all ingredients are well incorporated.
3. Cook the Shrimp: Heat olive oil in a large skillet or wok over medium-high heat. Add the pat-dried shrimp and cook for 1-2 minutes per side, until they turn pink and opaque. Do not overcrowd the pan; cook in batches if necessary. Remove shrimp from the pan and set aside.
4. Simmer the Sauce: Pour the prepared honey garlic sauce into the hot skillet. Bring to a gentle simmer, stirring continuously.
5. Thicken the Sauce: In a separate tiny bowl, whisk cornstarch with 1 tablespoon of cold water until smooth. Slowly pour the cornstarch slurry into the simmering sauce, whisking constantly. Continue stirring for 30-60 seconds, or until the sauce thickens into a glossy glaze. This beautiful glaze is what makes this Honey Garlic Shrimp truly shine.
6. Combine and Serve: Return the cooked shrimp to the skillet and toss gently with the thickened sauce until each piece is thoroughly coated. Garnish with chopped green onions and sesame seeds. Serve immediately and enjoy your delicious homemade honey garlic shrimp recipe!
Nutritional Benefits & Advantages
Shrimp is a nutritional powerhouse, making this dish both delicious and wholesome. It’s an excellent source of lean protein, essential for muscle repair and growth, and is low in calories and saturated fat. Shrimp also provides important nutrients like iodine, phosphorus, and zinc, vital for thyroid function, bone health, and immune support. The garlic incorporated offers powerful antioxidants and anti-inflammatory properties, while honey provides natural energy. This recipe, when served with a side of steamed vegetables and brown rice, creates a balanced meal rich in fiber, vitamins, and minerals.
Tips, Variations & Cooking Advice
- Spice It Up: For extra heat, increase the red pepper flakes or add a dash of sriracha to the sauce.
- Vegetable Boost: Toss in some quick-cooking vegetables like broccoli florets, snap peas, or bell pepper strips with the shrimp during the last few minutes of cooking for a more complete dish.
- Citrus Zest: A squeeze of fresh lime or lemon juice at the end can brighten the flavors.
- Gluten-Free: Use tamari instead of soy sauce to make this recipe gluten-free.
- Dairy-Free: This recipe is naturally dairy-free!
- Herbaceous Twist: Experiment with a sprinkle of fresh cilantro or basil for a different flavor profile.
- Marinade Potential: For deeper flavor, you can marinate the shrimp in half of the sauce for 15-20 minutes before cooking.
Common Mistakes to Avoid
- Overcooking Shrimp: Shrimp cooks very quickly. Overcooked shrimp becomes rubbery and tough. Watch for them to turn opaque and pink, then remove them promptly.
- Not Patting Shrimp Dry: Wet shrimp will steam instead of sear, preventing a nice golden crust and potentially watering down your sauce. Always pat them thoroughly dry.
- Overcrowding the Pan: Cooking too many shrimp at once lowers the pan’s temperature, leading to steaming instead of searing. Cook in batches if necessary.
- Skipping the Cornstarch Slurry: The cornstarch is crucial for achieving that desirable thick, glossy sauce. Don’t omit it!
- Burning the Garlic: Garlic cooks quickly. Add it with the sauce or only for a very short time if sautéing directly to avoid a bitter taste.
Storage & Meal Prep Tips
Leftover Honey Garlic Shrimp can be stored in an airtight container in the refrigerator for up to 2-3 days. Reheat gently on the stovetop over low heat or in the microwave, being careful not to overcook the shrimp a second time. If reheating in the microwave, use short bursts of heat. This dish is best enjoyed fresh, but leftovers make for a quick and flavorful lunch. For meal prep, cook the components separately and combine upon reheating. You can also make the sauce in advance and store it in the fridge for up to a week.
Conclusion
There you have it—a comprehensive guide to creating succulent Honey Garlic Shrimp right in your own kitchen! This dish proves that restaurant-quality flavor is attainable with simple ingredients and a little culinary know-how. Mastering this honey garlic shrimp recipe not only adds a fantastic, versatile meal to your repertoire but also builds confidence in your cooking skills. We encourage you to try this recipe tonight – your taste buds will thank you! Share your creations with us in the comments below, or tell us your favorite ways to serve this amazing dish.
FAQs
Q1: Can I use frozen shrimp?
A1: Absolutely! Just make sure to thaw them completely and pat them very dry before cooking to prevent excess moisture.
Q2: What can I serve with Honey Garlic Shrimp?
A2: It pairs perfectly with steamed rice (white or brown), quinoa, noodles (like lo mein or rice noodles), or even a fresh green salad. Steamed or roasted vegetables also make an excellent accompaniment.
Q3: How do I make the sauce thicker?
A3: Ensure your cornstarch slurry is properly mixed and slowly added to the simmering sauce. Continue to whisk gently for about 30-60 seconds until it reaches your desired consistency. If it’s still too thin, you can add another small slurry (½ tsp cornstarch with ½ tsp water).
Q4: Can I prepare the sauce in advance?
A4: Yes, you can whisk together all the sauce ingredients (except the cornstarch slurry) and store it in an airtight container in the refrigerator for up to 3-4 days. Add the cornstarch slurry just before cooking.
Q5: What if I don’t have rice vinegar?
A5: Apple cider vinegar is a suitable substitute for rice vinegar, offering a similar tang to balance the sweetness of the honey.