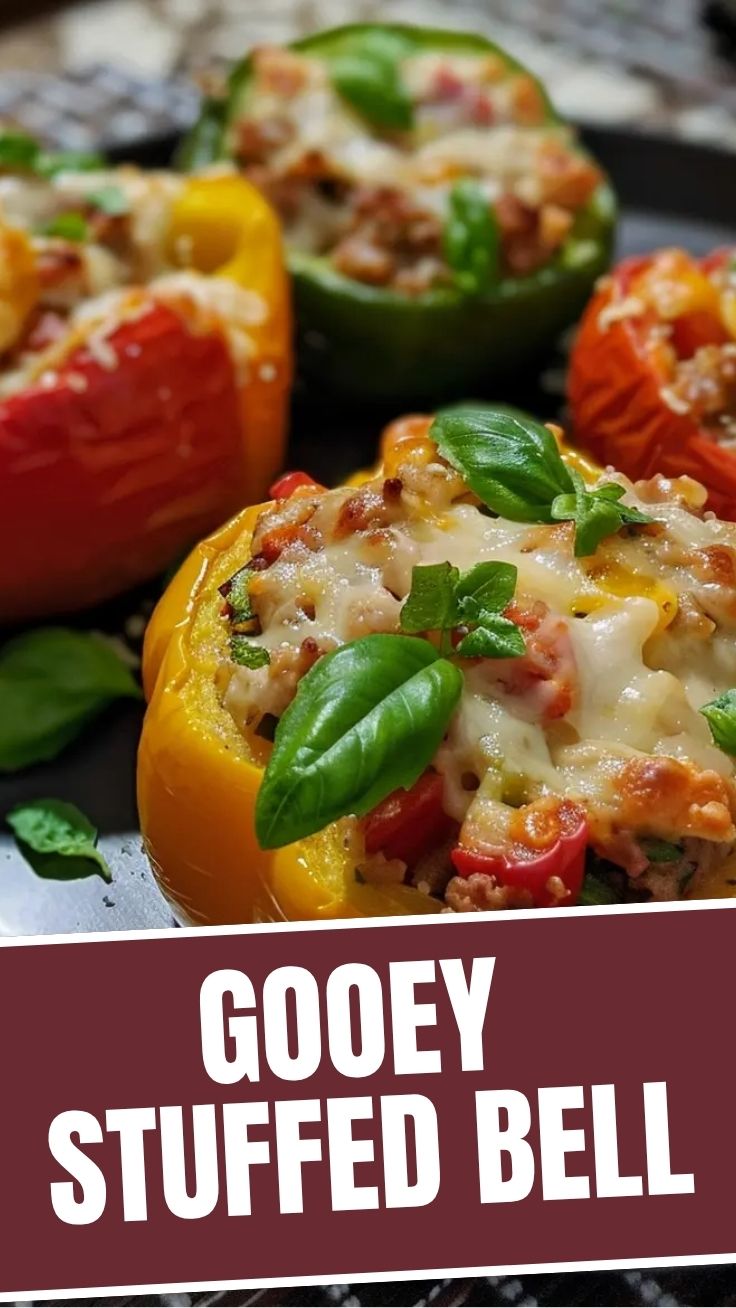
Elevate Your Weeknight Dinner: The Ultimate Guide to Savory Stuffed Bell Peppers
Are you tired of the same old dinner routine? Do you crave a dish that’s both comforting and impressive, without requiring hours in the kitchen? Look no further! This comprehensive guide to crafting delicious Stuffed Bell Peppers is your ticket to a flavorful, homemade meal that will delight your taste buds and impress your family. Preparing this classic dish at home not only offers unparalleled freshness and control over ingredients but also transforms a simple vegetable into a hearty, balanced entrée. The vibrant colors and robust flavors of perfectly cooked bell peppers, brimming with your choice of savory fillings, make for an unforgettable dining experience. Let’s dive in and unlock the secrets to mastering this culinary masterpiece.
Ingredients & Kitchen Tools
- Four large bell peppers (any color; red, yellow, and orange offer sweeter notes, while green provides a slightly more bitter, classic flavor). Choose firm, unblemished peppers.
- 1 pound ground meat (beef, turkey, chicken, or a plant-based alternative). Lean options are great for a healthier twist.
- 1 cup cooked rice (brown or white; leftover rice works perfectly, saving you time). Adds substance and texture to the filling.
- 1 (15-ounce) can diced tomatoes, undrained (or 1 ½ cups fresh diced tomatoes). Provides moisture and a tangy base.
- 1 onion, chopped (yellow or white; adds aromatic depth).
- 2 cloves garlic, minced (essential for flavor).
- 1 tablespoon olive oil (for sautéing).
- 1 teaspoon dried oregano (or Italian seasoning; classic herb pairing).
- ½ teaspoon salt (adjust to taste).
- ¼ teaspoon black pepper (freshly ground is always best).
- ½ cup shredded cheese (cheddar, mozzarella, or a blend; optional, for topping). Adds a rich, creamy finish.
- Baking dish (9×13 inch recommended).
- Large skillet (for cooking the filling).
- Cutting board and knife.
- Measuring cups and spoons.
Prep Time & Cooking Schedule
- Prep Time: 25 minutes
- Cook Time: 40-50 minutes
- Resting Time: 5 minutes (after baking, allows flavors to meld and makes for easier serving)
Before you begin, ensure all your ingredients are prepped and measured (mise en place). This will make the cooking process much smoother. For best results, cook your rice ahead of time if you don’t have leftovers. The total time from start to finish is approximately 70-80 minutes, making this an ideal weeknight meal or a fantastic option for meal prepping on a Sunday.
Step-by-Step Instructions
1. Prepare the Peppers: Preheat your oven to 375°F (190°C). Carefully slice the tops off your bell peppers, then remove the seeds and membranes. You can blanch them in boiling water for 5 minutes before stuffing if you prefer a softer pepper, but it’s not strictly necessary. Arrange them cut-side up in your baking dish.
2. Cook the Filling: In a large skillet, heat the olive oil over medium heat. Add the chopped onion and cook until softened, about 5-7 minutes. Stir in the minced garlic and cook for another minute until fragrant.
3. Brown the Meat: Add your ground meat to the skillet, breaking it up with a spoon. Cook until thoroughly browned, then drain any excess fat.
4. Combine Filling Ingredients: Stir in the cooked rice, diced tomatoes (undrained), oregano, salt, and pepper. Simmer for 5-7 minutes, allowing the flavors to meld and some of the liquid to reduce. This savory mixture is the heart of your Stuffed Bell Peppers!
5. Fill and Bake: Spoon the meat and rice mixture evenly into each bell pepper. If desired, top with shredded cheese. Pour about ½ inch of water into the bottom of the baking dish to create a steamy environment that helps soften the peppers.
6. Bake: Cover the baking dish loosely with foil and bake for 30 minutes. Remove the foil and continue baking for another 10-20 minutes, or until the peppers are tender and the filling is heated through. The cheese should be bubbly and lightly browned.
7. Serve: Let the stuffed peppers rest for 5 minutes before serving hot.
Nutritional Benefits & Advantages
These Stuffed Bell Peppers are a nutritional powerhouse! Bell peppers are low in calories and an excellent source of Vitamin C (more than an orange!), Vitamin A, and B6. They also contain antioxidants like capsanthin and quercetin. The protein from the ground meat (or lentils/beans for a vegetarian version) combined with the complex carbohydrates from the rice makes for a well-rounded meal that provides sustained energy. This dish is also naturally rich in fiber, promoting digestive health.
Tips, Variations & Cooking Advice
- Flavor Boost: Add a splash of Worcestershire sauce, a teaspoon of smoked paprika, or a pinch of red pepper flakes to the filling for an extra kick.
- Vegetarian/Vegan: Substitute ground meat with cooked lentils, quinoa, crumbled tempeh, or a plant-based ground “meat” substitute. Use vegetable broth instead of water in the baking dish and omit cheese or use a vegan alternative.
- Cheese Lovers: Experiment with different cheeses like provolone, Swiss, or a sharp white cheddar for varied flavor profiles.
- Herb Garden Freshness: Incorporate fresh herbs like parsley, basil, or chives into the filling or as a garnish for a burst of freshness.
- Alternative Cooking Methods: You can slow cook stuffed peppers on low for 3-4 hours, or in an Instant Pot on high pressure for 10-12 minutes, followed by a natural release.
Common Mistakes to Avoid
- Overfilling: Don’t pack the peppers too tightly, as the filling can expand slightly, and you want them to cook evenly.
- Undercooked Peppers: Ensure your peppers are tender enough. If they’re too firm, they can be difficult to cut and eat. Blanching beforehand can help, or simply extend the baking time.
- Dry Filling: Make sure there’s enough moisture. The diced tomatoes and any broth will provide this. If needed, add a little extra tomato sauce or broth to the filling.
- Lack of Seasoning: Taste your filling before stuffing! Adjust salt, pepper, and herbs as needed. Bland filling equals bland peppers.
Storage & Meal Prep Tips
Leftover Stuffed Bell Peppers store wonderfully. Allow them to cool completely, then transfer them to an airtight container. They will keep in the refrigerator for up to 3-4 days. For longer storage, freeze individual stuffed peppers. Wrap each tightly in plastic wrap, then foil, and place in a freezer-safe bag or container. They can be frozen for up to 3 months. To reheat, thaw overnight in the refrigerator (if frozen), then warm in the oven at 350°F (175°C) until heated through, or microwave for quicker results. Adding a splash of water or broth to the bottom of the dish during oven reheating can prevent drying.
Conclusion
Mastering Stuffed Bell Peppers is a rewarding culinary journey that adds a versatile and delicious dish to your repertoire. With their beautiful presentation and customizable fillings, these flavorful bell peppers are perfect for any occasion, from a comforting family dinner to an elegant potluck. We encourage you to try this recipe and experiment with your favorite flavors – the possibilities are endless! Share your creations and let us know your favorite variations in the comments below. Happy cooking!
FAQs
Q1: Can I make the filling ahead of time?
A1: Yes! You can prepare the filling mixture up to two days in advance and store it in an airtight container in the refrigerator. Stuff the peppers and bake just before serving.
Q2: What if I don’t like ground beef?
A2: Feel free to use ground turkey, chicken, pork, or a plant-based alternative. Lentils or quinoa also make excellent vegetarian fillings.
Q3: How do I prevent the peppers from becoming soggy?
A3: Ensure you don’t add too much liquid to the baking dish (about ½ inch of water or broth is plenty). Also, avoid over-blanching the peppers if you choose that step.
Q4: Can I use different types of rice?
A4: Absolutely! Brown rice, wild rice, or even a mix of grains can be used. Just ensure it’s cooked beforehand, as different types of rice have varying cooking times.
Q5: What’s the best way to cut the bell peppers for stuffing?
A5: You can either cut them in half lengthwise or slice off the top and stand them upright. Cutting them in half creates more surface area for browning and is often easier to eat.