Unleash Your Inner Baker: Master the Art of Homemade Zucchini Bread
Ever wondered how to transform humble garden zucchini into a moist, flavorful, and utterly irresistible treat that will have everyone clamoring for more? Look no further! This comprehensive guide will walk you through crafting the perfect loaf of Zucchini Bread right in your own kitchen. Baking at home allows for unparalleled control over ingredients, ensuring fresh, wholesome goodness while filling your home with an intoxicating aroma. Whether you’re a seasoned baker or just starting your culinary journey, this recipe is designed for success, even including tips for delectable gluten free zucchini bread options. Get ready to impress your taste buds and your loved ones!
Ingredients & Kitchen Tools
Crafting the perfect loaf requires a few essential ingredients and tools. Here’s what you’ll need:
- 2 cups all-purpose flour: The base for our bread. For a gluten free zucchini bread option, substitute with a 1:1 gluten-free baking blend.
- 1 ½ teaspoons ground cinnamon: Adds warmth and spice, a classic pairing with zucchini.
- 1 teaspoon baking soda: Our leavening agent, creating a tender crumb.
- ½ teaspoon salt: Balances flavors and enhances sweetness.
- ¼ teaspoon baking powder: Provides an extra lift.
- 3 large eggs: Binds the ingredients and adds richness.
- 1 cup granulated sugar: Sweetens the bread. Adjust to your preference.
- ½ cup packed light brown sugar: Adds depth of flavor and moisture.
- ½ cup vegetable oil: Ensures a moist and tender texture.
- 1 teaspoon vanilla extract: Enhances overall flavor.
- 2 cups grated zucchini (about 2 medium zucchini): The star ingredient, bringing moisture and subtle flavor. Squeeze out excess liquid for best results.
- Optional add-ins: 1 cup chopped walnuts or pecans, ½ cup chocolate chips, or ½ cup dried cranberries for added texture and flavor.
Kitchen Tools:
- Large mixing bowl: For combining dry ingredients.
- Medium mixing bowl: For wet ingredients.
- Whisk: For dry ingredients.
- Spatula or wooden spoon: For mixing everything together.
- Box grater or food processor: For grating zucchini.
- 9×5-inch loaf pan: The perfect size for our loaf.
- Parchment paper: For easy removal and cleanup.
- Wire rack: For cooling the bread.
- Measuring cups and spoons: For accurate ingredient measurement.
Prep Time & Cooking Schedule
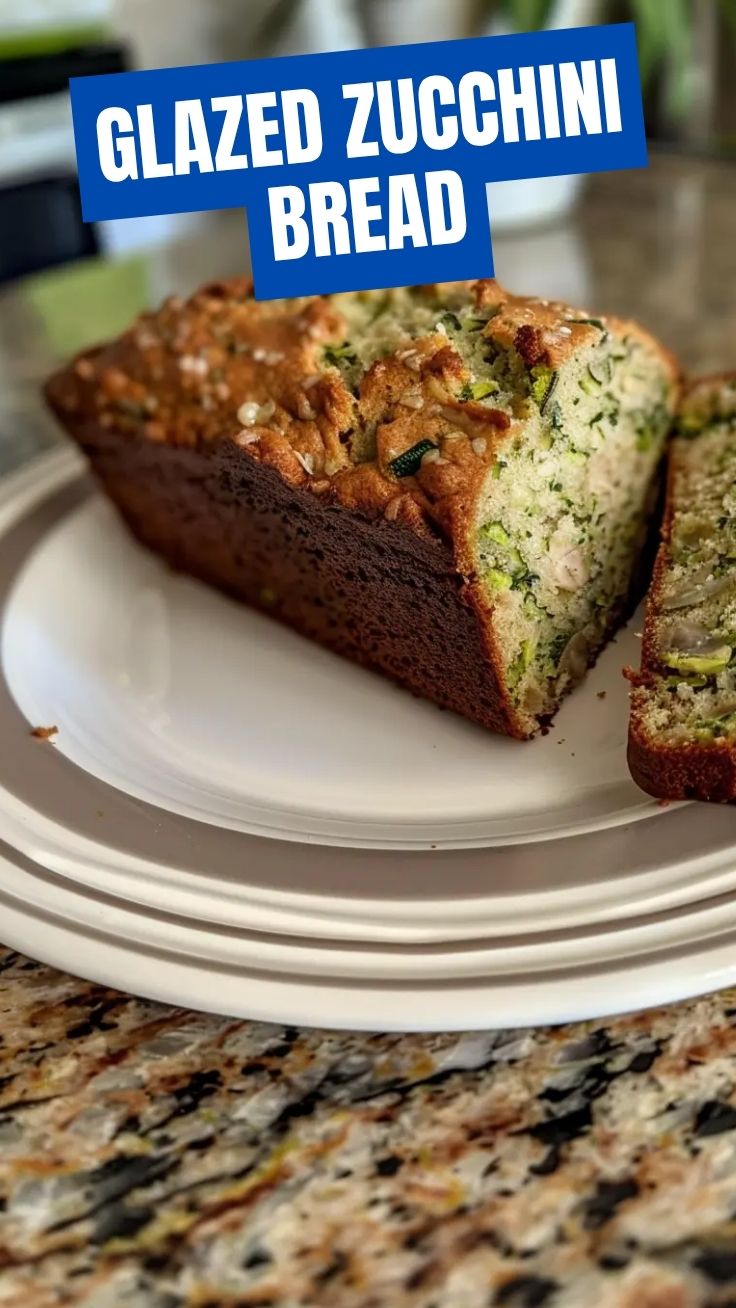
This recipe is surprisingly quick to prepare, making it a fantastic last-minute baking project or a delightful weekend activity.
- Prep Time: 15 minutes (Includes grating zucchini)
- Cook Time: 50-60 minutes
- Cooling Time: 15-20 minutes in the pan, then fully on a wire rack.
Plan to have the oven preheating while you prepare your ingredients, ensuring a seamless baking process from start to finish.
Step-by-Step Instructions
Follow these clear steps to achieve a perfectly baked Zucchini Bread:
1. Preparation is Key: Preheat your oven to 350°F (175°C). Grease and flour a 9×5-inch loaf pan, or line it with parchment paper, leaving an overhang on the sides for easy lifting.
2. Combine Dry Ingredients: In a large bowl, whisk together the flour, cinnamon, baking soda, salt, and baking powder. Set aside.
3. Mix Wet Ingredients: In a separate medium bowl, whisk the eggs until light and frothy. Add both granulated and brown sugars, vegetable oil, and vanilla extract. Whisk until well combined and smooth.
4. Introduce the Zucchini: Gently fold in the grated zucchini into the wet ingredients. It’s crucial to squeeze out any excess moisture from the zucchini before adding it to prevent a soggy loaf, especially if you’re aiming for a sturdy gluten free zucchini bread.
5. Combine Wet and Dry: Pour the wet ingredients into the dry ingredients. Stir just until combined. Be careful not to overmix; overmixing can lead to a tough bread. If using, fold in any optional add-ins at this stage.
6. Bake to Perfection: Pour the batter evenly into the prepared loaf pan. Bake for 50-60 minutes, or until a wooden skewer inserted into the center comes out clean.
7. Cooling Down: Let the bread cool in the pan for 15-20 minutes on a wire rack before carefully removing it. Allow it to cool completely on the wire rack before slicing and serving. This allows the bread to set and prevents it from crumbling.
Nutritional Benefits & Advantages
Beyond its delicious taste, zucchini bread offers surprising nutritional advantages. Zucchini, the primary ingredient, is low in calories and rich in vitamins A and C, potassium, and dietary fiber. This fiber content aids in digestion and can contribute to a feeling of fullness. While this recipe includes sugar, the addition of vegetables helps balance some of the indulgence, providing important micronutrients often missing from other sweet treats. Baking at home also allows you to control sugar levels and fat content, making it a healthier alternative to store-bought versions.
Tips, Variations & Cooking Advice
- Flavor Boosters: Enhance the cinnamon with a pinch of nutmeg or allspice. A teaspoon of lemon zest can also brighten the flavor profile.
- Dietary Adaptations: For a dairy-free version, simply ensure your oil is dairy-free. As mentioned, a 1:1 gluten-free flour blend works wonders for delightful gluten free zucchini bread.
- Texture Play: For a crispier crust, sprinkle a tablespoon of demerara sugar over the top of the batter before baking.
- Mini Loaves: Adjust baking time for smaller loaf pans (around 30-35 minutes for mini loaves).
- Cream Cheese Frosting: For an extra decadent treat, top your cooled bread with a simple cream cheese frosting.
Common Mistakes to Avoid
- Overmixing: This develops gluten too much, resulting in a dense, tough bread. Mix just until ingredients are combined.
- Not Squeezing Zucchini: Excess moisture leads to a gummy, soggy loaf. Don’t skip this crucial step!
- Opening Oven Door Too Soon: Resist the urge to check frequently, especially in the first 30 minutes, as this can cause the bread to sink.
- Not Cooling Properly: Slicing a warm loaf can cause it to crumble. Allow it to cool fully for the best texture.
Storage & Meal Prep Tips
Your freshly baked Zucchini Bread will stay fresh at room temperature, tightly wrapped, for up to 3-4 days. For longer storage, wrap slices or whole loaves tightly in plastic wrap and then foil, and freeze for up to 3 months. Thaw at room temperature or gently reheat in the microwave or oven. This bread makes for an excellent breakfast, snack, or even a light dessert, perfect for meal prepping a week’s worth of treats.
Conclusion
Embarking on the journey of baking homemade Zucchini Bread is a rewarding experience, yielding a delicious and versatile treat that truly celebrates seasonal produce. With our detailed instructions and helpful tips, you’re now equipped to create a loaf that’s moist, flavorful, and utterly satisfying, even exploring options like delightful gluten free zucchini bread. Don’t hesitate to experiment with your favorite add-ins and make this recipe your own! We encourage you to try this recipe, share your baking successes, and let us know your favorite variations in the comments below!
FAQs
Q1: Can I use frozen zucchini?
A1: Yes, but you must thaw it completely and squeeze out as much moisture as possible before grating and adding to the batter.
Q2: My zucchini bread is too dense. What went wrong?
A2: This is often a result of overmixing the batter or not squeezing enough moisture from the zucchini. Ensure you mix just until combined.
Q3: Can I reduce the sugar in the recipe?
A3: Yes, you can typically reduce the total sugar by about ¼ to ⅓ cup without significantly altering the texture, though the flavor will be less sweet.
Q4: How do I know when the bread is fully baked?
A4: Insert a wooden skewer or toothpick into the center of the loaf. If it comes out clean with no wet batter, it’s done.