Master the Art of Homemade Perfection: Your Ultimate Guide to Irresistible Banana Bread
Tired of store-bought imposters that just don’t quite hit the spot? Imagine the comforting aroma of freshly baked goods wafting through your home, a delightful treat that’s both nourishing and incredibly satisfying. Today, we’re diving deep into the world of homemade Banana Bread, a classic that promises warmth and a touch of nostalgia with every bite. This comprehensive guide will not only lead you through a foolproof Recipe but also equip you with the knowledge to personalize, perfect, and preserve your culinary masterpiece. Preparing this beloved comfort food at home isn’t just about saving money; it’s about crafting an experience, controlling ingredients, and infusing love into every slice. Get ready to elevate your baking game and create the ultimate banana bread.
Ingredients & Kitchen Tools
Crafting the perfect loaf requires the right components and equipment. Here’s what you’ll need:
Wet Ingredients:
- 3 ripe medium bananas: Look for brown spots! The riper, the sweeter and more flavorful your bread will be. About 1 ½ cups mashed.
- 1/2 cup unsalted butter, melted: Adds richness and moisture. If using salted, reduce added salt by ¼ teaspoon.
- 1 large egg, at room temperature: Binds ingredients and adds structure. Room temperature eggs emulsify better.
- 1/2 cup granulated sugar: Provides sweetness and encourages browning. Adjust to your preferred sweetness level.
- 1/4 cup brown sugar, packed: Adds depth of flavor and moisture due to molasses content.
- 1 teaspoon vanilla extract: Enhances all the other flavors. Use pure vanilla for best results.
Dry Ingredients:
- 1 ½ cups all-purpose flour: The base of our bread. Sift for a lighter texture, or simply whisk well.
- 1 teaspoon baking soda: Our leavening agent, reacts with acid (bananas) to create lift.
- 1 teaspoon ground cinnamon: Adds warmth and spice.
- 1/2 teaspoon salt: Balances sweetness and enhances flavor.
Optional Add-ins:
- ½ cup chopped walnuts or pecans: For crunch and nutty flavor.
- ½ cup chocolate chips (dark or semi-sweet): A delightful addition for chocolate lovers.
Kitchen Tools:
- Large mixing bowl: For combining wet and dry ingredients.
- Medium mixing bowl: For mashing bananas.
- Whisk or electric mixer: For achieving a smooth batter.
- Rubber spatula: For scraping down bowls and folding ingredients.
- Fork or potato masher: For mashing bananas.
- 9×5 inch loaf pan: The standard size for banana bread. Grease and flour or line with parchment paper.
- Measuring cups and spoons: For accurate ingredient quantities.
Prep Time & Cooking Schedule
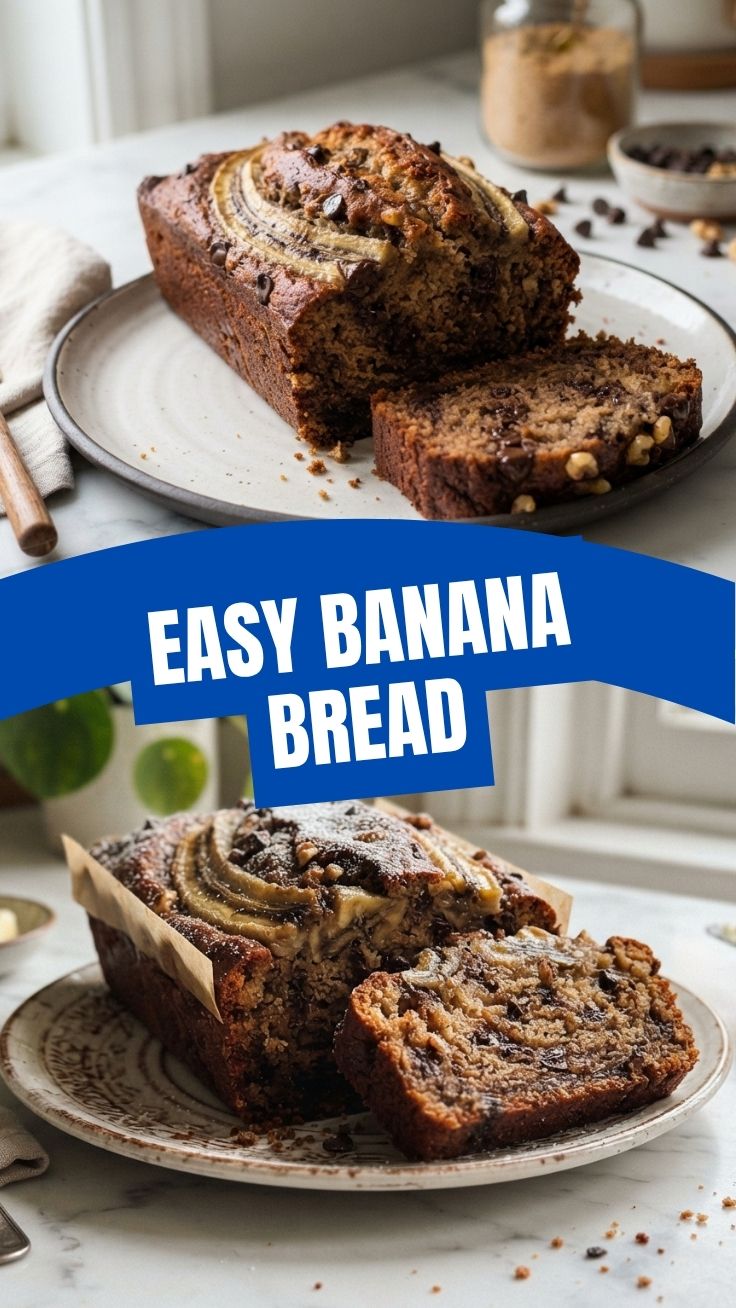
This delightful Banana Bread comes together surprisingly quickly.
- Prep Time: 15 minutes (This includes mashing bananas and gathering ingredients. Focus on getting everything ready before you start mixing.)
- Cook Time: 50-65 minutes (The variability depends on your oven and the moisture content of your bananas.)
- Resting Time: 15-20 minutes (Crucial for the bread to set and become easier to slice. Avoid the temptation to cut it hot!)
To plan your baking, allocate about 1.5 hours from start to finish for a warm, fragrant loaf.
Step-by-Step Instructions
Follow these steps for a perfectly moist and flavorful loaf:
1. Preheat & Prep: Preheat your oven to 350°F (175°C). Grease and flour your 9×5 inch loaf pan, or line it with parchment paper, leaving an overhang on the long sides for easy removal.
2. Mash Bananas: In a medium bowl, mash the ripe bananas with a fork or potato masher until mostly smooth with a few small lumps remaining (this adds texture).
3. Combine Wet Ingredients: In a large mixing bowl, melt the butter. Stir in the mashed bananas, granulated sugar, brown sugar, egg, and vanilla extract until well combined and smooth.
4. Whisk Dry Ingredients: In a separate medium bowl, whisk together the flour, baking soda, ground cinnamon, and salt. Ensure there are no lumps and the ingredients are evenly distributed.
5. Combine Wet and Dry: Gradually add the dry ingredients to the wet ingredients, mixing with a rubber spatula until just combined. Do not overmix! Overmixing develops gluten, leading to a tough loaf. A few streaks of flour are perfectly acceptable. If using, gently fold in chopped nuts or chocolate chips now.
6. Transfer and Bake: Pour the batter into your prepared loaf pan, spreading it evenly.
7. Bake: Bake for 50-65 minutes, or until a wooden skewer or toothpick inserted into the center comes out clean. If the top is browning too quickly, loosely tent it with aluminum foil.
8. Cool: Once baked, remove the pan from the oven and let it cool in the pan on a wire rack for 10-15 minutes. This allows the Banana Bread to firm up. Then, use the parchment paper overhang to lift the bread out of the pan and transfer it to the wire rack to cool completely before slicing. This incredible Recipe yields a wonderfully moist and tender crumb.
Nutritional Benefits & Advantages
Bananas are a nutritional powerhouse, contributing significantly to the health benefits of this bread. They are an excellent source of potassium, crucial for heart health and blood pressure regulation. They also provide dietary fiber, aiding digestion and promoting gut health. Furthermore, bananas are rich in vitamin B6, vital for brain function and metabolism, and vitamin C, an antioxidant. While this is a treat, using ripened bananas naturally sweetens the bread, potentially allowing for a reduction in added sugars compared to some other baked goods.
Tips, Variations & Cooking Advice
- Extra Moist: For an even moister loaf, add 1-2 tablespoons of sour cream or Greek yogurt to the wet ingredients.
- Flavor Boost: A pinch of nutmeg or allspice can complement the cinnamon beautifully.
- Gluten-Free: Substitute the all-purpose flour with a 1:1 gluten-free baking blend that contains xanthan gum.
- Dairy-Free: Use a plant-based butter alternative and an egg substitute (e.g., flax egg) if desired.
- Sugar Reduction: For a less sweet version, reduce the granulated sugar by ¼ cup. The ripeness of the bananas will still provide ample sweetness.
- Mini Loaves/Muffins: Adjust baking time. Mini loaves will take about 30-40 minutes, while muffins typically need 20-25 minutes.
Common Mistakes to Avoid
- Under-ripe Bananas: This is the most common mistake! Under-ripe bananas lack the sweetness and moisture needed for a truly delicious bread. Wait for those brown spots!
- Overmixing: As mentioned, overmixing develops the gluten, resulting in a tough, dry loaf. Mix until just combined.
- Opening Oven Door Too Soon: Resist the urge to check on your bread too early, especially during the first 30 minutes. This can cause the bread to sink.
- Not Cooling Completely: Slicing warm banana bread is tempting, but it can lead to a crumbly, messy slice. Let it cool for cleaner cuts and better texture.
Storage & Meal Prep Tips
- Room Temperature: Store leftover Banana Bread wrapped tightly in plastic wrap or in an airtight container at room temperature for up to 3-4 days. This keeps it moist.
- Refrigeration: While not strictly necessary, you can refrigerate it for up to a week, especially if your kitchen is warm. Bring to room temperature before serving for best flavor.
- Freezing: Banana Bread freezes beautifully! Wrap individual slices or the whole loaf tightly in plastic wrap, then an additional layer of aluminum foil. Freeze for up to 3 months.
- Reheating: Thaw frozen slices at room temperature or gently warm in the microwave or a low oven (300°F/150°C) until just heated through.
Conclusion
There’s truly nothing quite like the comforting embrace of a warm, homemade slice of Banana Bread. This guide has provided you with all the insights and steps to create a show-stopping loaf that will undoubtedly become a family favorite. From selecting the perfect bananas to avoiding common pitfalls, you now have the tools to achieve baking success. Don’t hesitate to dive into this delightful Recipe and experience the joy of baking from scratch. Share your masterpieces, experiment with variations, and savor every moment of this timeless treat! What variations will you try first?
FAQs
Q1: My bananas aren’t ripe enough. What can I do?
A1: You can speed up ripening by placing them in a paper bag with an apple or in a low oven (250°F/120°C) for 15-30 minutes until skins turn black.
Q2: Can I reduce the sugar in the recipe?
A2: Yes, you can generally reduce the granulated sugar by ¼ cup without significantly impacting the texture, especially if your bananas are very ripe.
Q3: Why did my banana bread sink in the middle?
A3: This can happen due to under-baking, opening the oven door too early, or too much leavening agent. Ensure you’re baking until a toothpick comes out clean.
Q4: How do I know if my banana bread is fully cooked?
A4: The best test is inserting a wooden skewer or toothpick into the center of the loaf. If it comes out clean (without wet batter), it’s done. The top should also be golden brown and spring back when lightly pressed.
Q5: Can I add other fruits or spices?
A5: Absolutely! Blueberries, dried cranberries, or grated apple make wonderful additions. A touch of ginger, nutmeg, or cardamom can also elevate the spice profile.