Decadent Homemade Red Velvet Cake: Your Guide to Sweet Perfection
Ever wondered what makes a Red Velvet Cake so irresistibly charming? Is it the vibrant hue, the subtle cocoa notes, or perhaps the luxurious tang of its cream cheese frosting? While this iconic dessert often conjures images of fancy bakeries, crafting your own at home is not only achievable but immensely rewarding. Beyond the impressive presentation, preparing this classic yourself offers complete control over ingredients, ensuring a fresher taste and a truly personalized experience. Dive into this guide to unlock the secrets of a truly magnificent homemade Red Velvet Cake that will impress everyone fortunate enough to get a slice.
Ingredients & Kitchen Tools
To embark on your red velvet journey, gather these essential components:
For the Cake:
- All-Purpose Flour (2 ½ cups): Provides structure.
- Granulated Sugar (1 ¾ cups): Sweetens and tenderizes the cake.
- Unsweetened Cocoa Powder (2 tablespoons): The essential “velvet” flavor; use natural for best results.
- Baking Soda (1 teaspoon): Leavening agent for rise.
- Salt (1 teaspoon): Balances sweetness and enhances flavor.
- Buttermilk (1 cup): Adds moisture and tenderizes; crucial for the distinct red velvet crumb. (Substitution: 1 cup milk + 1 tbsp lemon juice/white vinegar, let sit 5 mins).
- Vegetable Oil or Melted Unsalted Butter (½ cup): Adds moisture and richness.
- Large Eggs (2): Binds ingredients and adds richness.
- Red Food Coloring (1-2 ounces, liquid GEL preferred): The iconic color; adjust to desired vibrancy.
- White Vinegar (1 teaspoon): Reacts with baking soda and buttermilk for added lift and tenderness.
- Vanilla Extract (1 teaspoon): Enhances overall flavor.
For the Cream Cheese Frosting:
- Cream Cheese (8 ounces, full-fat, softened): The star of the frosting; ensure it’s at room temperature for a smooth consistency.
- Unsalted Butter (½ cup, softened): Adds richness and stability.
- Powdered Sugar (3 ½ to 4 cups, sifted): Sweetens and thickens; sift to avoid lumps.
- Vanilla Extract (1 teaspoon): Flavor enhancer.
Kitchen Tools:
- Two 9-inch round cake pans: For baking concentric layers.
- Mixing bowls (large and medium): For wet and dry ingredients.
- Electric mixer (stand or hand-held): Essential for creaming butter and sugar, and whipping frosting.
- Whisk: For combining dry ingredients.
- Rubber spatula: For scraping bowls and folding.
- Measuring cups and spoons: For precise ingredient amounts.
- Parchment paper: To line cake pans and prevent sticking.
- Cooling racks: For cakes to cool completely.
- Offset spatula or butter knife: For frosting application.
Prep Time & Cooking Schedule
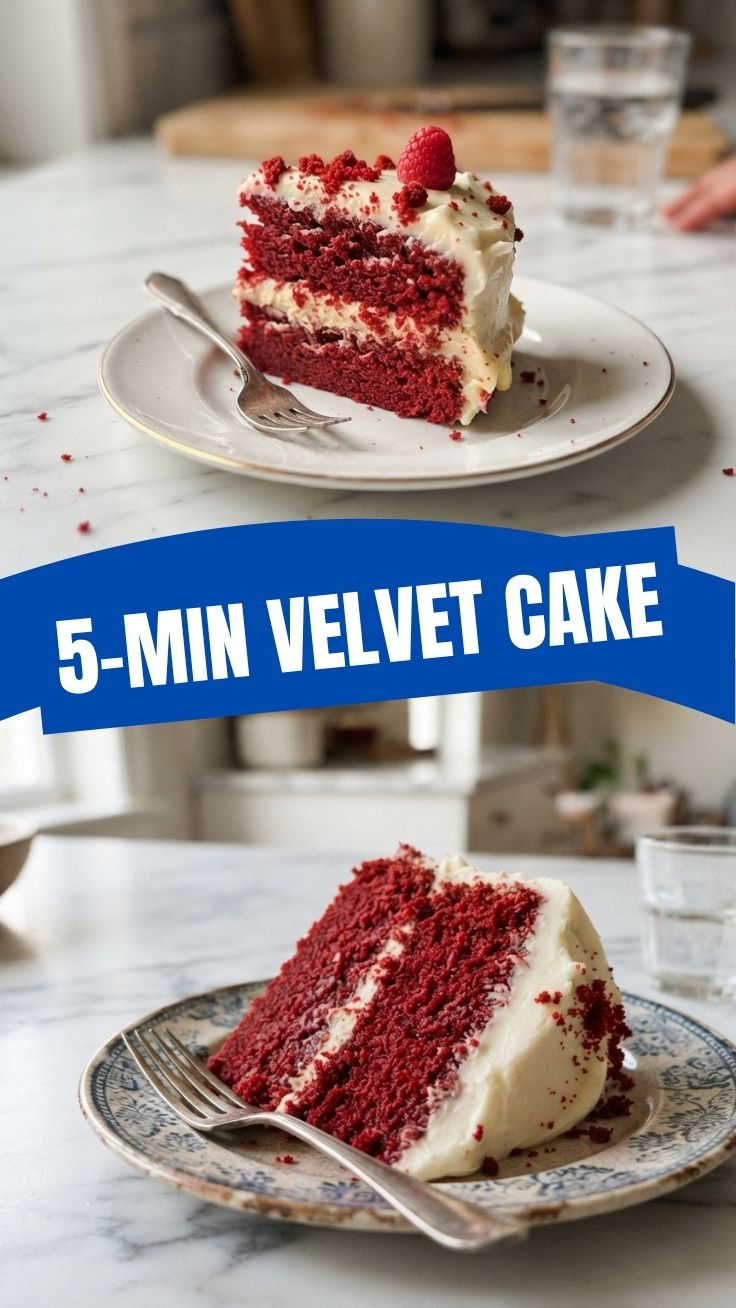
Crafting a Red Velvet Cake requires a bit of planning, but the schedule is straightforward.
- Prep Time: 25-30 minutes (This includes preparing pans, measuring ingredients, and mixing the batter).
- Cook Time: 25-30 minutes (Per batch of two 9-inch cake layers).
- Resting/Cooling Time: At least 2 hours (Crucial for cakes to cool completely before frosting to prevent melting).
Aim to tackle this recipe when you have a few uninterrupted hours, ideally in the morning or early afternoon so the cake can cool thoroughly before evening assembly and serving.
Step-by-Step Instructions
1. Prepare Cake Pans: Preheat your oven to 350°F (175°C). Grease and flour two 9-inch round cake pans, then line the bottoms with parchment paper. This ensures your beautiful layers release easily.
2. Combine Dry Ingredients: In a large bowl, whisk together the all-purpose flour, granulated sugar, cocoa powder, baking soda, and salt. Make sure there are no lumps in the cocoa.
3. Mix Wet Ingredients: In a separate medium bowl, combine the buttermilk, vegetable oil (or melted butter), eggs, red food coloring, white vinegar, and vanilla extract. Whisk until well blended and the color is uniform.
4. Combine Wet and Dry: Pour the wet ingredients into the dry ingredients. Using your electric mixer on low speed, mix until just combined. Be careful not to overmix, as this can lead to a dry, tough cake. A few small lumps are fine.
5. Bake the Cake: Divide the batter evenly between the prepared cake pans. Bake for 25-30 minutes, or until a wooden skewer inserted into the center comes out clean.
6. Cooling: Remove cakes from the oven and let them cool in the pans for 10-15 minutes before inverting them onto wire racks to cool completely. This full cooling is vital before attempting to frost, ensuring your Red Velvet Cake maintains its structure and the cream cheese frosting doesn’t melt.
7. Prepare Cream Cheese Frosting: In a large bowl, using an electric mixer, beat the softened cream cheese and butter until smooth and creamy (about 2-3 minutes). Gradually add the sifted powdered sugar, one cup at a time, mixing on low speed until combined, then increase speed to medium until fluffy. Stir in the vanilla extract. If the frosting is too thick, add a tablespoon of milk; if too thin, add more powdered sugar.
8. Assemble and Frost: Once the cake layers are completely cool, place one layer on your serving plate. Spread a generous amount of cream cheese frosting over the top. Carefully place the second layer on top and spread the remaining frosting over the top and sides of the cake. Decorate as desired!
Nutritional Benefits & Advantages
While a homemade Red Velvet Cake is certainly an indulgence, making it yourself offers a few advantages. You control the quality of ingredients, opting for organic or pasture-raised where possible. Buttermilk is a good source of probiotics and calcium. Cocoa powder, especially unsweetened natural cocoa, offers antioxidants and flavonoids, contributing to heart health. Furthermore, making desserts at home allows for mindful portion control, transforming a rich treat into an occasional, delightful experience.
Tips, Variations & Cooking Advice
- Flavor Boost: For a deeper cocoa flavor, you can slightly increase the cocoa powder to 3 tablespoons, or use Dutch-processed cocoa for an even darker, less acidic flavor (though it may slightly mute the red).
- Moisture Secrets: Don’t skimp on the buttermilk and oil! They are key to the cake’s signature moist and tender crumb.
- Even Layers: For truly professional-looking layers, you can level the tops of the cakes with a serrated knife once completely cooled.
- Dietary Adaptations:
* Gluten-Free: Substitute the all-purpose flour with a 1:1 gluten-free baking blend that contains xanthan gum.
* Dairy-Free: Use dairy-free buttermilk (plant-based milk with lemon juice or vinegar), dairy-free butter, and dairy-free cream cheese for the frosting.
- Visual Appeal: For a darker, more dramatic red, opt for gel food coloring over liquid. You might also add a tiny touch of purple food coloring to deepen the red, especially if using alkaline Dutch-processed cocoa.
Common Mistakes to Avoid
- Overmixing the Batter: This develops gluten, leading to a tough and dry cake. Mix until just combined.
- Not Sifting Powdered Sugar: Leads to lumpy cream cheese frosting. Always sift!
- Frosting Warm Cakes: This is probably the most common mistake. Warm cakes will melt your frosting, creating a messy disaster. Be patient and allow cakes to cool completely.
- Using Cold Cream Cheese/Butter for Frosting: Cold ingredients lead to a lumpy, separated frosting. Ensure both are at room temperature.
- Incorrect Oven Temperature: An oven that’s too hot can lead to dry cakes, while one too cool can result in dense, underbaked layers. Use an oven thermometer to verify accuracy.
Storage & Meal Prep Tips
Leftover Red Velvet Cake should be stored in an airtight container in the refrigerator due to the cream cheese frosting. It will stay fresh for up to 3-4 days. For optimal flavor and texture, allow slices to come to room temperature for about 30 minutes before serving. You can also freeze unfrosted cake layers wrapped tightly in plastic wrap and then foil for up to 2-3 months. Thaw frozen layers overnight in the refrigerator before assembling and frosting.
Conclusion
Crafting your own Red Velvet Cake from scratch is a culinary journey that promises both a delightful challenge and a remarkably delicious reward. By following these steps, you’ll achieve a moist, tender crumb perfectly complemented by the tangy sweetness of homemade cream cheese frosting. Don’t be afraid to experiment and personalize this classic to your taste. We encourage you to try this recipe, share your creations, and perhaps, discover your new favorite homemade dessert!
FAQs
Q1: Can I make this cake without red food coloring?
A1: Yes, you can. It will still be a delicious chocolate-buttermilk cake, but it won’t have the iconic red hue. Some natural alternatives like beet powder can provide a more muted red.
Q2: My cream cheese frosting is too runny. What can I do?
A2: This usually happens if the cream cheese or butter was too warm, or not enough powdered sugar was used. Try chilling the frosting for 15-20 minutes, then beat it again. You can also gradually beat in more sifted powdered sugar until it reaches the desired consistency.
Q3: How do I prevent my cake layers from sticking to the pan?
A3: Always grease and flour your pans thoroughly, and line the bottoms with parchment paper. This triple defense usually prevents sticking.
Q4: Can I use oil instead of butter in the cake?
A4: Yes, the recipe already calls for vegetable oil, which contributes to the cake’s moist texture. If you prefer, you can use melted unsalted butter for a slightly richer flavor.
Q5: What’s the secret to a perfectly moist Red Velvet Cake?
A5: The key is a combination of buttermilk, oil, and avoiding overmixing. The acidity of the buttermilk also reacts with the baking soda and vinegar to create a tender crumb.